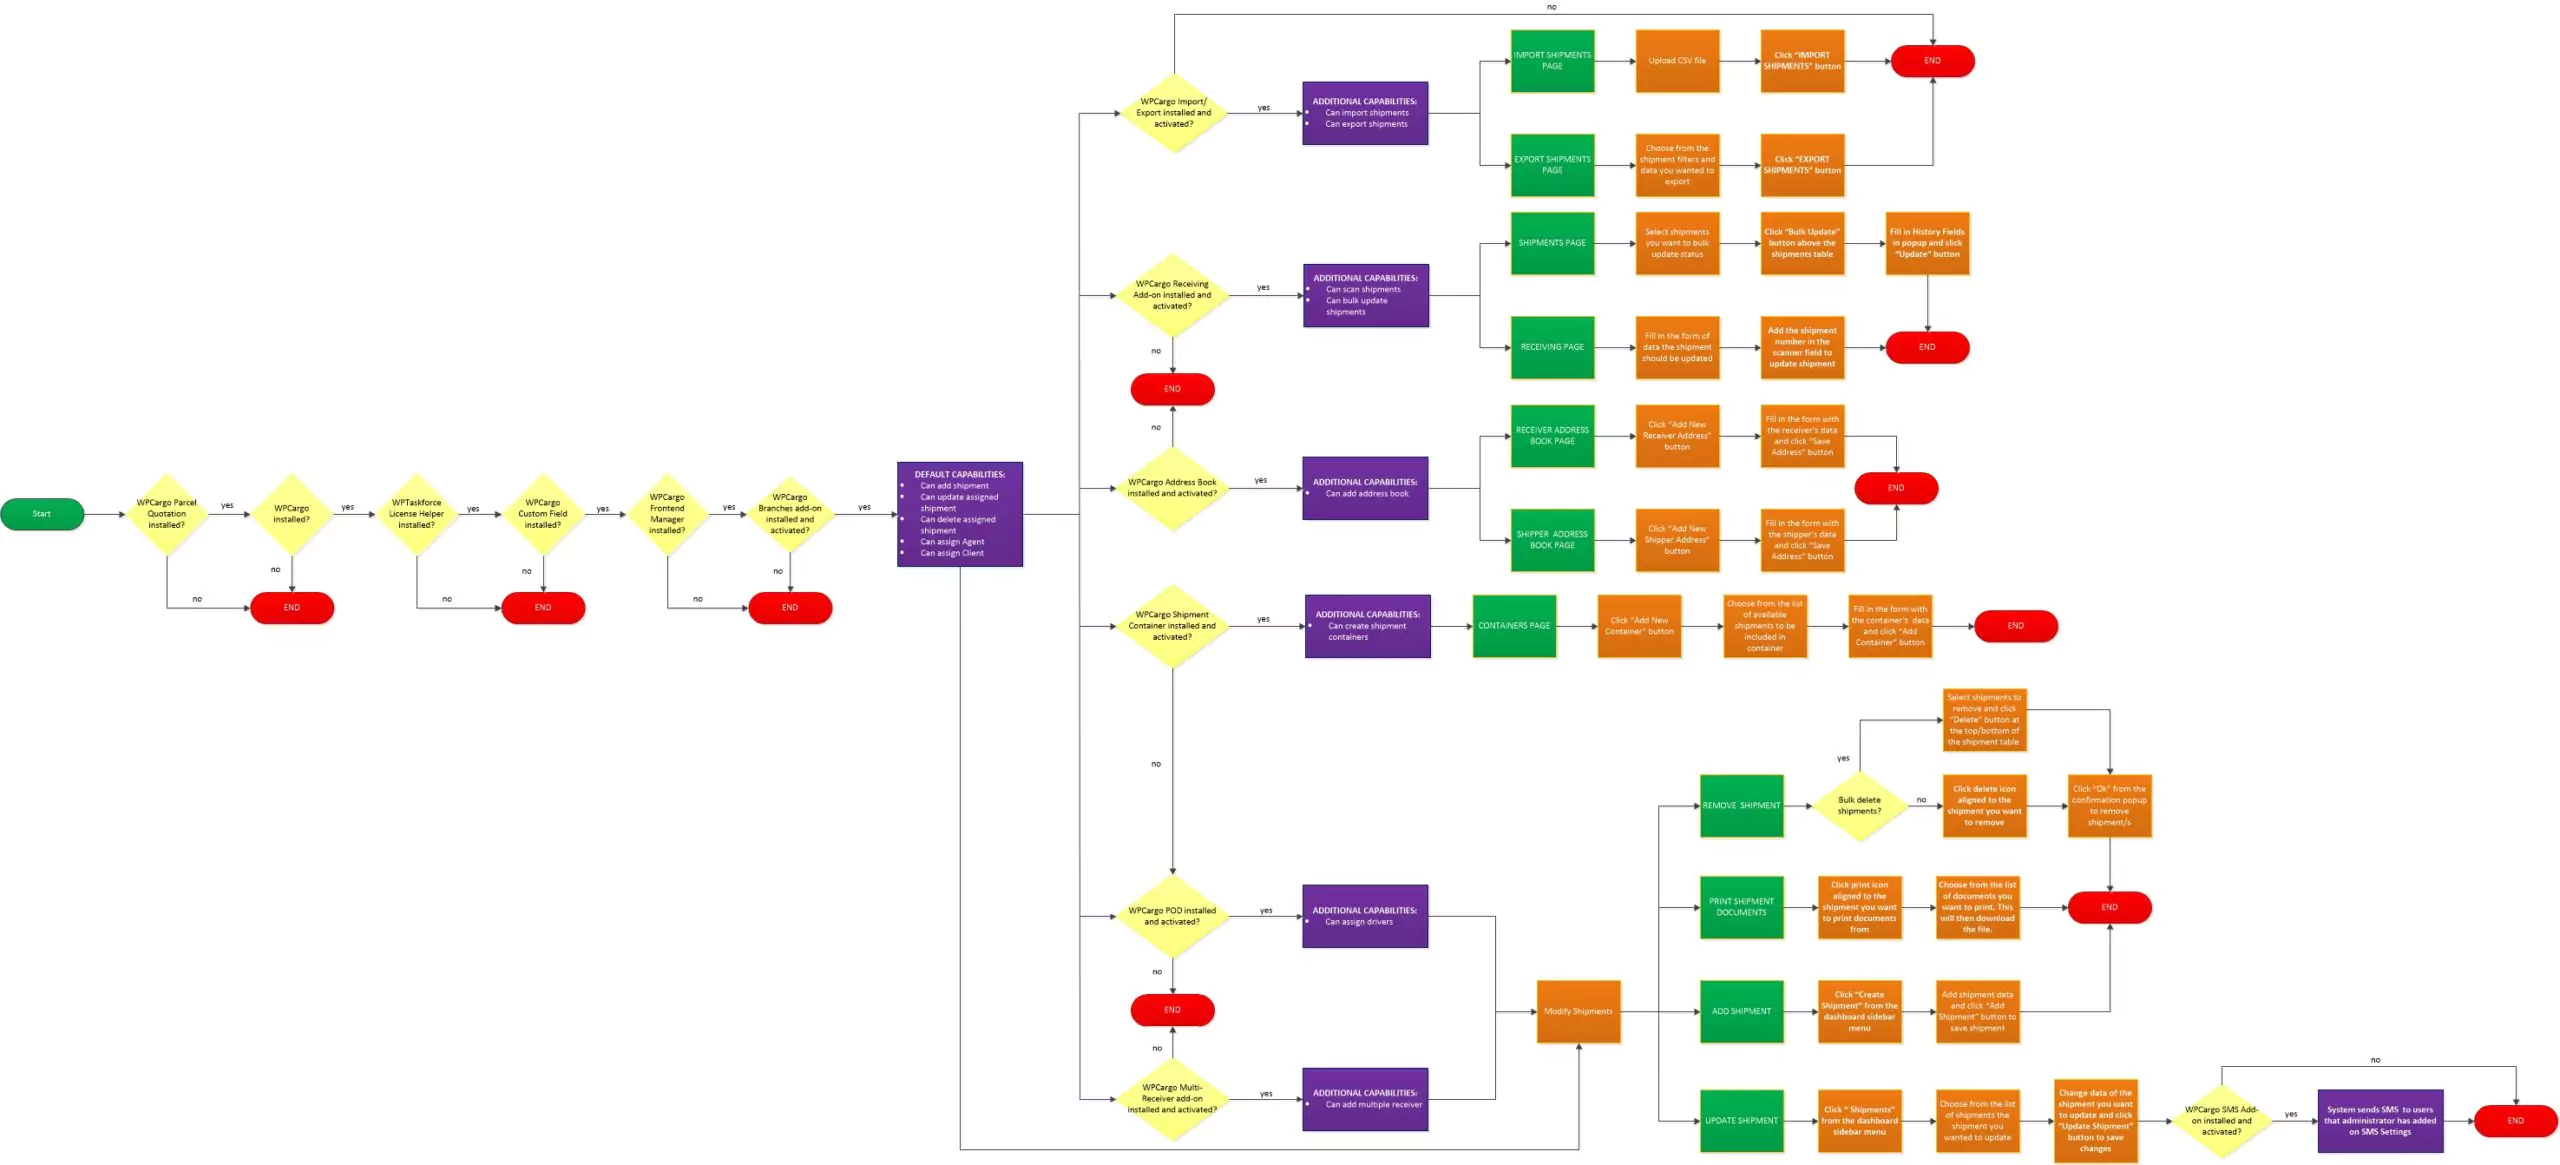
WPCargo Parcel Quotation Package branch manager user role has the following default capabilities
- Can add shipments
- Can update shipments
- Can view shipments
- Can print shipment documents
- Can track shipments
- Can export shipments
- Can import shipments
- Can add multiple receiver
- Can use address book
- Can assign agent
- Can assign client
- Can assign driver
NOTE: Only shipments assigned to branch manager are available for these capabilities
How to view shipments
- Login to your account.
- Go to the Shipments page.
- Click the Shipment Number or view button to view shipment details
How to track shipments
- There are two ways to access the WPCargo tracking form
- If WPCargo Theme Pro is installed, track form will be available on the homepage banner.
- You can also access the tracking form through a page where the administrator has added the tracking form section.
- Copy your shipment number and paste on the shipment number field and submit.
- System will show the shipment data.
How to create shipments
- Go to Create Shipment page and fill in the shipment information.
- Click Submit to save the shipment.
NOTE: For more detailed instruction of creating shipments, please check guide here.
How to update shipments
- Go to the Shipments page.
- Click the update button to open shipment details.
- Change data of the field you want to update.
NOTE: For more detailed instruction of updating shipments, please check guide here.
How to bulk update status of shipment
- Select shipments you want to update status.
- Click the Bulk Update button at the bottom or top of the shipment table.
NOTE: For more detailed instruction of updating shipments, please check guide here.
How to remove shipments
- Go to the Shipments page.
- There are two ways to remove shipments
- Individual remove of shipments – Click the delete button aligned to the shipment your want to remove.
- Bulk remove of shipments – select shipments you want to remove and click the Delete button at the bottom or top of the shipment table.
NOTE: For more detailed instruction of removing shipments, please check guide here.
How to print shipment documents
- Go to the Shipments page.
- Click the print button and choose from the list of documents you want to print.
- Invoice
- Label
- Waybill
- BOL – this will only be available if administrator enables printing of BOL
- The system will download the file you want to print into a PDF format
NOTE: For more detailed printing of documents, check complete guide here.
How to export shipments
- Go to the Import/Export page and fill in the shipment filters for the list of shipments you want to export.
- Shipper Name
- Status
- Date Range
- Shipment Data
- Click the Export Shipment button.
- The system will generate a CSV file with the list of shipments and the data you have chosen to export.
NOTE: For more detailed instruction of exporting shipments, please check guide here.
How to import shipments
- Go to the Import/Export page and download the CSV file template.
- Fill in the CSV file with the shipment details to its corresponding columns
- Upload the file on the Import page.
- Click the Import Shipment button to import the shipment data in the file you have uploaded.
NOTE: For more detailed instruction of importing shipments, please check guide here.
How to add shipper address book
- Go to the Address Book page and go to the Shipper Book Address tab.
- Click Add New Shipper button.
- Fill in the shipper details form from the popup.
- Click the Save Address button to save the address book.
How to add receiver address book
- Go to the Address Book page and go to the Receiver Book Address tab.
- Click Add New Receiver button.
- Fill in the receiver details form from the popup.
- Click the Save Address button to save the address book.
How to add multiple receiver
- Click Add Receiver button on Multiple Receiver section.
- Fill in receiver information.
- Click Add button to save receiver details.