These guides cover:
________________________________________________________________________________________________________
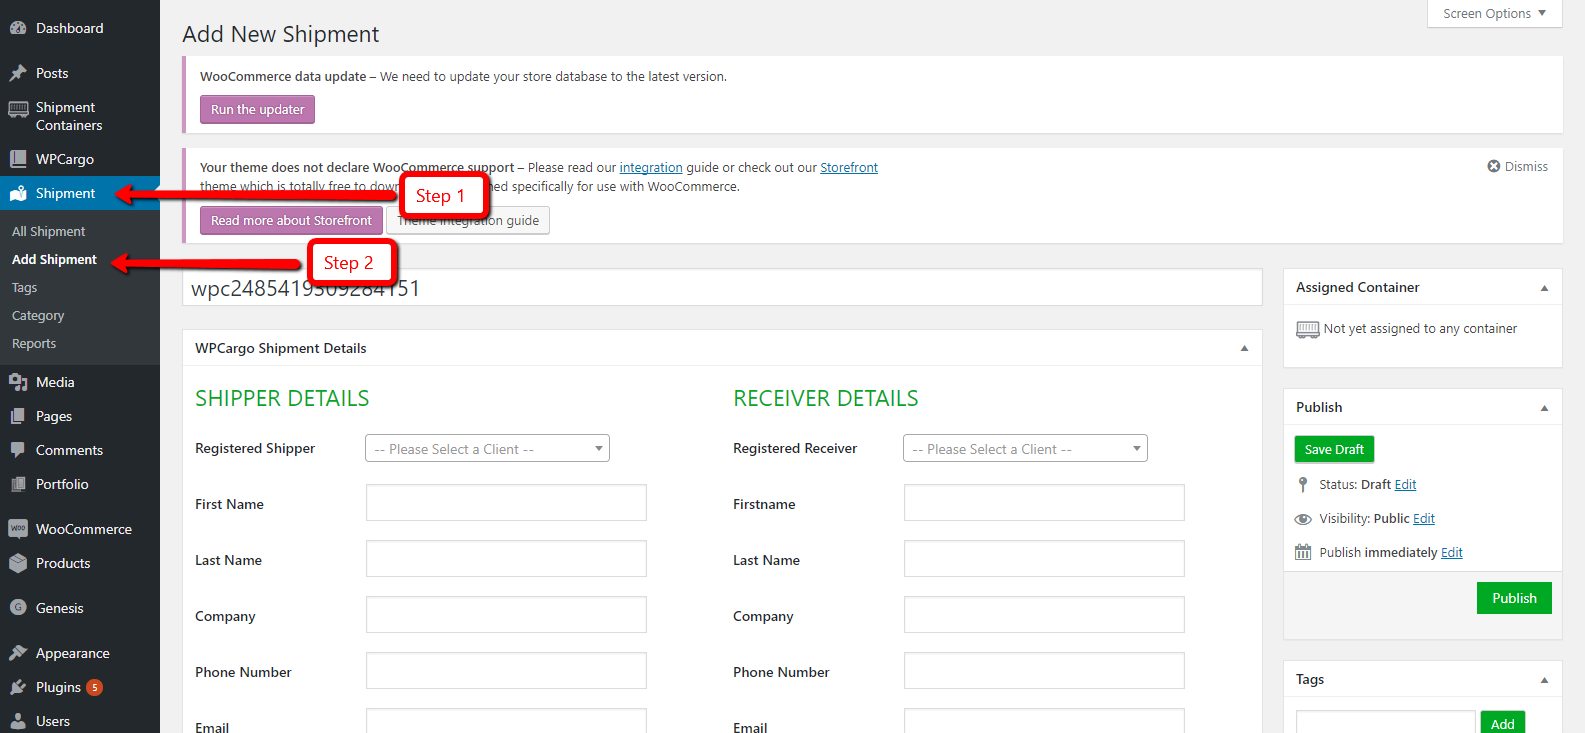
1. Login to your WordPress site and go to admin dashboard.
2. Go to Dashboard > Shipment > Add Shipment.
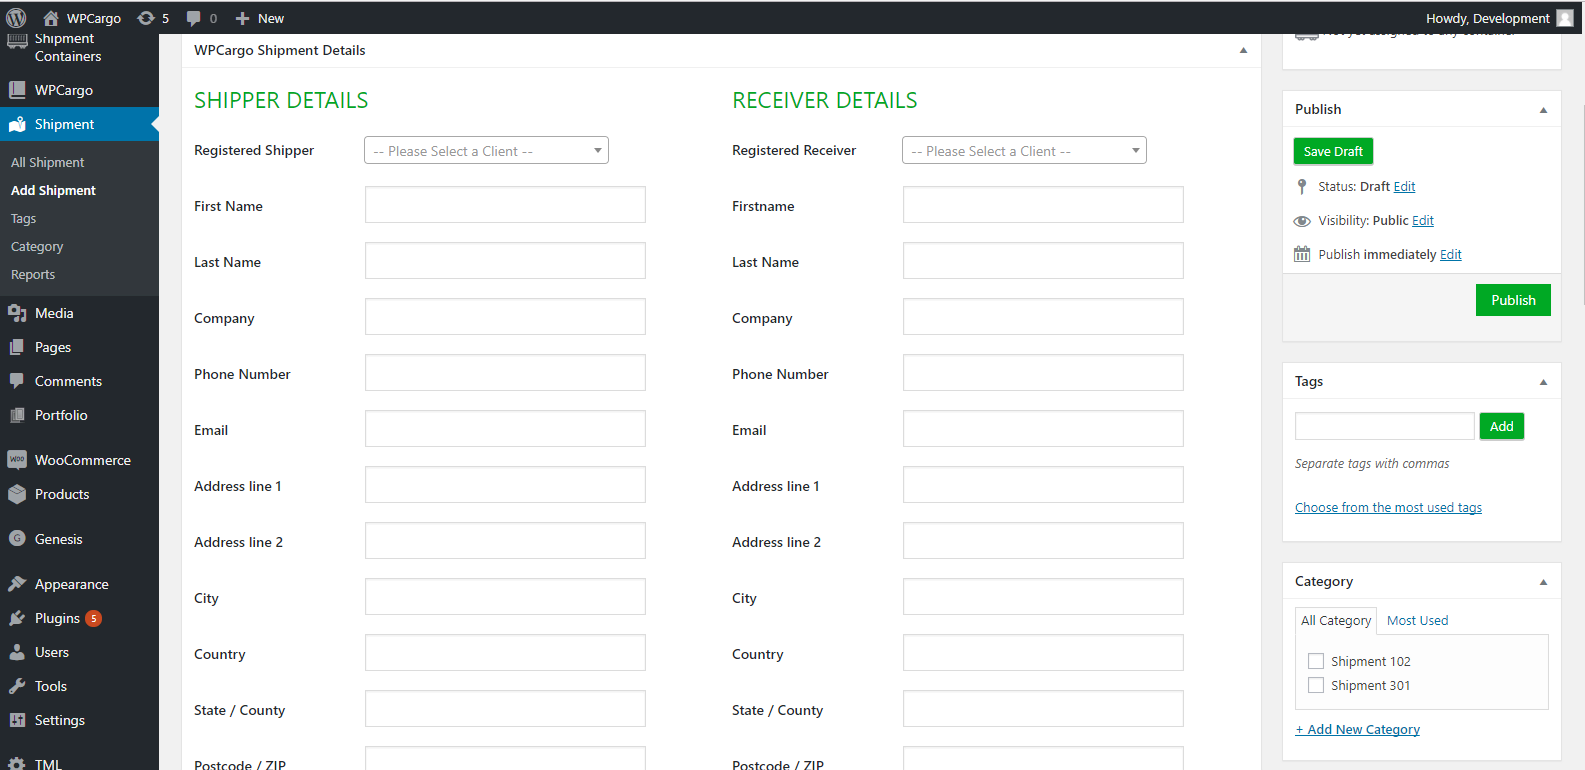
3. Click the dropdown arrow, then select your registered shipper and receiver.
4. Fill out all form fields.
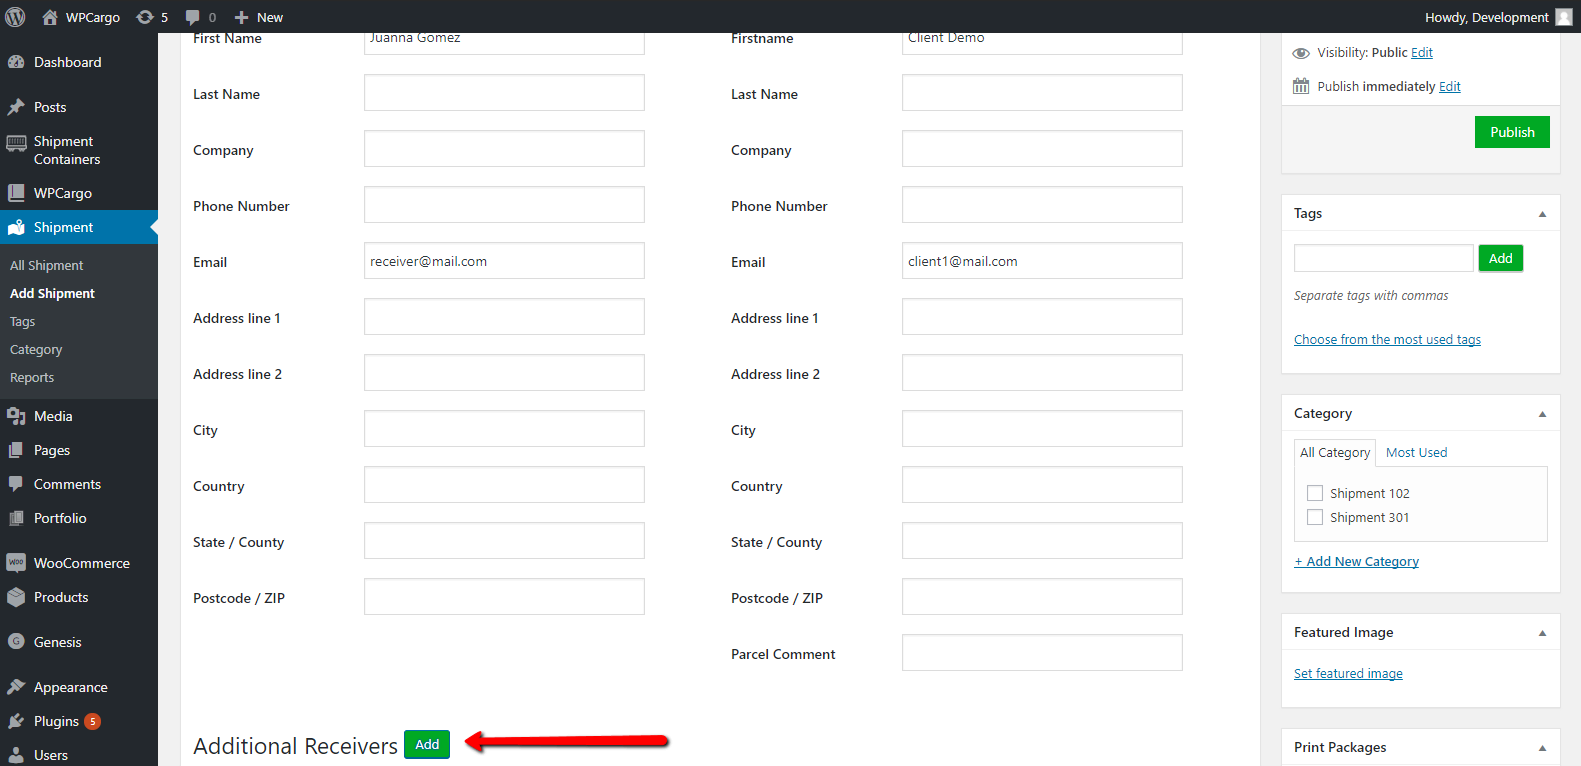 5. To add additional receivers, click the Add button.
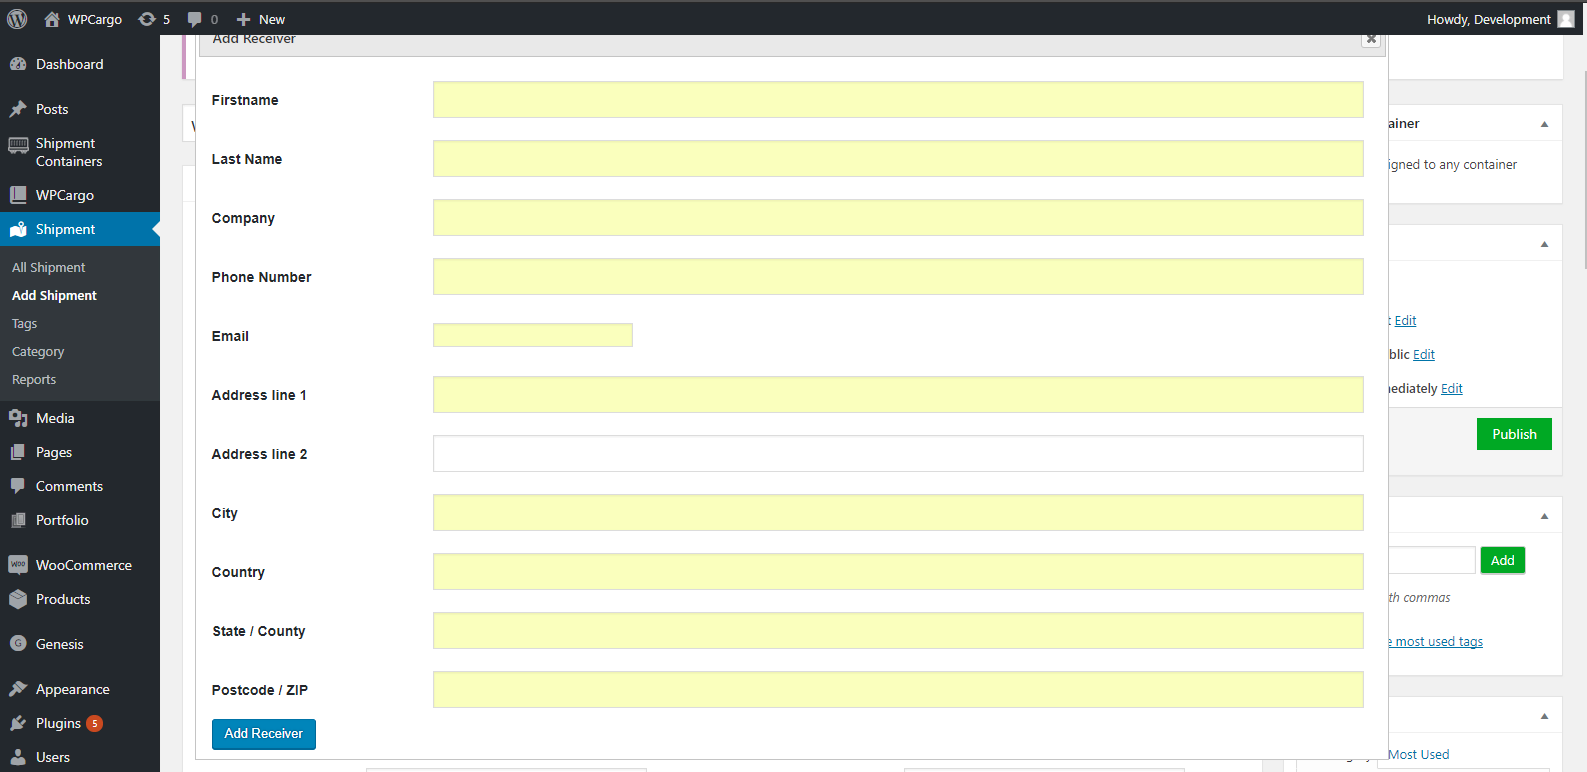
6. After doing so, the additional receiver pops up.
7. Fill out all form fields and then click the Add Receiver button.
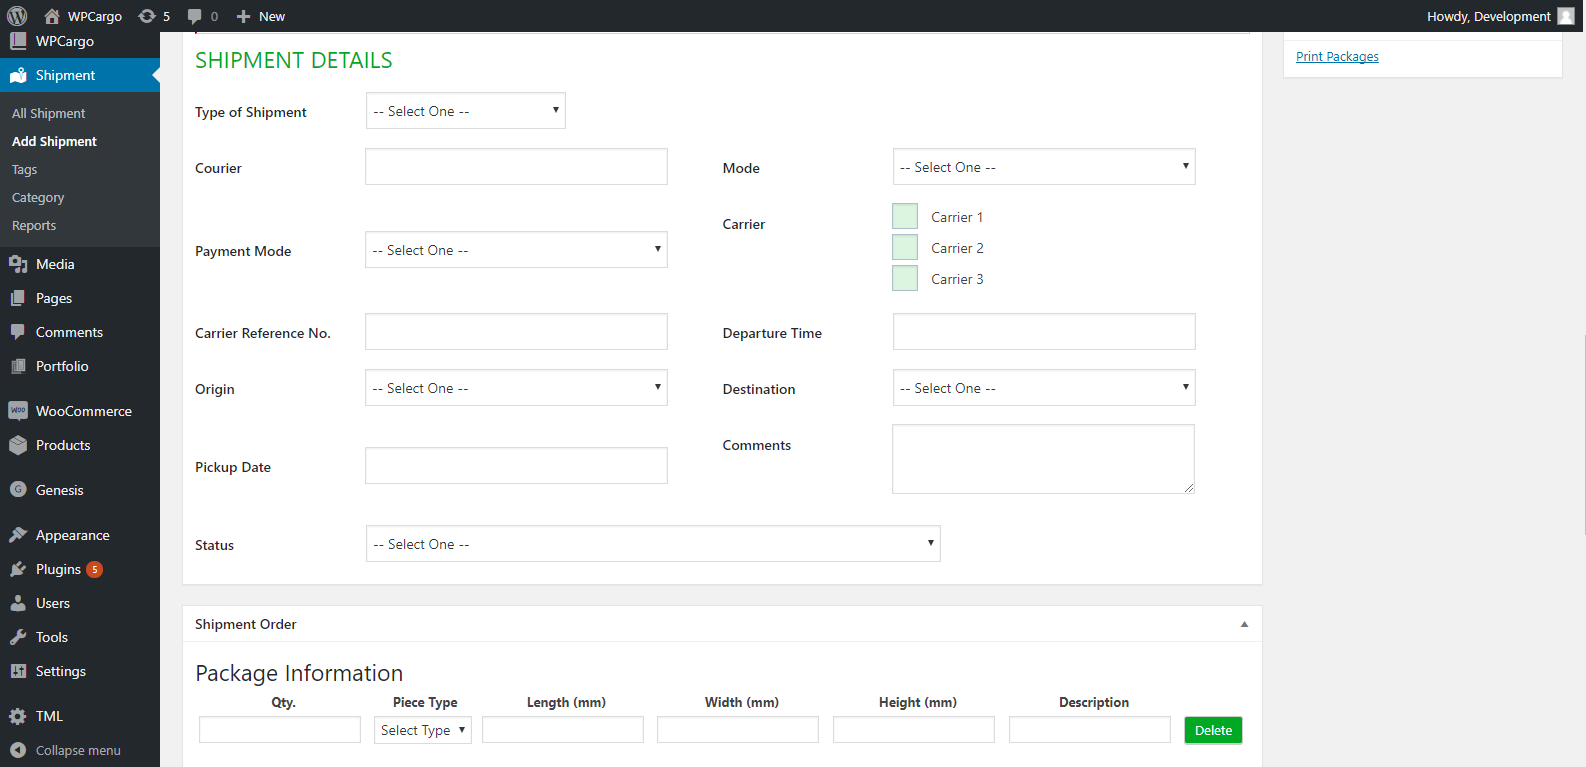
8. Click the drop down arrow, then select type of shipment.
9. Fill out all form fields.
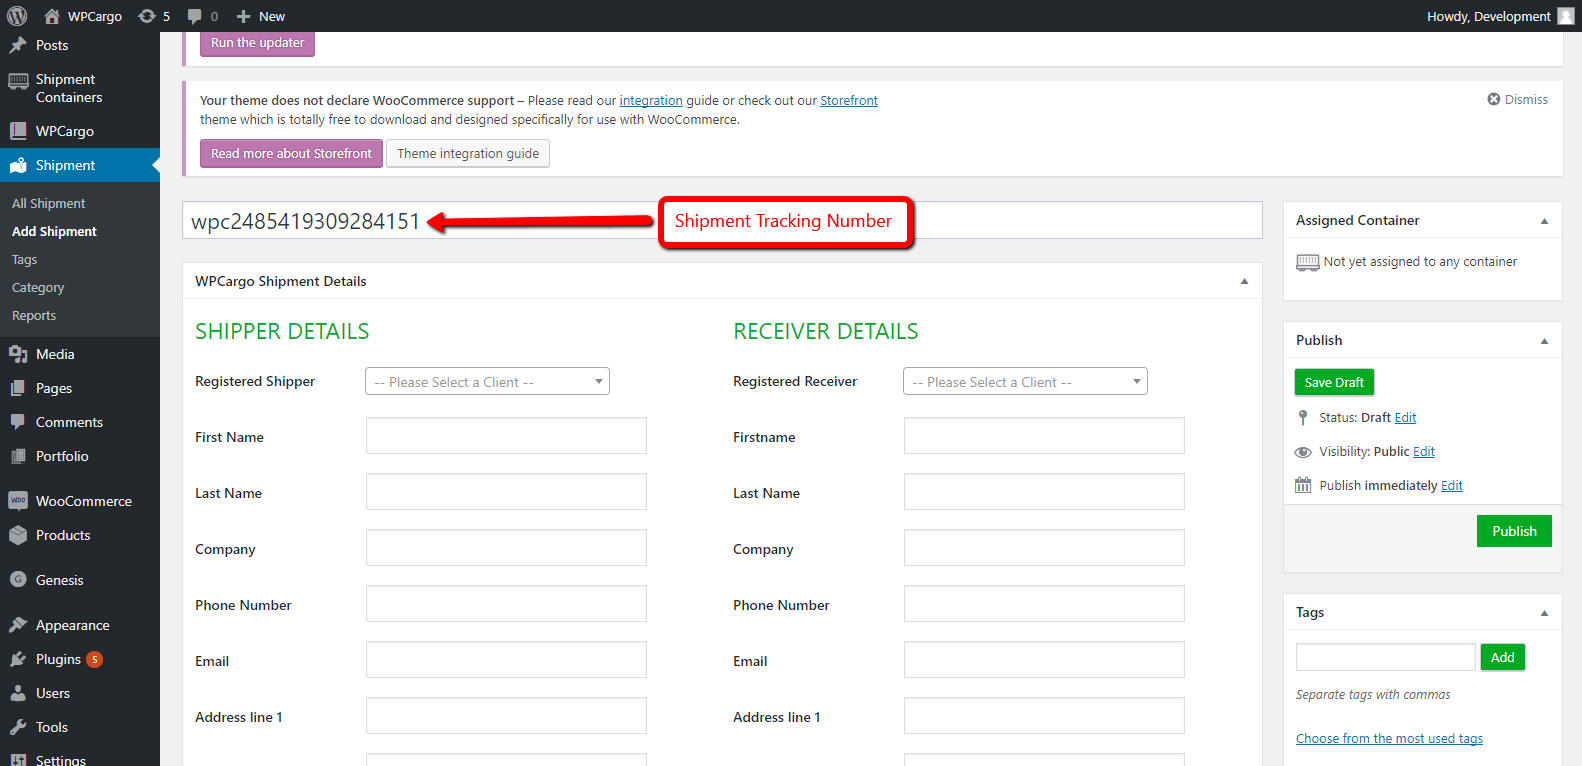
10. You can also edit the shipment tracking number.
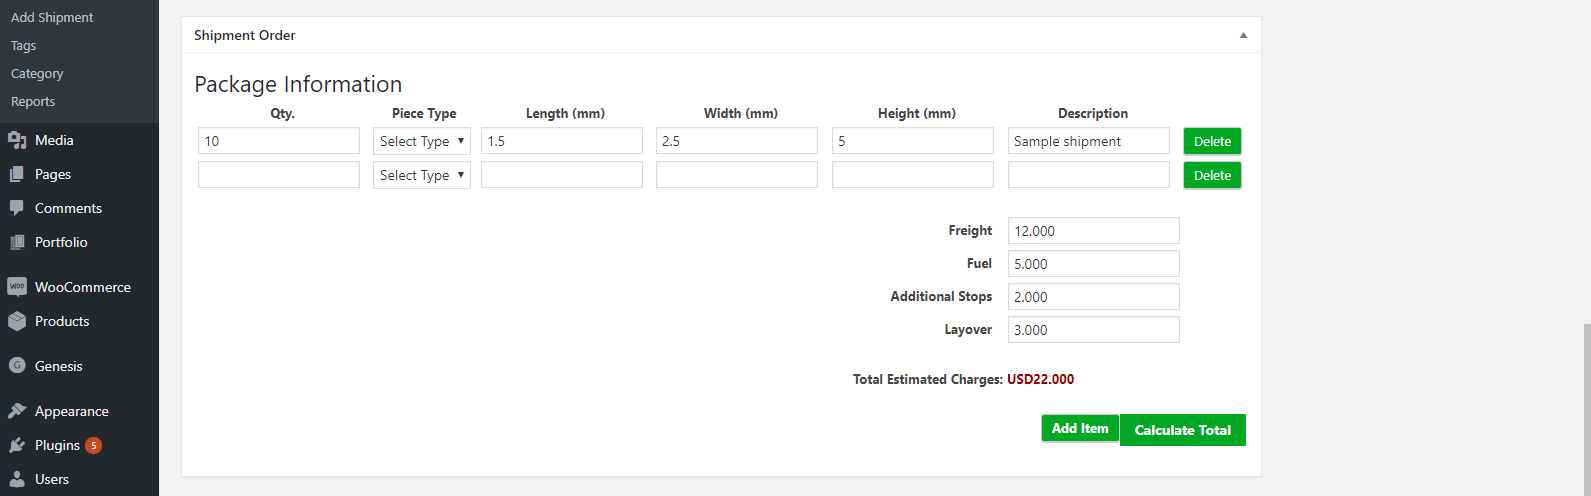
11. Click the drop down arrow, then select your type of your piece.
12. Fill out all form fields
13. Add shipment price, then click the calculate total button.
14. To add a new item, click the Add item button.
15. To delete your item, click the Delete button.
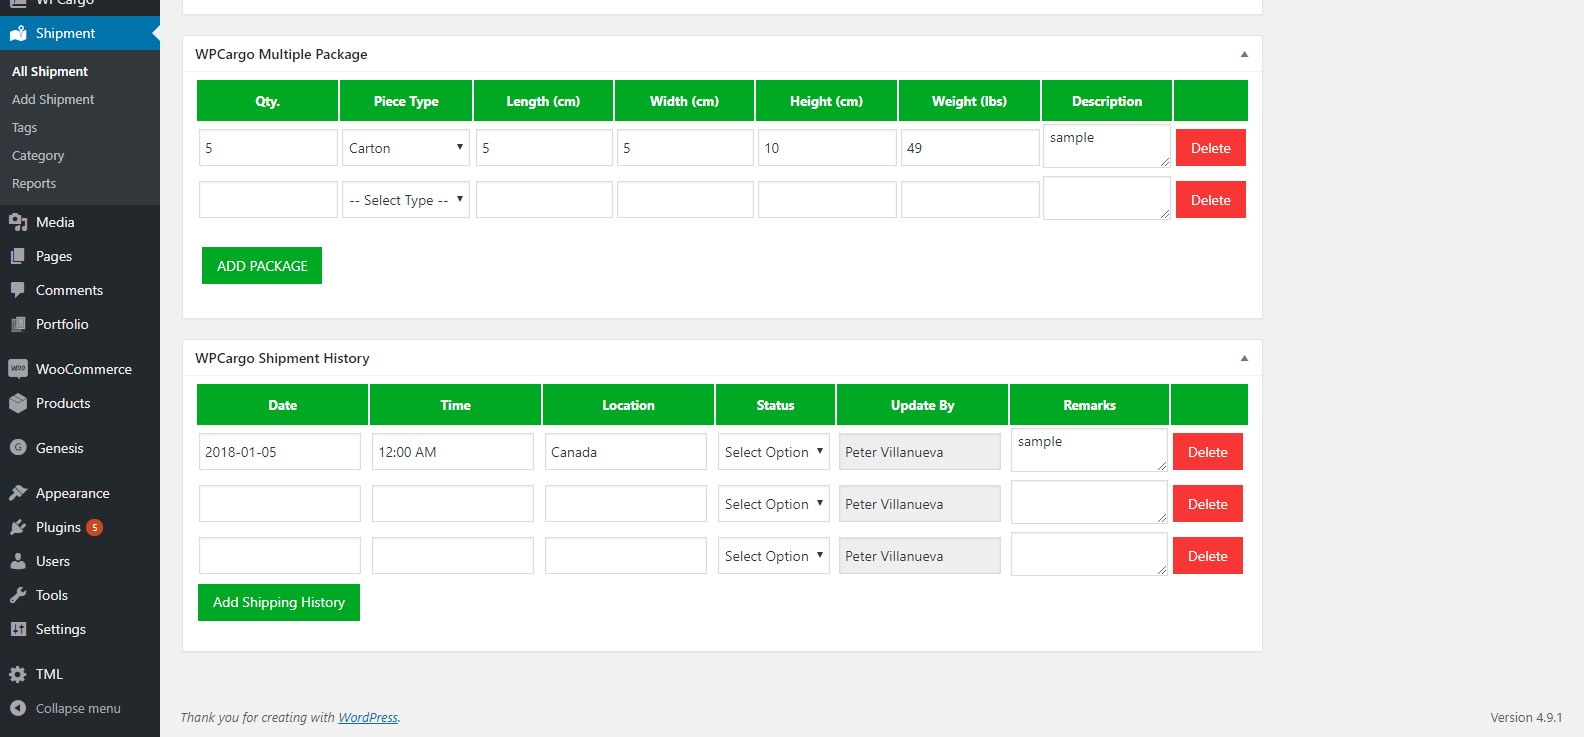
16. Click the drop down arrow, then select your type of your piece.
17. Fill out all form fields.
18. You can add new package by clicking the Add Package button.
19. To delete your package, click the Delete button.
20. To add the shipment history, click the Add shipping History button.
21. Click the Publish button on the right side of the page.
22. You can also view your shipment history by going to Dashboard > Shipment > All Shipment.
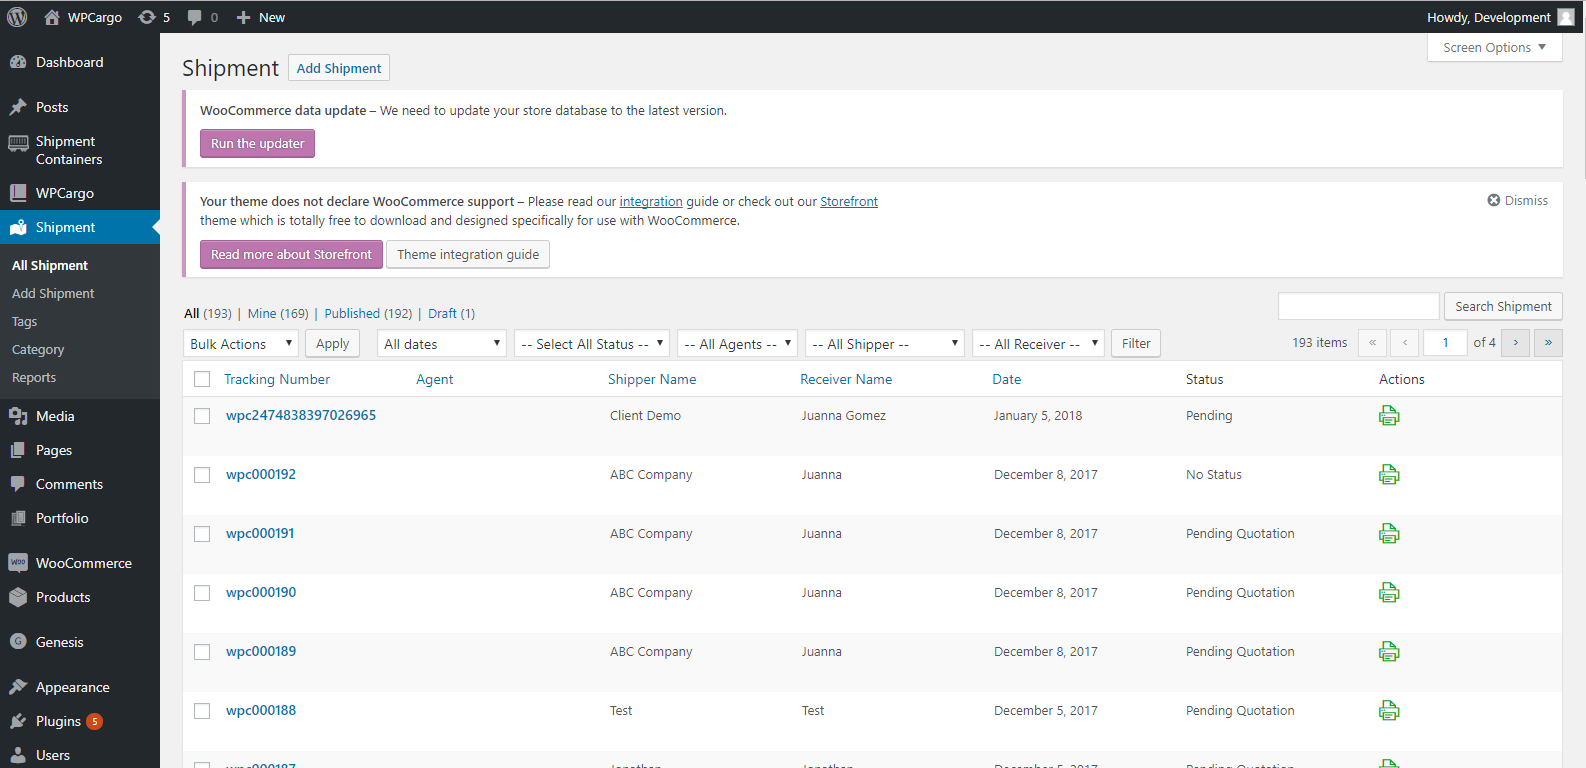
23. You can also view your shipment history , Go to Dashboard > Shipment > All Shipment.