These guides cover:
- Features
- How to install and activate license WPCargo API Add on
- How to assign and reset API key to user
- How to use plugin API’s
- How to add shipment using API through AJAX
In adding shipment using WPCargo API through AJAX has many ways, this is one of many ways how.
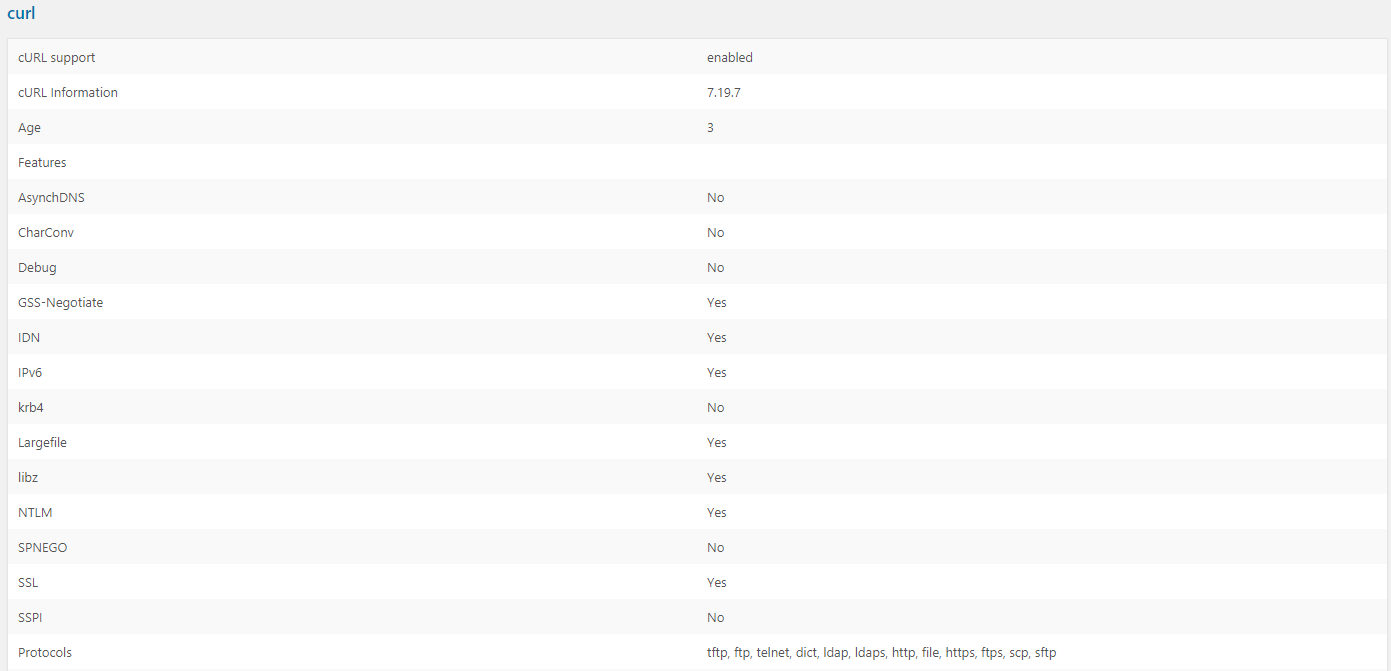
Note: Make sure that you hosting has CURL module installed because it won’t run your AJAX script because in this sample code use cURL functions.
How to check if your hosting has a CURL module installed?
- Install WordPress phpinfo() plugin and activate.
- Go to admin dashboard > Settings > PHP Info menu
- Search CURL section in you phpinfo page.
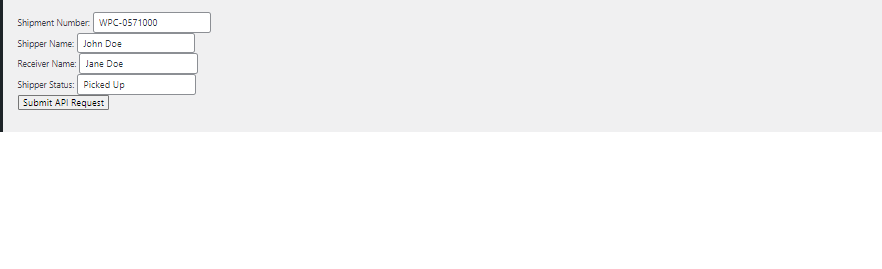
First step, We need to create and form in adding shipment.
NOTE:
1. the file should be a .php file
2. make sure that the input “shipment” field must be required because the API will search this field and update its data
<form id="update_shipment">
    Shipment Number: <input type="text" name="shipment" value="" /><br/>
    Shipper Name: <input type="text" name="wpcargo_shipper_name" value="" /><br/>
    Receiver Name: <input type="text" name="wpcargo_receiver_name" value="" /><br/>
    Shipper Status: <input type="text" name="wpcargo_status" value="" /><br/>
    <input type="submit" value="Submit API Request" /><br/>
</form>
  <script>
    jQuery(document).ready( function( $ ){
      $('form#update_shipment').on('submit', function( e ){
          e.preventDefault();
          var ajaxUrl = "<?php echo admin_url('admin-ajax.php'); ?>";
          var shipment = $( 'input[name="shipment"]' ).val();
          var shipperName = $( 'input[name="wpcargo_shipper_name"]' ).val();
          var receiveName = $( 'input[name="wpcargo_receiver_name"]' ).val();
          var status = $( 'input[name="wpcargo_status"]' ).val();

          $.ajax({
            type:"POST",
            dataType:"JSON",
            data:{
              action:'update_shipment',
              shipment:shipment,
              shipperName:shipperName,
              receiveName:receiveName,
              status:status
            },
            url: ajaxUrl,
            beforeSend:function(){
              //** Proccessing
              console.log( 'loading...' );
            },
            success:function(response){
              //** Process Completed
              console.log( response )
            }
          });
        });
      });
  </script>
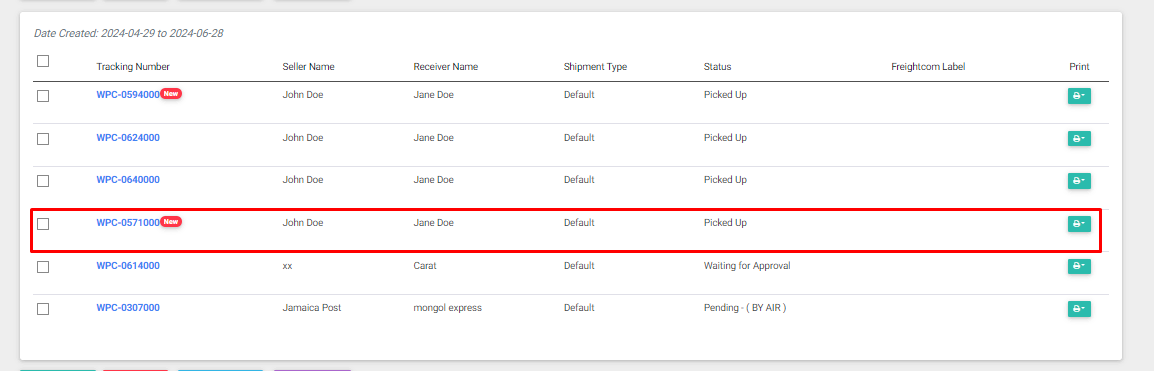
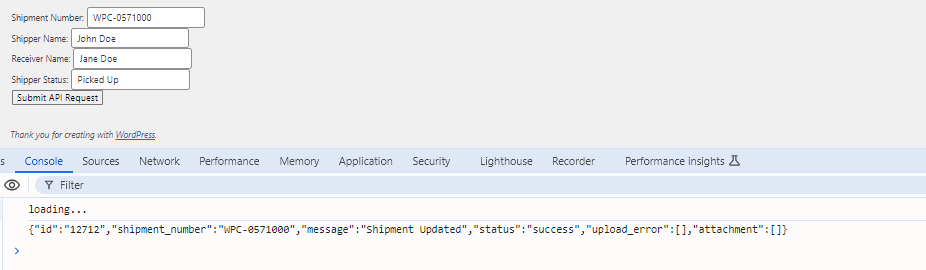
In this example, we will update the shipment “WPC-0571000”.
Here is the sample output of the code snippet above:
We are trying to update the ff. shipment’s data:
wpcargo_shipper_name = John Doe
wpcargo_receiver_name = Jane Doe
wpcargo_status = Picked Up
Second Step, create a new file called “ajax.php”. Make sure that this file is included if you are developing a custom plugin. If not, then you can just paste this code on your active theme’s functions.php file.
function jvd_add_shipment_ajax_callback() {
$ch = curl_init();
//&amp;nbsp; Add form data into array and build query parameter
// note: Array key is the post meta and the array value with the post meta value
// "shipment" key must always exist because this will the the API bases which shipment to update ( by shipment title )
$post = http_build_query( array(
'shipment' => sanitize_text_field( $_POST['shipment'] ),
'wpcargo_shipper_name' => sanitize_text_field( $_POST['shipperName'] ),
'wpcargo_receiver_name' => sanitize_text_field( $_POST['receiveName'] ),
'wpcargo_status' => sanitize_text_field( $_POST['status'] )
) );
// Add the option URL with API key
curl_setopt($ch, CURLOPT_URL, 'http://mysite.com/wp-json/wpcargo/v1/api/my-api-key-here/shipment/update' );
curl_setopt($ch, CURLOPT_POST, 1);
curl_setopt($ch, CURLOPT_POSTFIELDS, $post );
curl_setopt($ch, CURLOPT_RETURNTRANSFER, true);
$result = curl_exec ($ch);
curl_close ($ch);
// Return the response of the API
echo json_encode( $result );
wp_die();
}
add_action( 'wp_ajax_update_shipment', 'jvd_add_shipment_ajax_callback' );
add_action( 'wp_ajax_nopriv_update_shipment', 'jvd_add_shipment_ajax_callback' );
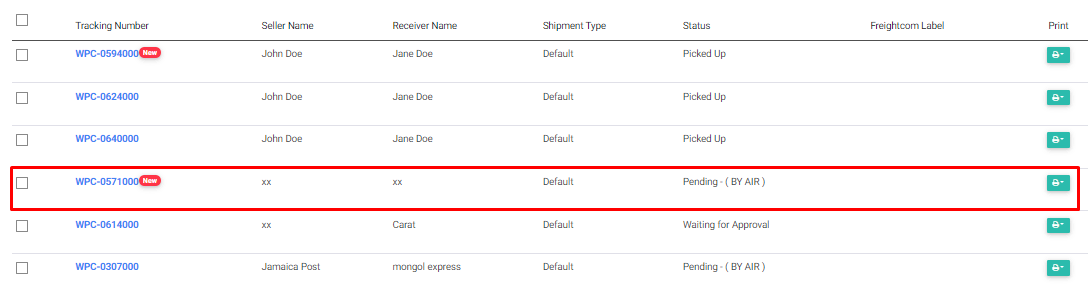
Final Step. After adding the ajax callback, submit your form and you will see few logs on the console which would look like this:
When you go back to your dashboard, you will see that the shipment is already updated.