This add-on requires the following plugins
- WPCargo Track and Trace
- WPTaskforce License Helper – comes with any products purchased
- WPCargo Custom Field Add-ons
Install and activate required plugins.
- Setup WPCargo Track and Trace plugin.
- Install and activate WPTaskforce License Helper.
- Setup WPCargo Custom Field Add-ons.
Install and activate WPCargo Frontend Manager.
- Check the order confirmation email with the list of products purchased and download the WPCargo Frontend Manager.
- Login to your wp-admin.
- Go to Dashboard > Plugins > Add New > Upload.
- Select the downloaded plugin.
- Install the plugin.
- Activate the plugin.
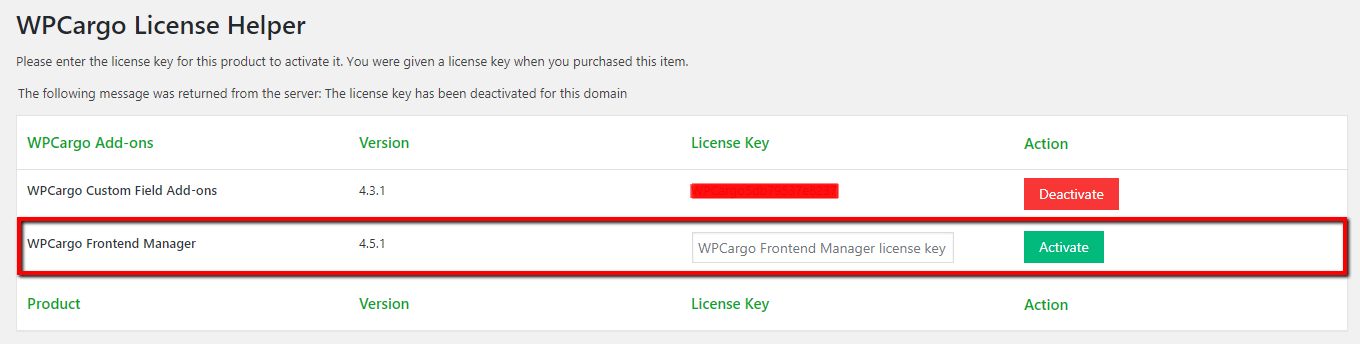
Activate WPCargo Frontend Manager license key.
- To acquire your license key, please refer to the mode of payment you have used when product was purchased.
- Purchased through PayPal – an email will be sent to the email you have provided on the order details including the license key of the product.
- Purchased through Western Union – email the MTCN to info@wpcargo.com. When payment is received, an email will be sent with the order details including the license key of the product.
- Copy WPCargo Frontend Manager’s license key.
- Go to Dashboard > WPCargo > WPTaskforce License Helper.
- Paste license key to WPCargo Frontend Manager field and click the Activate button.
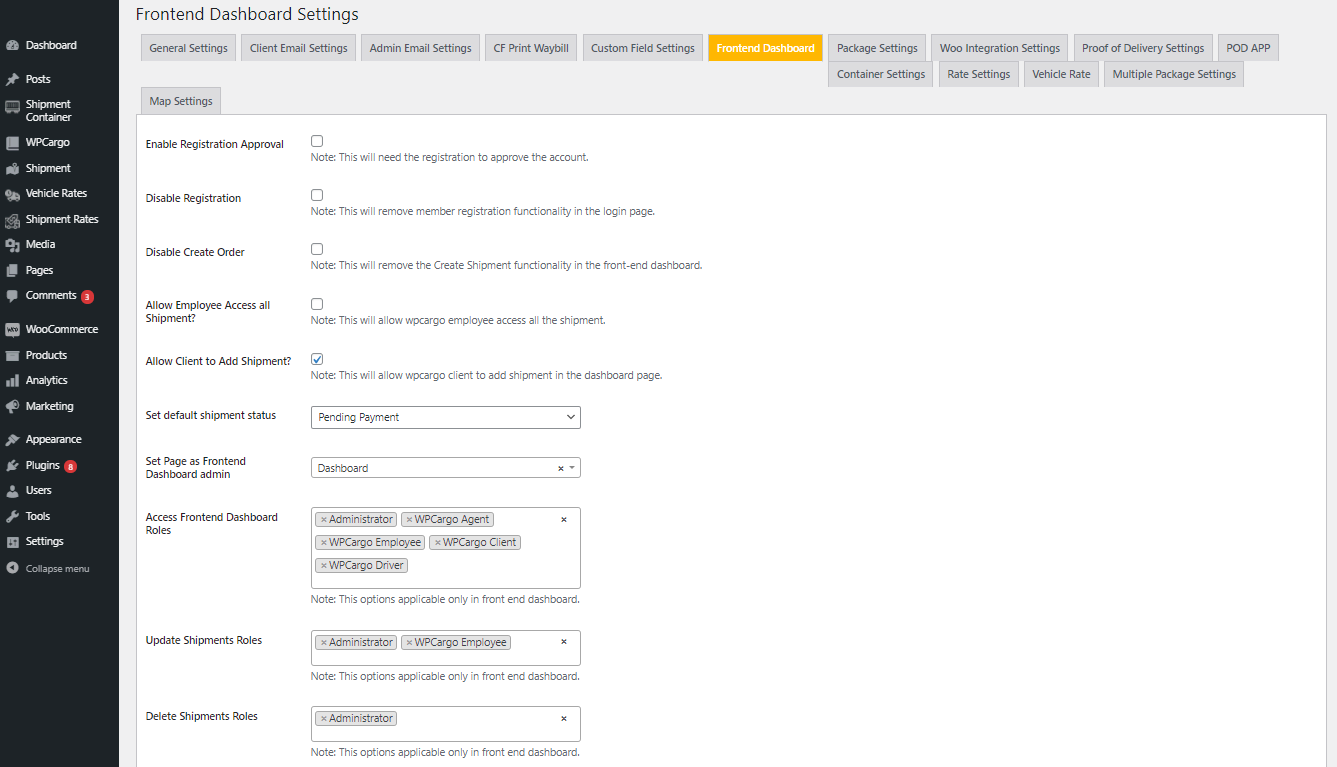
Manage WPCargo Frontend Manager settings.
Go to Admin Dashboard > WPCargo > Frontend Dashboard for the updates.
- Enable Registration Approval – After registration the account must approved before accessing the Dashboard page.
- Disable Create Order – this removes the Create Shipment button on Frontend Dashboard which disables all users to create shipment through dashboard.
- Allow Employee Access all Shipment? – this allows employee user roles to access all shipments added on the site.
- Allow Client to Add Shipment? – Allows the client to create shipment from the dashboard.
- Set default shipment status – This is the status of shipment after it’s created.
- Set Page as Frontend Dashboard admin – by default, the Dashboard page created by the plugin is set. You can change this to your custom created page. Take note that this will replace the content of the page you have chosen into the default content of the dashboard which has the list of shipments.
- Access Frontend Dashboard Roles – choose which user roles are allowed to access the Frontend Dashboard.
- Update Shipments Roles – choose which user roles are allowed to update shipments.
- Delete Shipments Roles – choose which user roles are allowed to remove shipments.
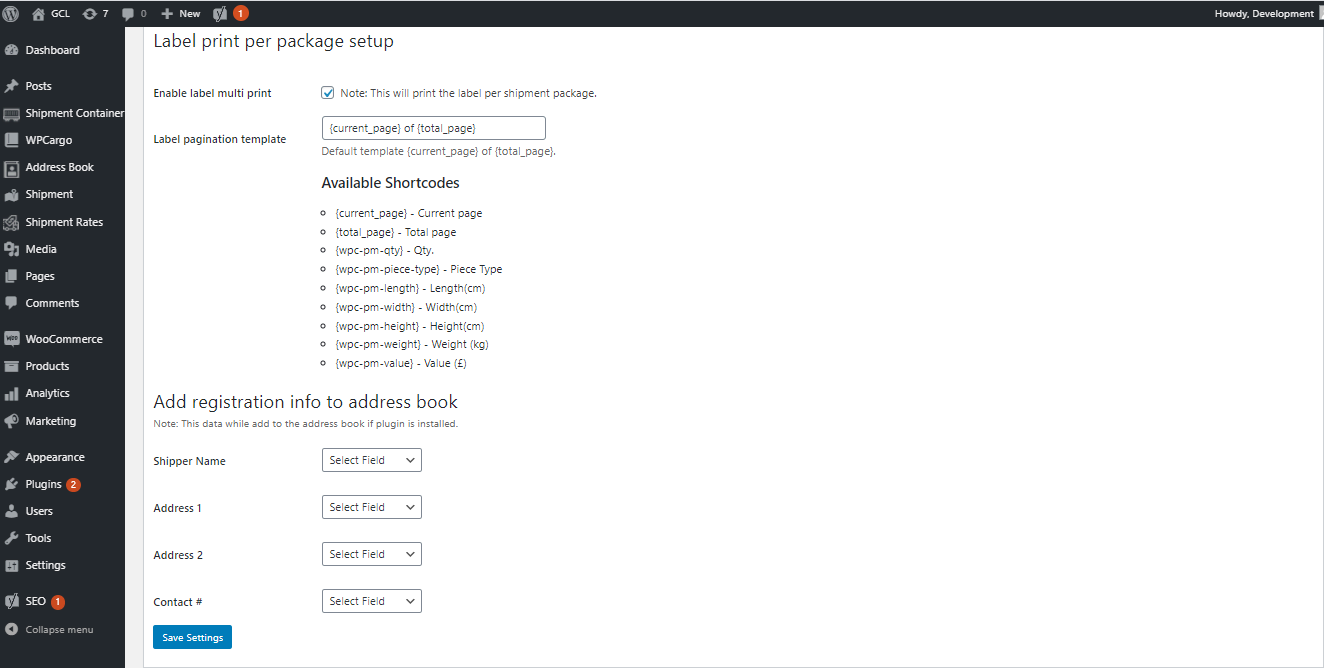
- Enable Chinese Fonts – If enabled, it will show Chinese characters on your PDF files (Waybill, Invoice and Label).
- Enable Print BOL – if enabled, this adds BOL from the print options in Print column of shipments list.
- Waybill Paper Size – choose paper size of waybill for printing.
- Waybill Paper Orientation – choose paper orientation of waybill for printing.
- Print documents on checkout – This will show the print pdf’s option during checkout only. Noted that this is for not log in user(s).
- Add registration info to address book – This will be added to your address book as shipper if it is mapped/assigned fields