To set up WPCargo Merchant Add on you make sure all the following plugins is installed and activated.
- WPCargo
- WPTaskForce License Helper
- WPCargo Custom Field Add-ons
- WPCargo Frontend Manager
- WPCargo Shipment Rate
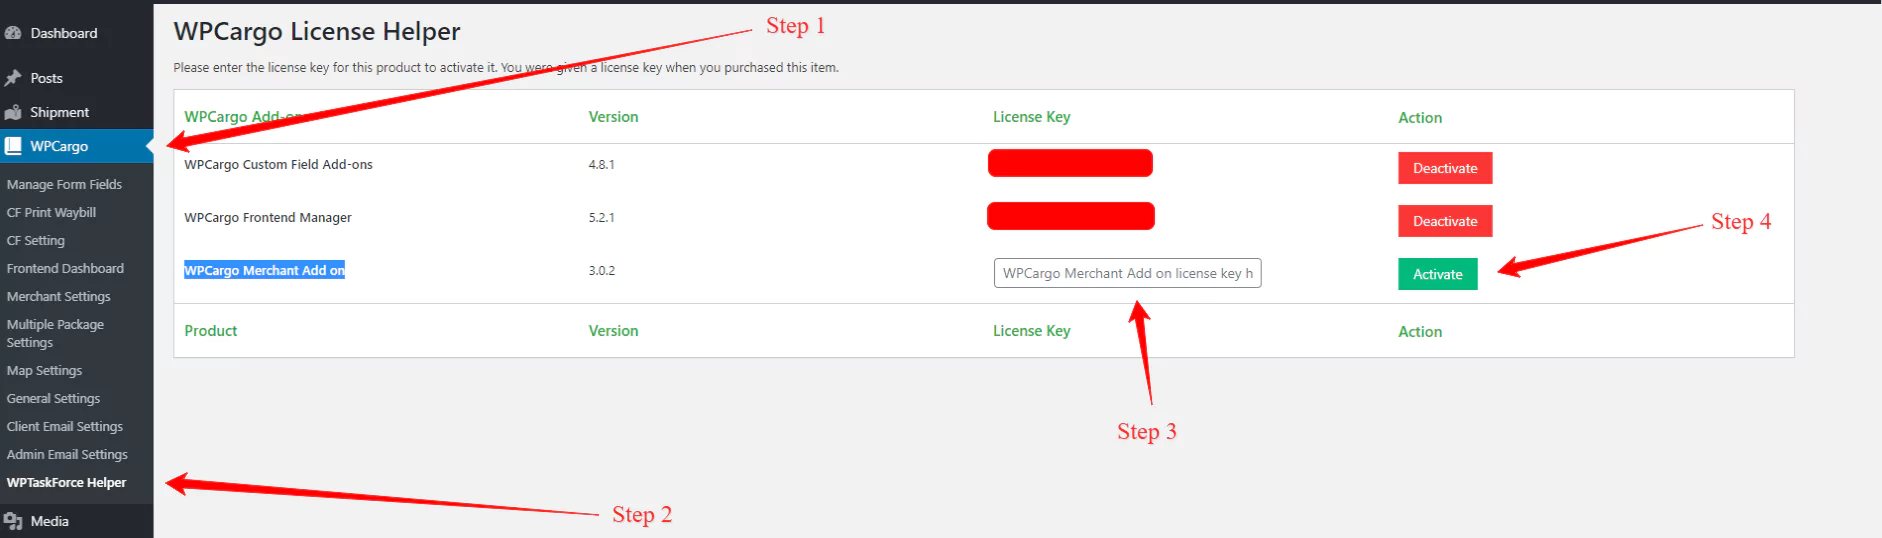
After installed all the plugins including the WPCargo Merchant Add on plugins you need to activate the plugin license. This license is sent to you email after your purchase is completed.
To activate your WPCargo Merchant Add on license, follow this steps.
- Login to your site admin dashboard
- Go to admin sidebar menu WPCargo -> WPCargo Merchant Add on
- Add license key to “WPCargo Merchant Add on” field
- Click “Activate” button to activate your license
Now, we have to set up the plugins settings.
- Login to your site admin dashboard
- Go to admin sidebar menu WPCargo -> Merchant Settings
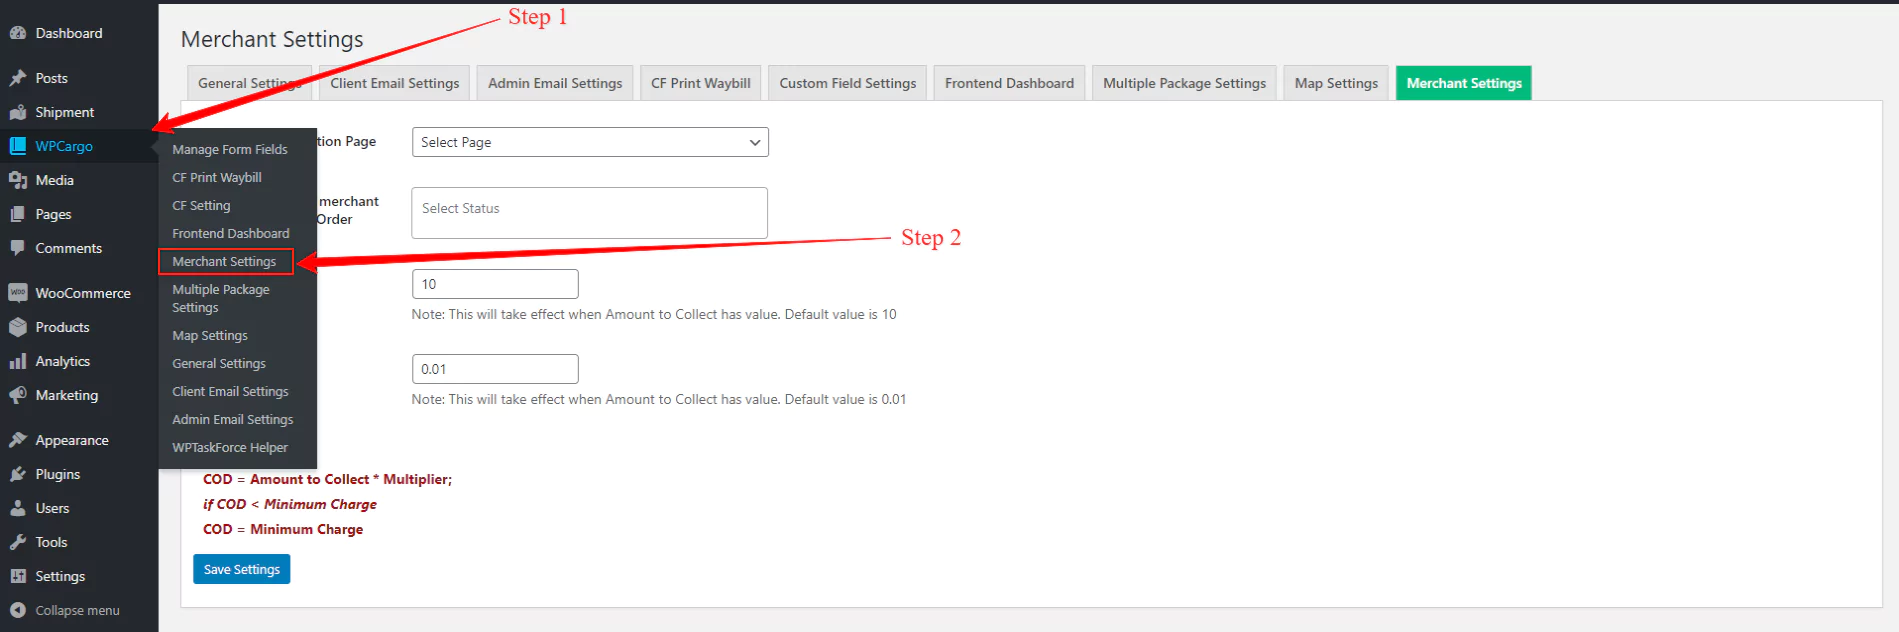
In the plugin settings, you have to fill up all the forms
- Set Term and Condition Page – This is the page of your site terms and condition.
- Select Status where merchant can Update/Cancel Order – Shipment Status where the merchant can update or Cancel their orders.
- Minimum Charge – This will be the minimum price charges. Note: This will take effect when Amount to Collect has value. Default value is 10.
- Multiplier – Is the multiplier amount based on the Amount to collect to get the COD charges. Note: This will take effect when Amount to Collect has value. Default value is 0.01
Formula for the COD:
COD = Amount to Collect * Multiplier;
if COD < Minimum Charge
COD = Minimum Charge

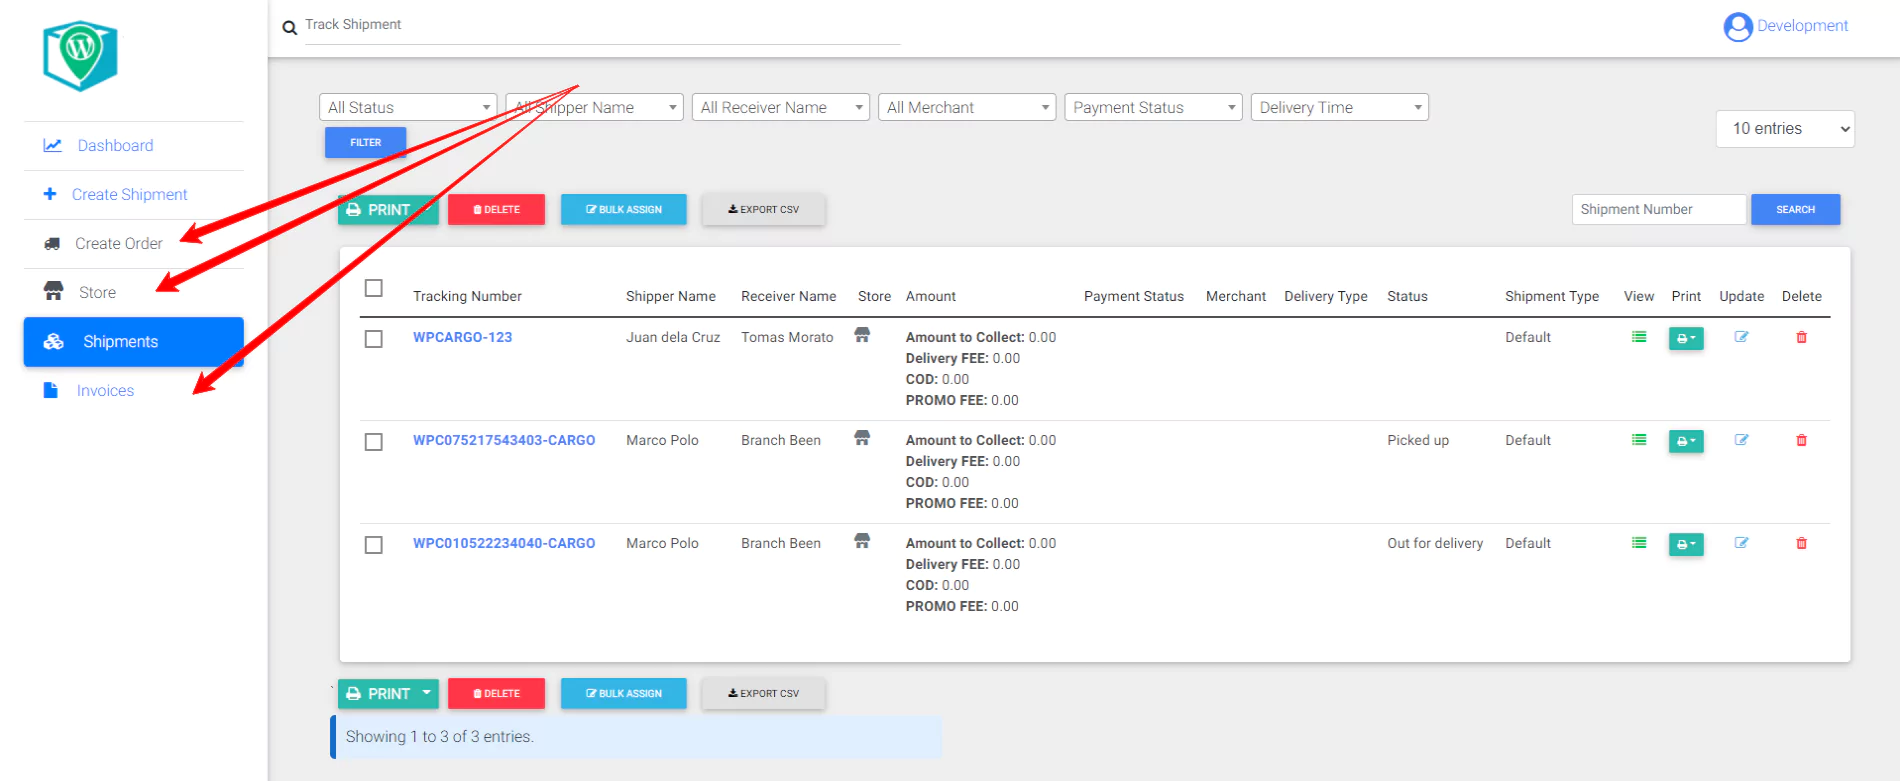
After settings up the plugin settings, there will be additional settings added in the Frontend Manager Dashboard.
- Create Order – Where admin can create order for the merchant.
- Stores – Where all the list of all the merchants create to their respective accounts.
- Invoices – Where all the created invoices from the merchant orders.