WPCargo Shipping Rate allows you to define rates based on the origin and destination entered in Search Rates form. The system allows you to define your locations, zones and shipping rates and let clients enter shipment weight and dimensions to get rate results. This plugin requires Woocommerce for integration which allows clients to proceed to checkout after filling in the shipment information.
To set up this plugin must be in the following order
- User Group (optional) – This will be used to make the shipping rate exclusive to the certain group.
Note: This is only available if you have “User Management Addon” installed. - Delivery Types (optional) – Type of Delivery for the shipping rate
- Locations (required) – Locations for the specific rates for the shipping rate
- Zones (required) – Group of locations based on zones for the shipping rate
- Warehouse (required) – Location of the warehouse where the shipment is to drop-off.
- Pickup Rates (required) – Rate when the shipment is for Pickup based on zone and weight.
- Shipment Rates (required) – Rates for each shipment based on zone, delivery type and user group.
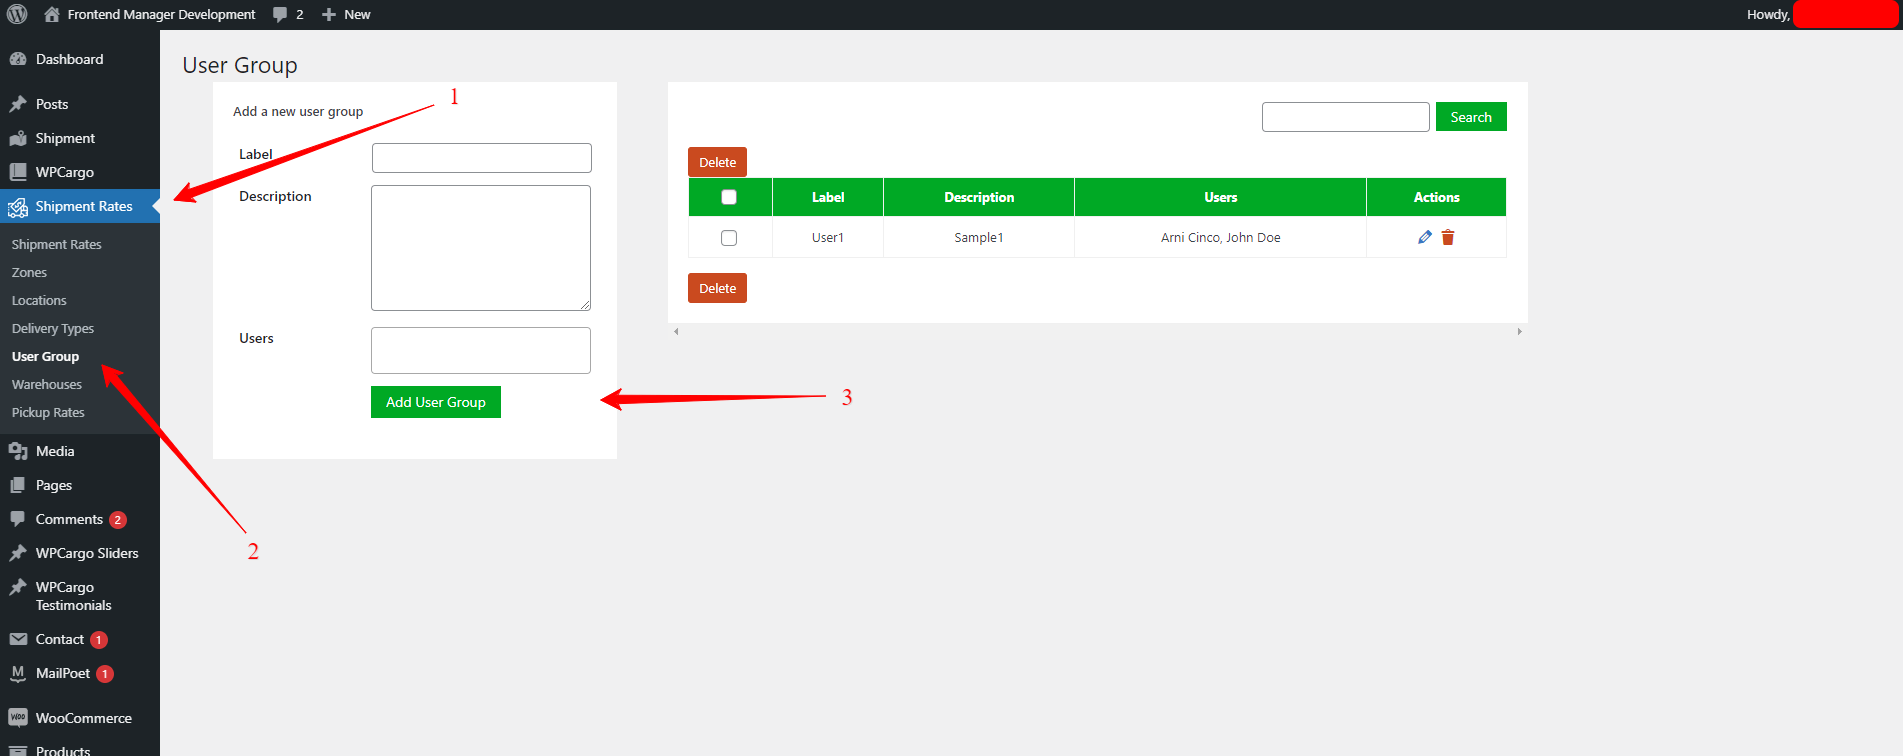
Set up “User Group“
- Login to wp-admin page
- Go to admin sidebar Shipment Rates -> User Group
- Fill up the Form
- Click “Add User Group” button to save the Group
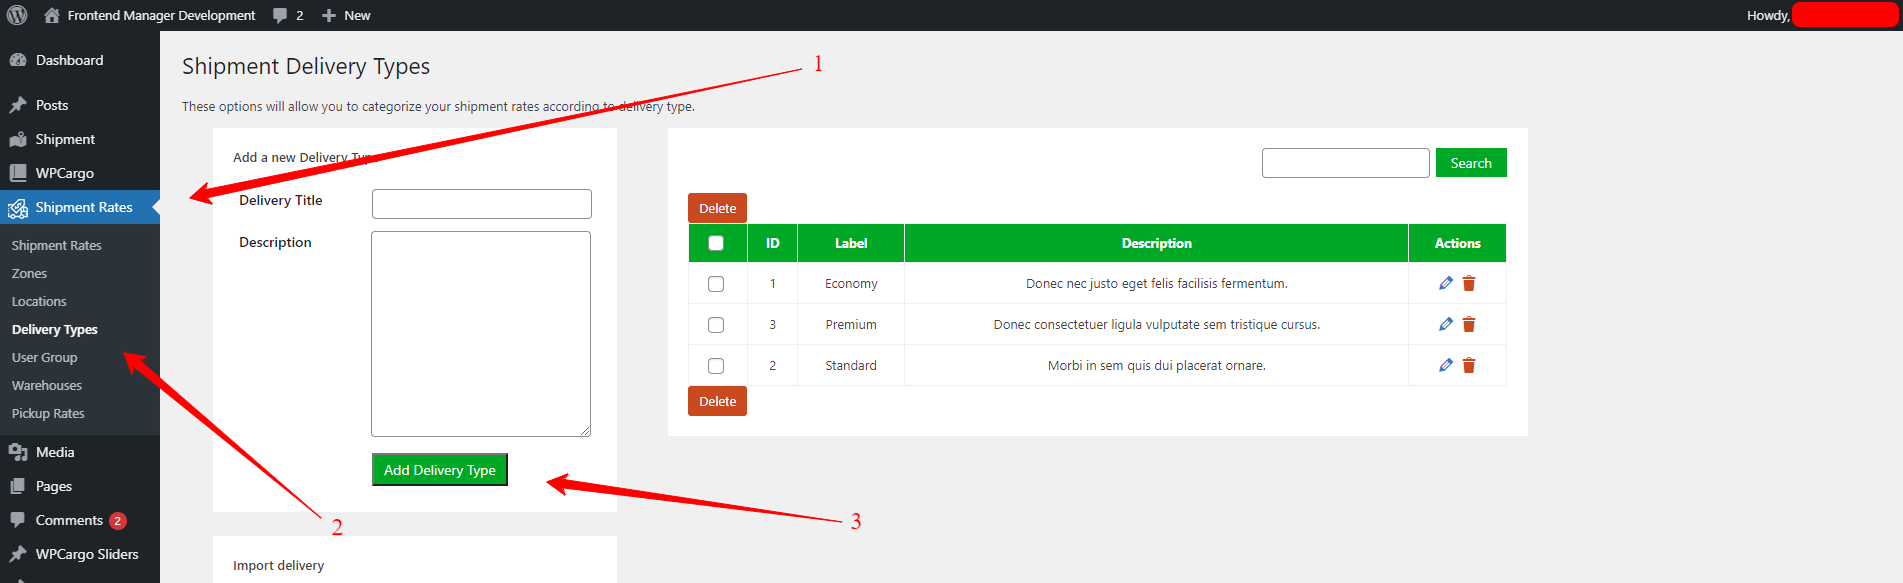
Set up “Delivery Types“
- Login to wp-admin page
- Go to admin sidebar Shipment Rates -> Delivery Types
- Fill up the Form
- Click “Add Delivery Type” button to save the Delivery Types
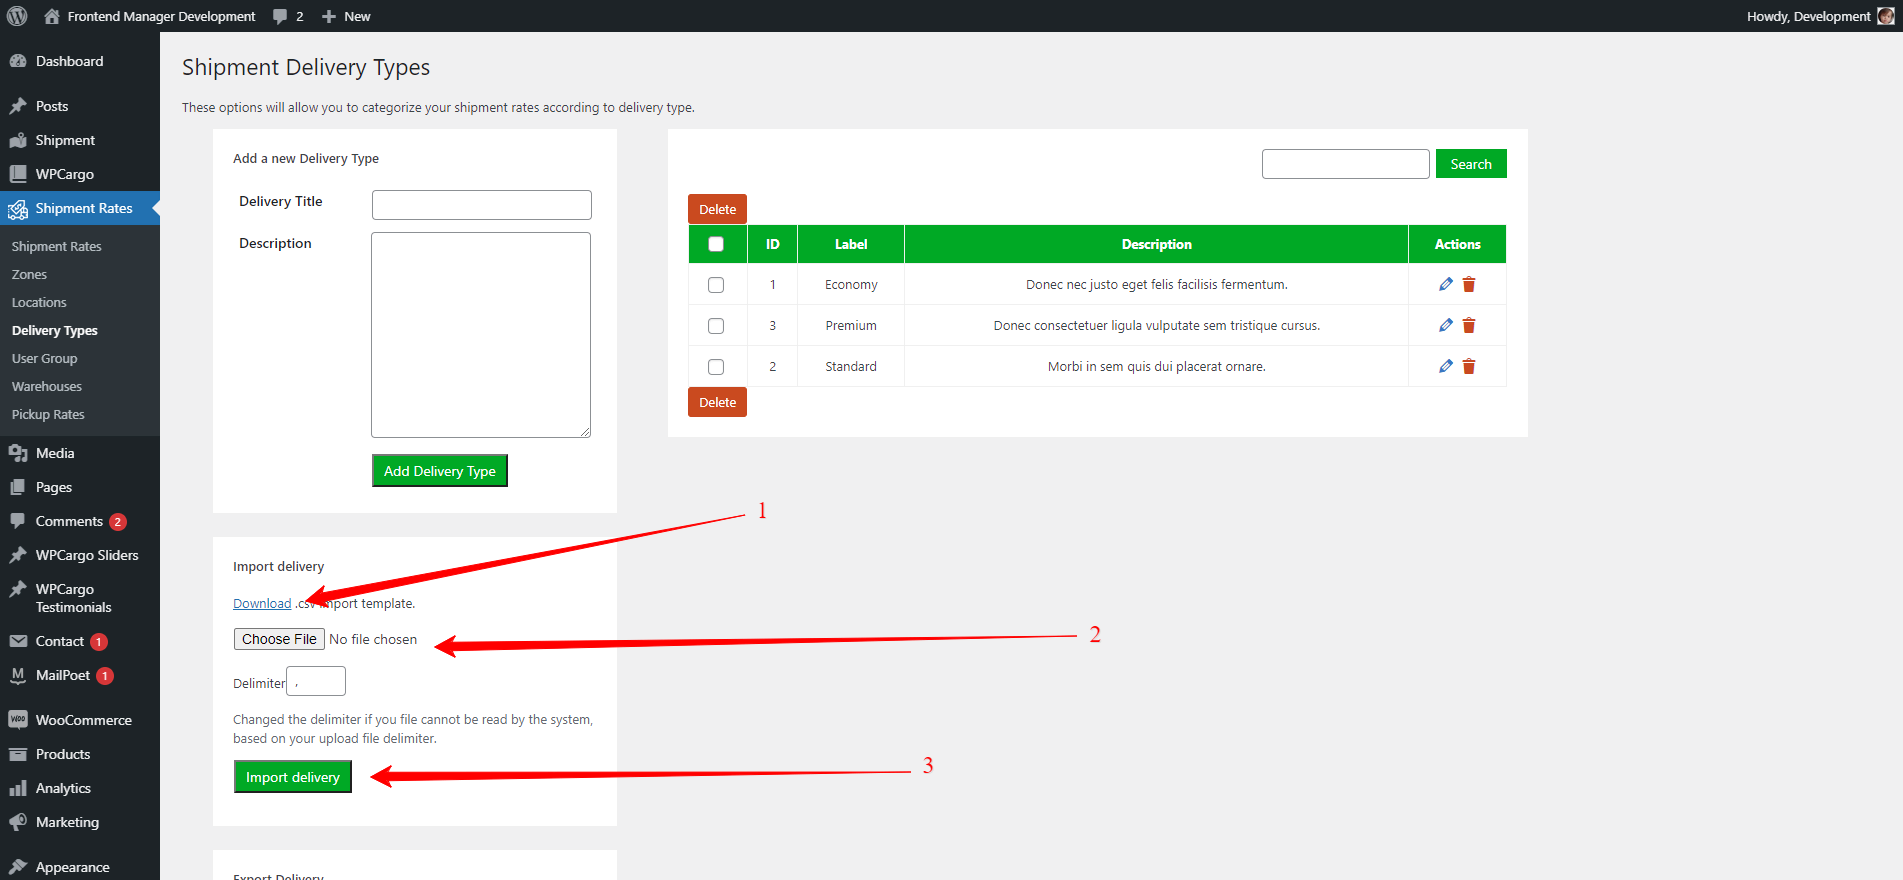
Using the import functionality in generating “Delivery Types”
- Download the required template in importing the Delivery types
- Add the data to each row for the delivery type “Label” and “Description”
- Note : Leave the “deliveryID” column empty for importing the file
- Click the “Choose File” button and select file to import
- Click “Import Delivery” button to import the file
Set up “Locations“
- Login to wp-admin page
- Go to admin sidebar Shipment Rates -> Locations
- Fill up the Form
- Click “Add Location” button to save the Location
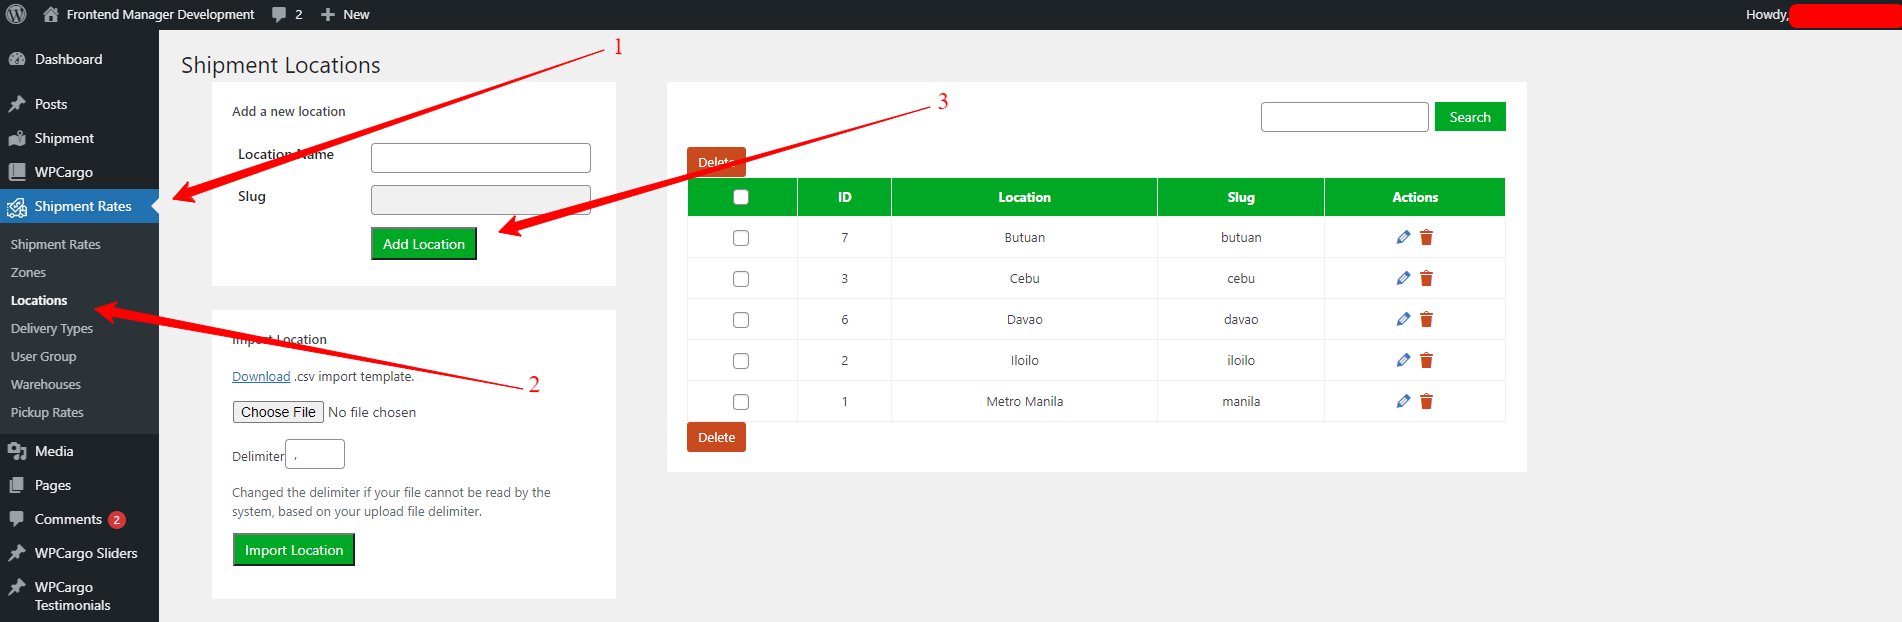
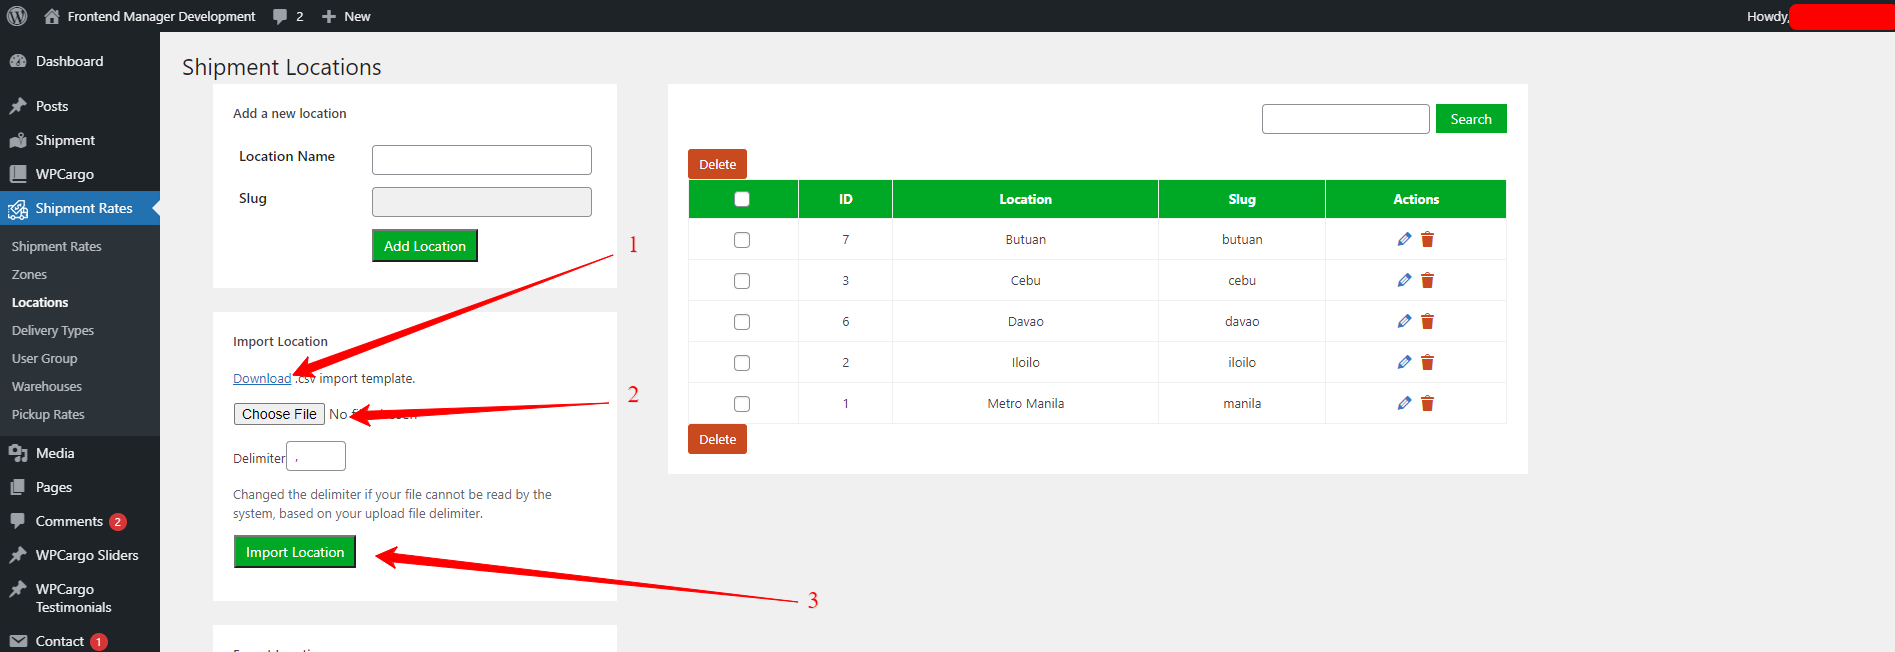
Using the import functionality in generating “Locations”
- Download the required template in importing the location
- Add the data to each row for the delivery type “Location” and “Slug”
- Note : Leave the “locationID” column empty for importing the file
- Click the “Choose File” button and select file to import
- Click “Import Location” button to import the file
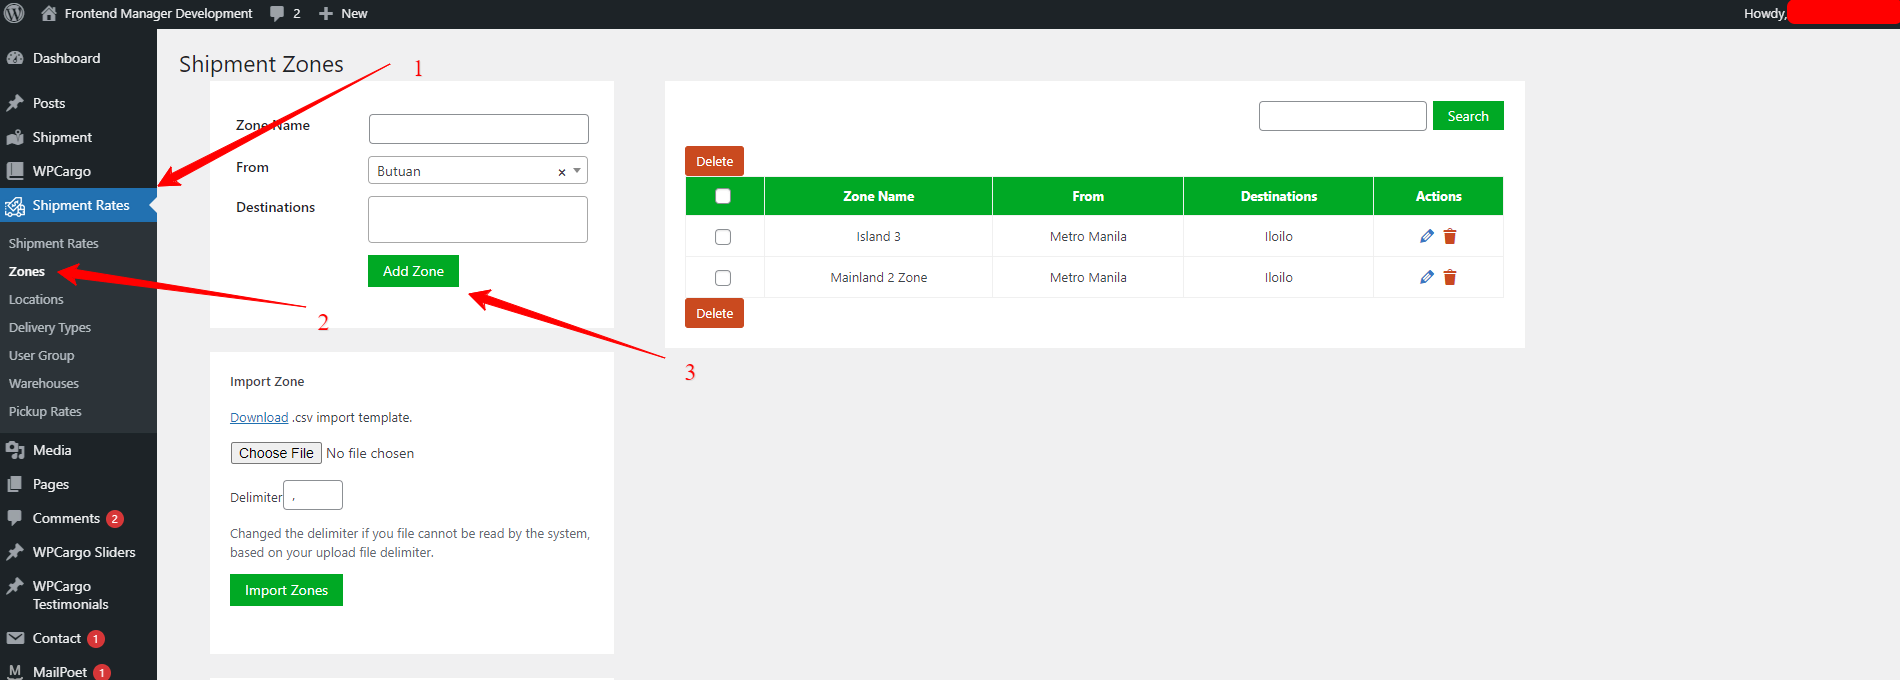
Set up “Zones“
- Login to wp-admin page
- Go to admin sidebar Shipment Rates -> Zones
- Fill up the Form
- Click “Add Zone” button to save the Zone
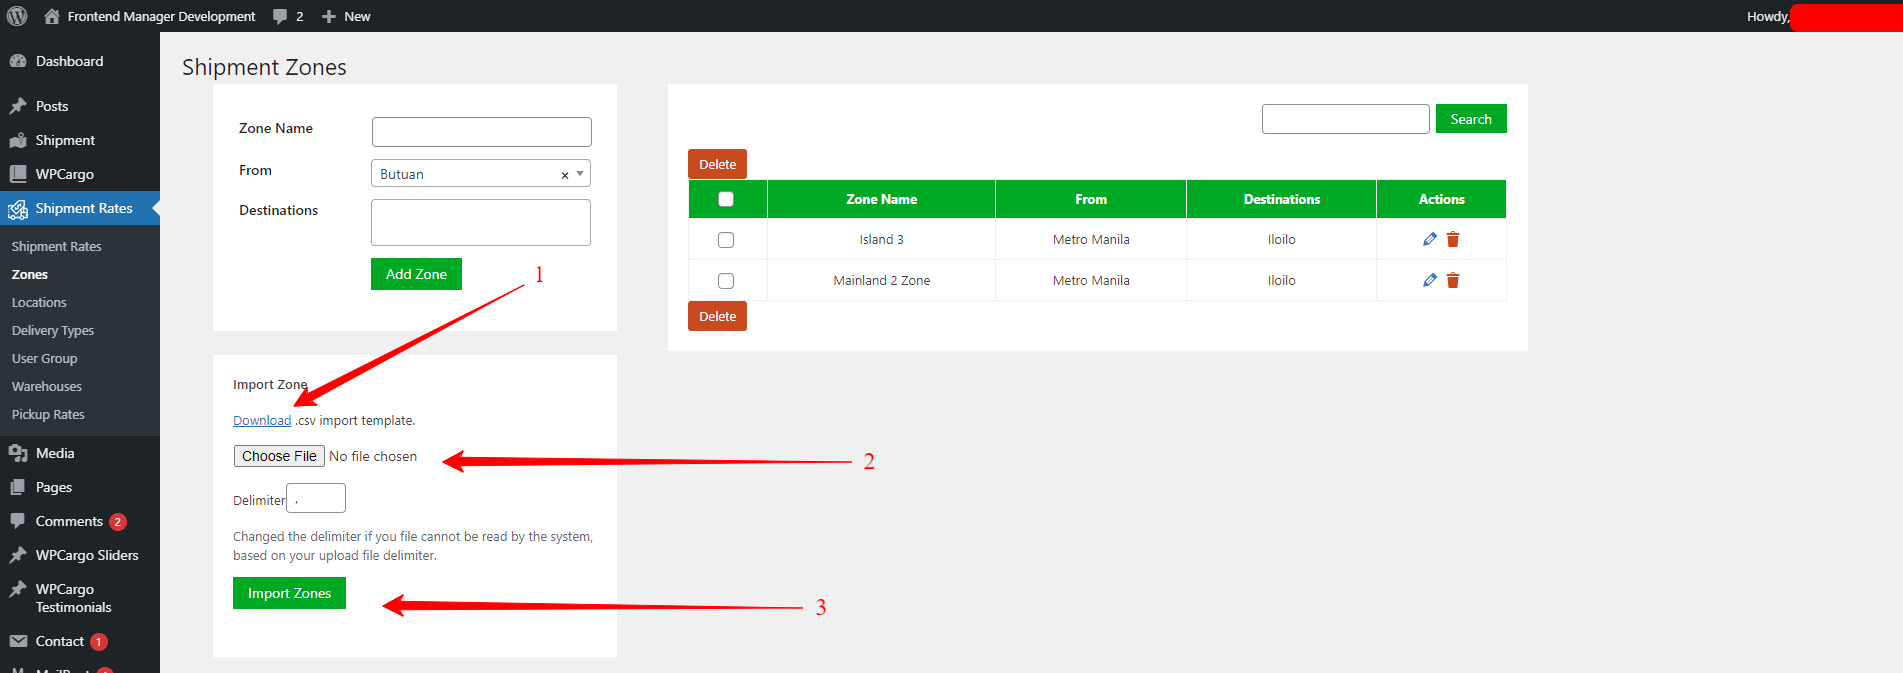
Using the import functionality in generating “Zone”
- Download the required template in importing the zone
- Add the data to each row for the “Zone”, “Origin” and “Locations”
- Note : Leave the “zoneID” column empty for importing the file
- Click the “Choose File” button and select file to import
- Click “Import Zones” button to import the file
Note: Make sure the the Locations and the Origin values is registered in the list of locations. this will not create zone if the value not exist in the locations
- Zone (required) – Name of the zone
- Origin (required) – Origin location
- Locations (required) – Destination location
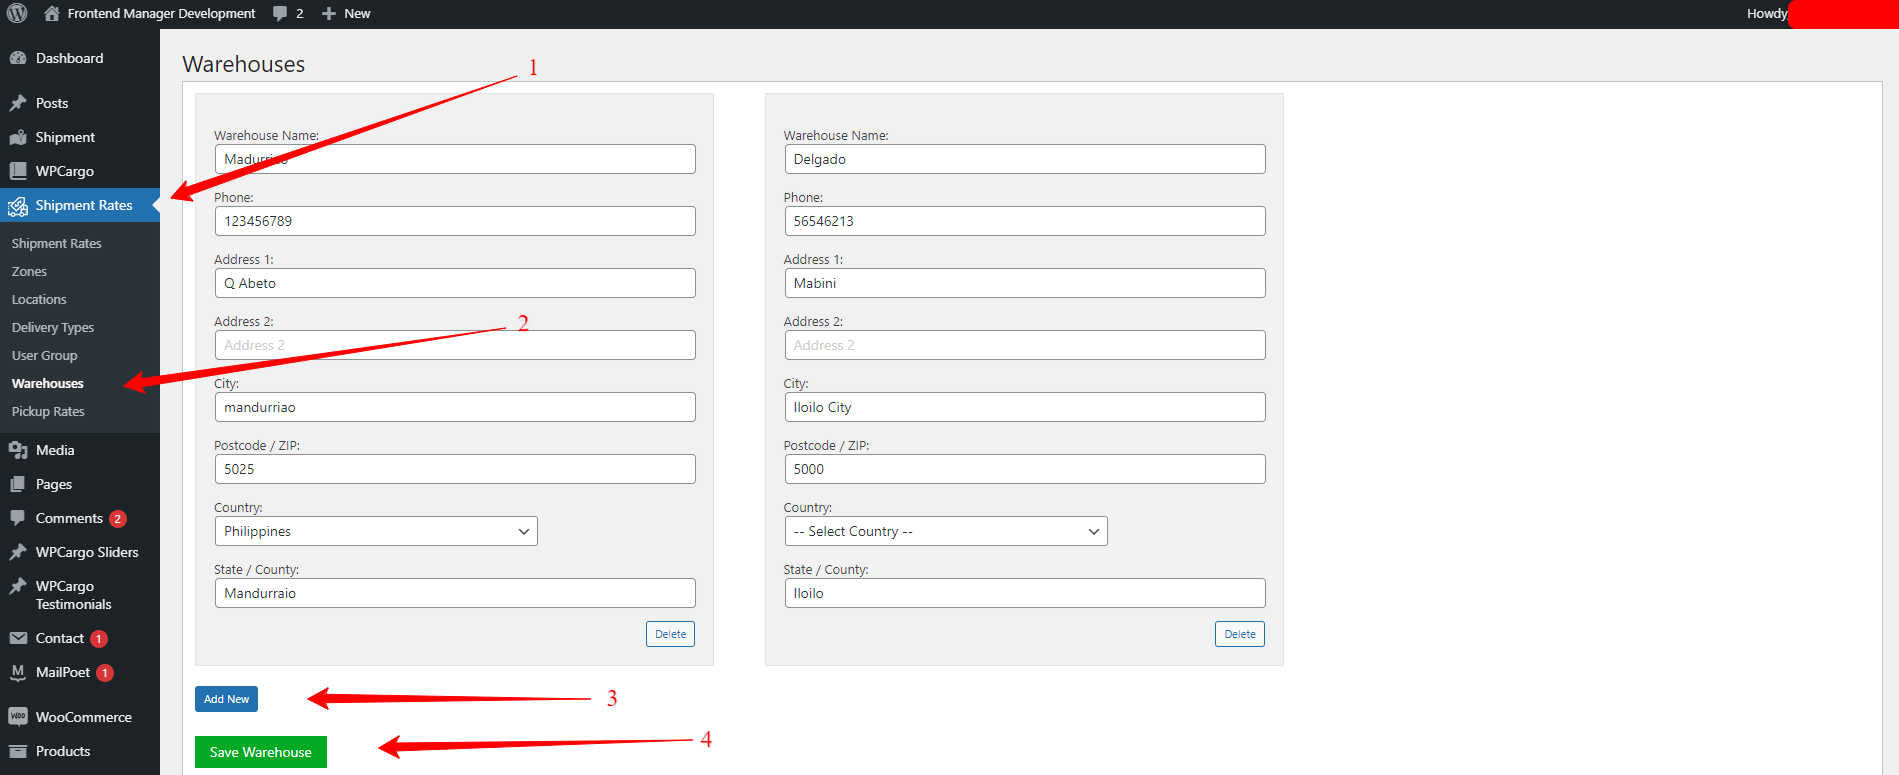
Set up “Warehouse“
- Login to wp-admin page
- Go to admin sidebar Shipment Rates -> Warehouse
- Fill up the Form
- Click “Save Warehouse” button to save the Warehouse
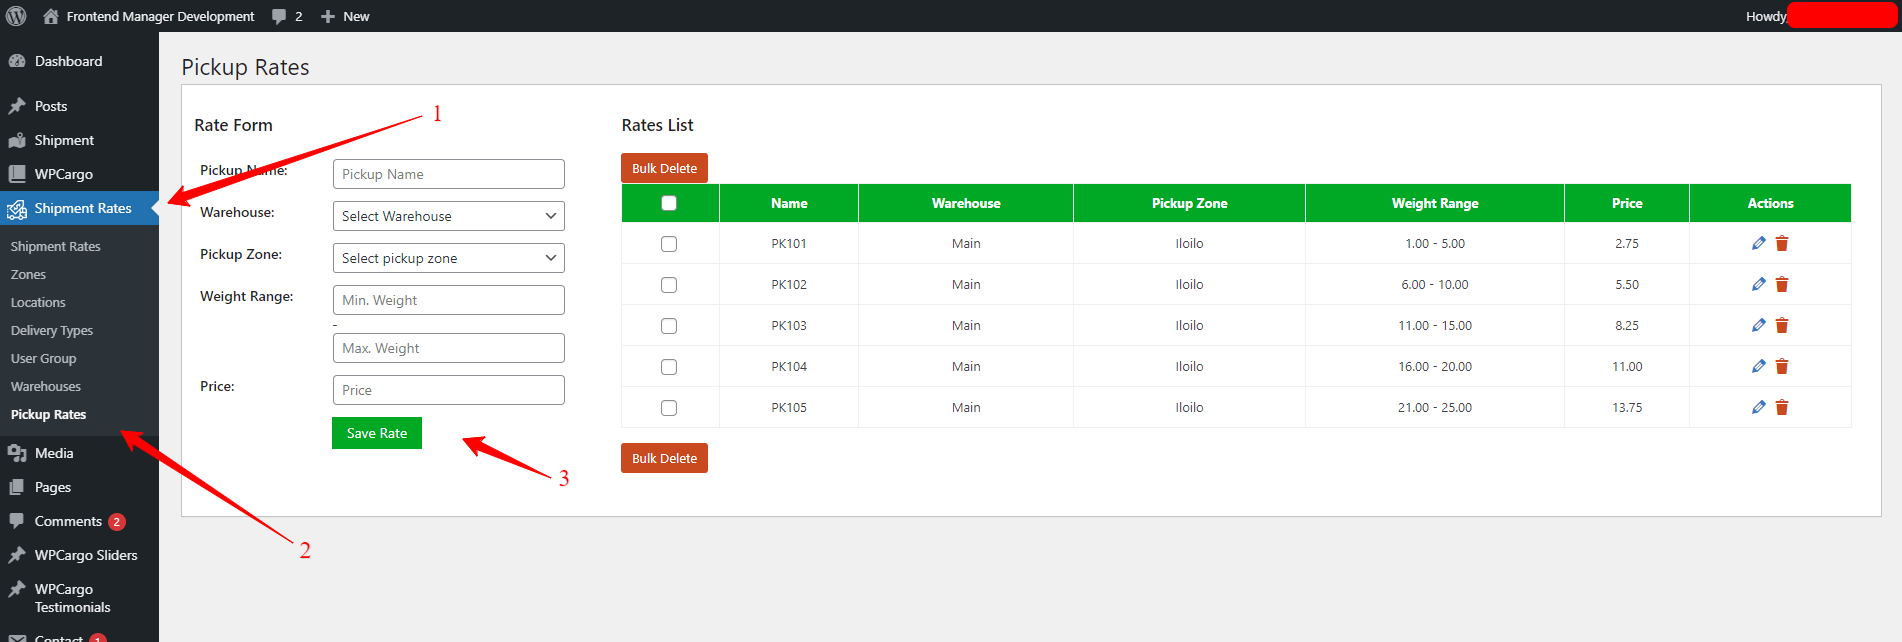
Set up “Pickup Rates“
- Login to wp-admin page
- Go to admin sidebar Shipment Rates -> Pickup Rates
- Fill up the Form
- Click “Save Rate” button to save the Pickup Rates
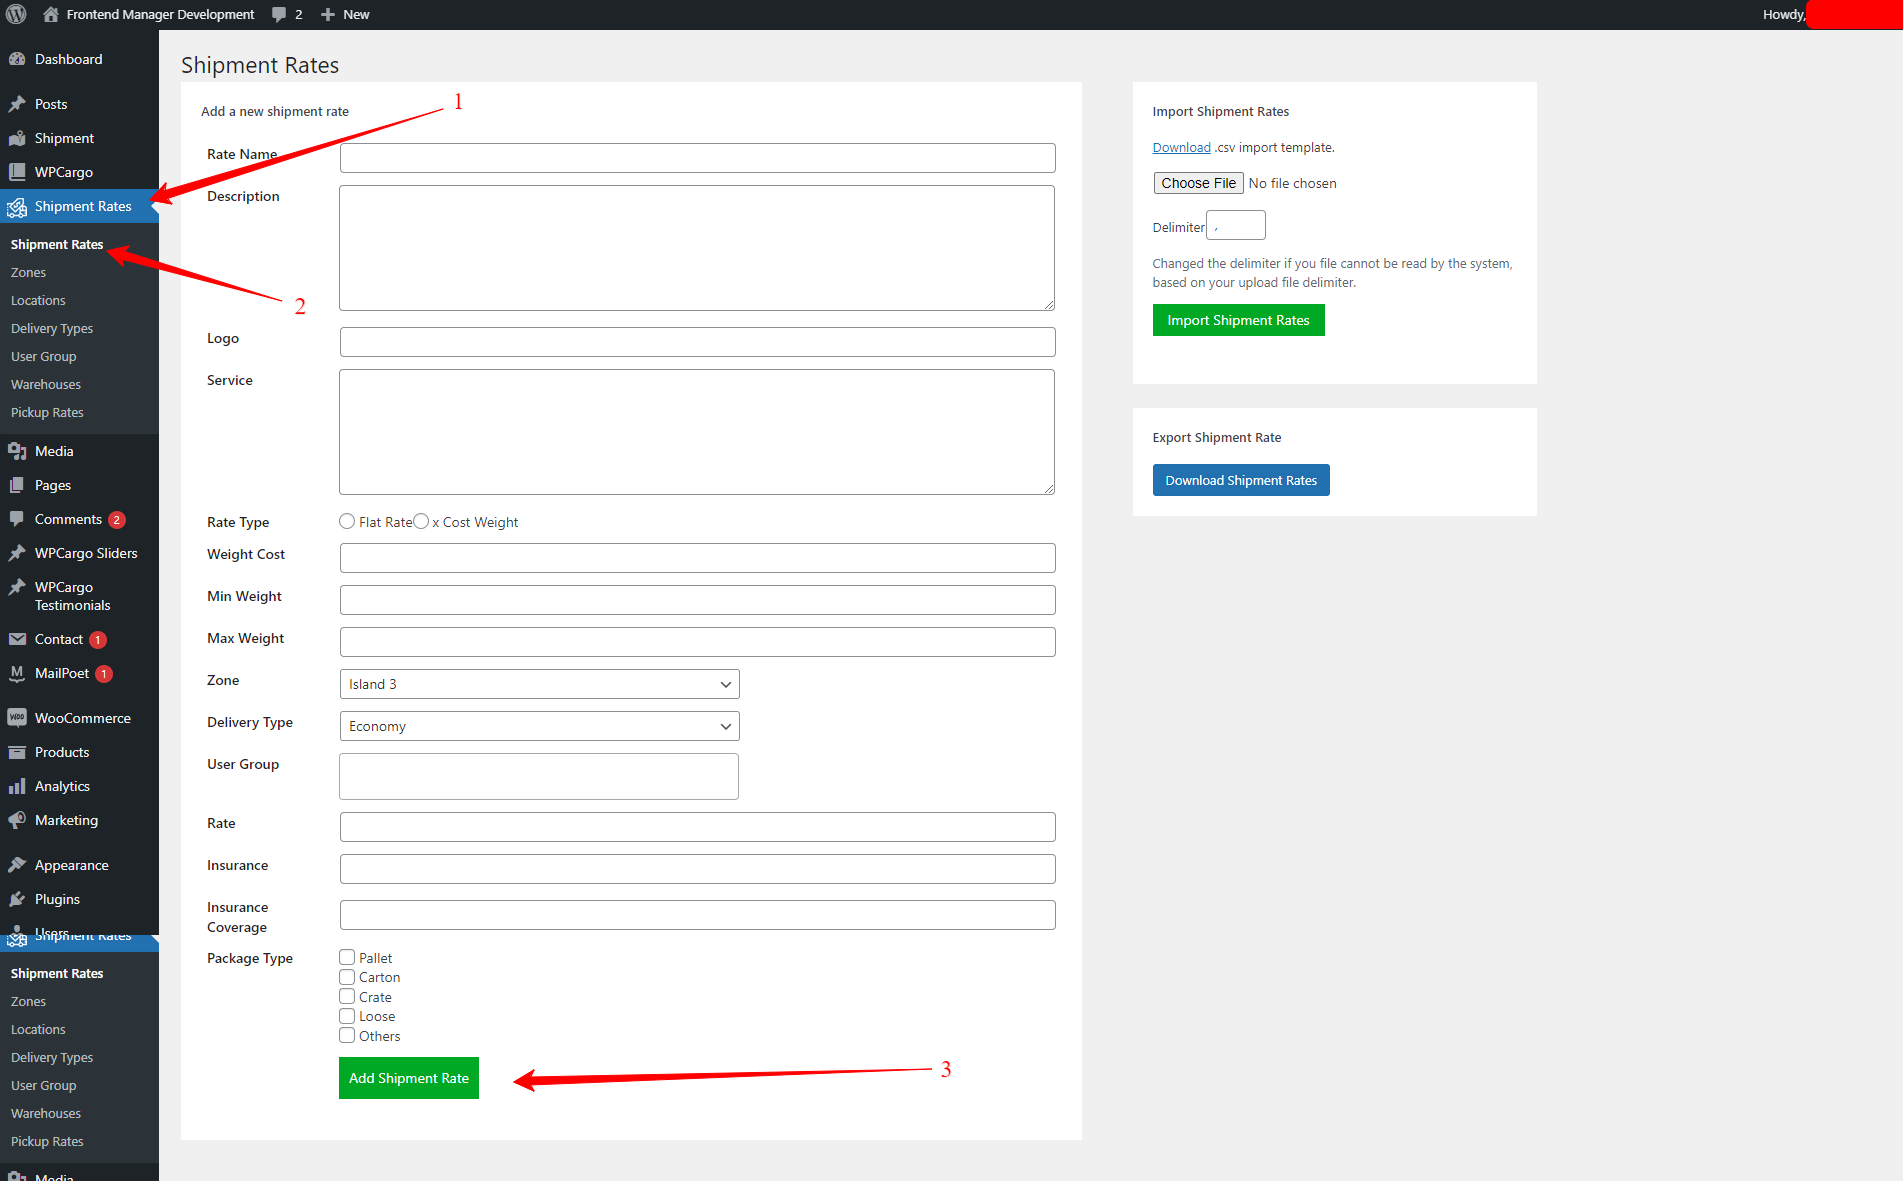
Set up “Shipment Rates“
- Login to wp-admin page
- Go to admin sidebar Shipment Rates -> Shipment Rates
- Fill up the Form
- Click “Add Shipment Rate” button to save the Rates
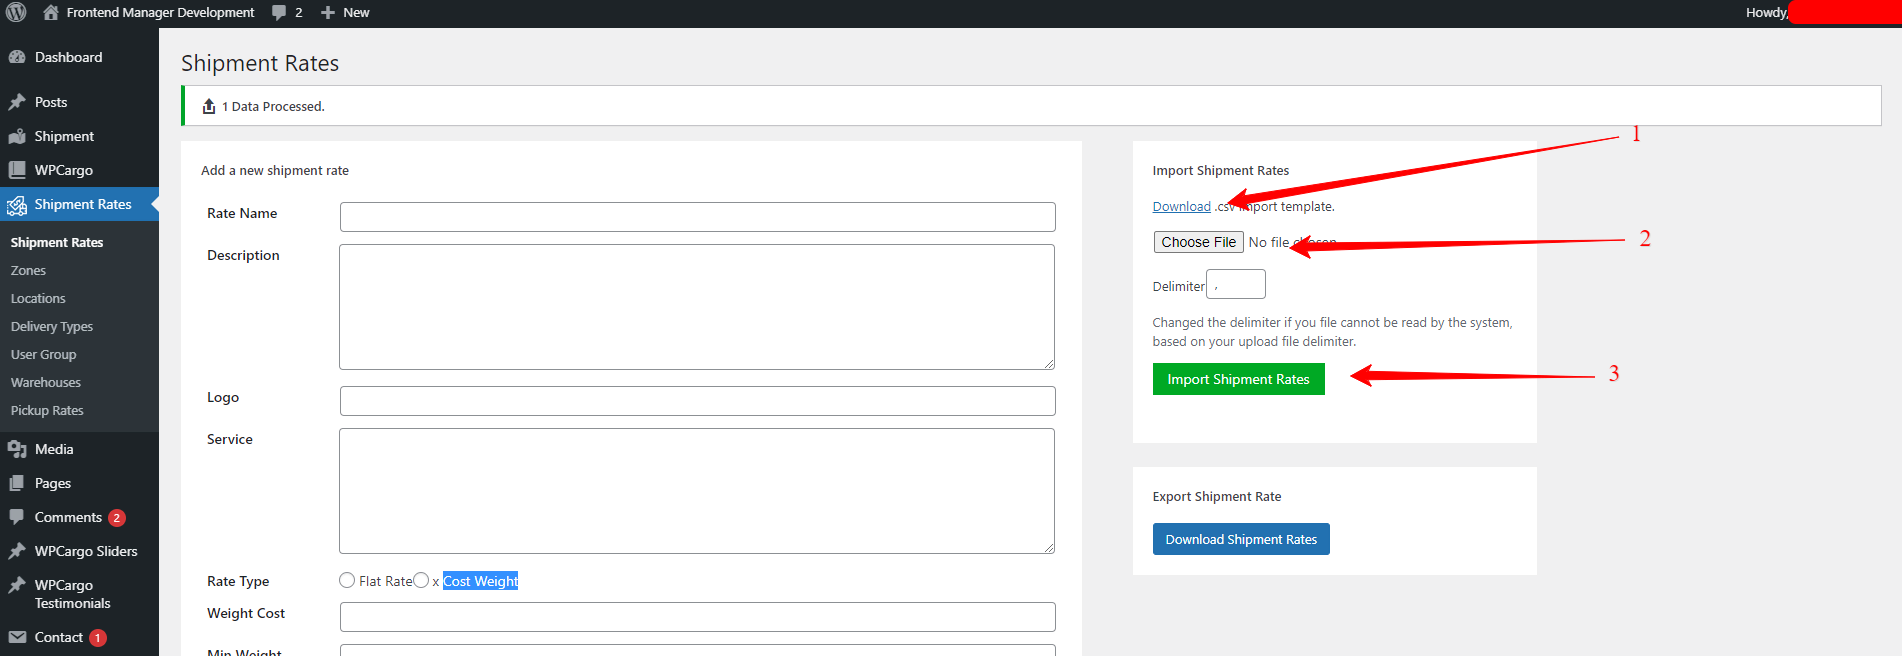
Using the import functionality in generating “Shipping Rate”
- Download the required template in importing the Shipping Rate
- Add the data to each row based on the column headers
- Note : Leave the “Rate ID” column empty for importing the file
- Click the “Choose File” button and select file to import
- Click “Import Shipping Rates” button to import the file
Column Description
- Rate Name (required) – Name of the shipping rate
- Description (required) – Description for the shipping rate
- Logo (optional) – Logo for the rate
- Service (optional) – Service description of the rate
- Rate Type (required) – Type of the Rate
- Flat Rate – use zero (0) as value
- Cost Weight – use one (1) as value
- Weight Cost (required) – Cost per weight
- Min Weight (required) – Minimum weight for the rate
- Max Weight (required) – Maximum weight for the rate
- Zone (required) – Zone for the rate (note: make sure that the value is registered in the shipment zones list)
- Delivery Type (required) – Type of delivery (note: make sure that the value is registered in the delivery type list)
- User Group (optional) – Group of users for the rates (note: make sure that the value is registered in the user group list)
- Rate (required) – Cost of the shipment rate
- Insurance (optional) – Cost for the shipment rate insurance
- Insurance Coverage (optional) – Cost for the shipment rate insurance coverage
- Package Type (optional) – Package type under the shipping rate (Note: use comma (,) to add multiple packages )
- Example ( Pallet, Carton )