[vc_row][vc_column][/vc_column][/vc_row][vc_row][vc_column width=”1/4″][vc_widget_sidebar sidebar_id=”sidebar_3″ title=”Get Started”][/vc_column][vc_column width=”3/4″][vc_column_text]
Shortcodes included with WPCargo Track & Trace
WPCargo comes with several shortcode that you can insert it in your page.
WPCargo Track & Trace
– single page tracking form + result
– generate tracking form
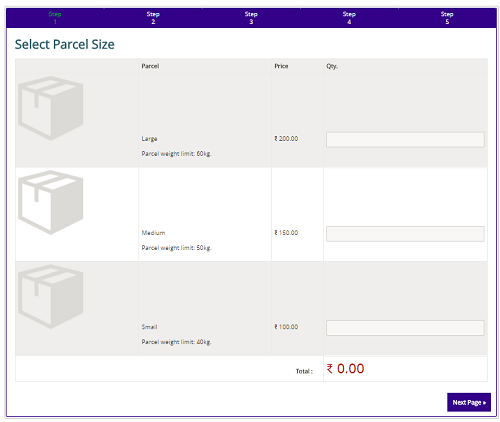
– Generate separate result in separate page[/vc_column_text][dt_fancy_title title=”WPCargo Pick-up Management Add-ons” title_size=”h2″ title_color=”custom” custom_title_color=”#000000″][vc_column_text css=”.vc_custom_1513240341536{margin-top: 20px !important;}”][wpcargo-pick-up-management] – Online booking form where you can chose shipment cost
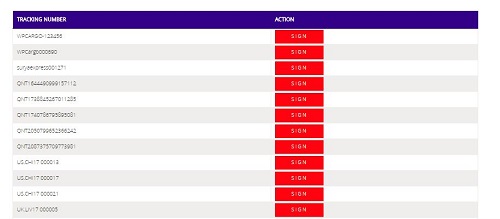
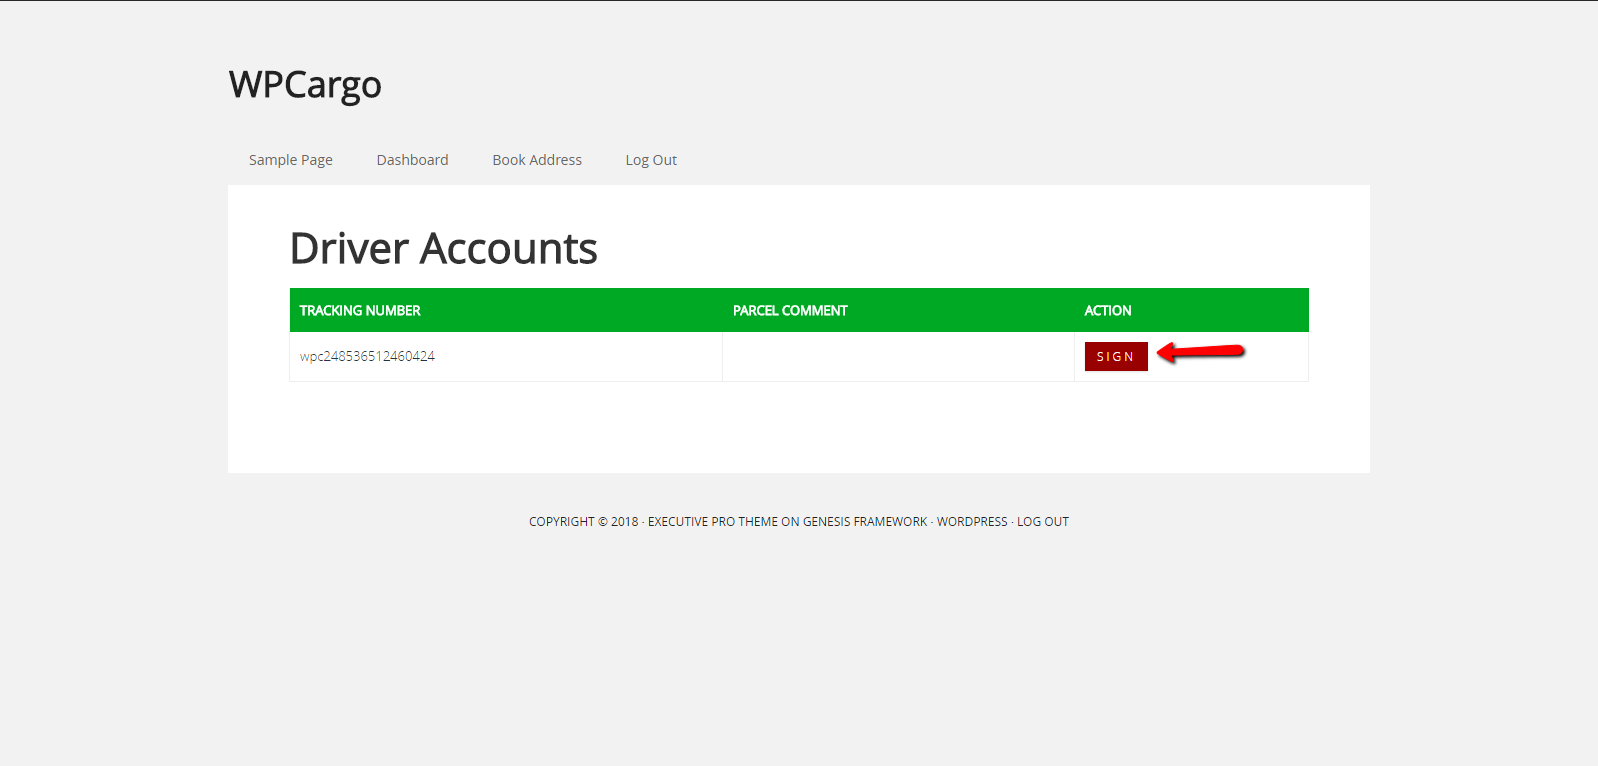
 [/vc_column_text][dt_fancy_title title=”WPCargo Proof of Delivery Add-ons ” title_size=”h2″ title_color=”custom” custom_title_color=”#000000″][vc_column_text css=”.vc_custom_1513240359311{margin-top: 20px !important;}”][wpc_driver_accounts] – List of shipment assigned to a driver
 [/vc_column_text][dt_fancy_title title=”WPCargo Client Account Add-ons ” title_size=”h2″ title_color=”custom” custom_title_color=”#000000″][vc_column_text css=”.vc_custom_1513240409025{margin-top: 20px !important;}”] – List of shipment created or booked by customers
 [/vc_column_text][dt_fancy_title title=” WPCargo Parcel Quotation Add-ons” title_size=”h2″ title_color=”custom” custom_title_color=”#000000″][vc_column_text css=”.vc_custom_1519053983383{margin-top: 20px !important;}”][wpc-pq-dashboard orderpageid=”ID of Order page” viewpageid=”ID of View Page” updatepageid=”ID of Update Page”] –
To view pending quotes, current orders and order history .“orderpageid” parameter will redirect to page where the “[wpc-pq dashboardpageid=”ID of main Page”]” shorcode is added.” ” viewpageid” parameter will redirect to page where the “[wpc-pq-view]” shortcode is added. “updatepageid” parameter will redirect to page where the “[wpc-pq-update]” is added.
 [/vc_column_text][dt_fancy_title title=”WPCargo Address Book Add-ons” title_size=”h2″ title_color=”custom” custom_title_color=”#000000″][vc_column_text css=”.vc_custom_1513240474763{margin-top: 20px !important;}”][wpc-pq-book-address] – To create and list of shipper book address and receiver book address.
 [/vc_column_text][dt_fancy_title title=”WPCargo Shipment Container Add-ons” title_size=”h2″ title_color=”custom” custom_title_color=”#000000″][vc_column_text css=”.vc_custom_1513240388504{margin-top: 20px !important;}”][wpcargo-container-track-form pageredirect=”page_id”] – To locate or track the container no. and view where “pageredirect” parameter will redirect to page where the “[wpcargo-container-track-result]” is added.
[wpcargo-container-track-result] – This will receive the result of “[wpcargo-container-track-form].
 [/vc_column_text][vc_raw_html]JTNDc2NyaXB0JTIwYXN5bmMlMjBzcmMlM0QlMjIlMkYlMkZwYWdlYWQyLmdvb2dsZXN5bmRpY2F0aW9uLmNvbSUyRnBhZ2VhZCUyRmpzJTJGYWRzYnlnb29nbGUuanMlMjIlM0UlM0MlMkZzY3JpcHQlM0UlMEElM0NpbnMlMjBjbGFzcyUzRCUyMmFkc2J5Z29vZ2xlJTIyJTBBJTIwJTIwJTIwJTIwJTIwc3R5bGUlM0QlMjJkaXNwbGF5JTNBYmxvY2slM0IlMjB0ZXh0LWFsaWduJTNBY2VudGVyJTNCJTIyJTBBJTIwJTIwJTIwJTIwJTIwZGF0YS1hZC1sYXlvdXQlM0QlMjJpbi1hcnRpY2xlJTIyJTBBJTIwJTIwJTIwJTIwJTIwZGF0YS1hZC1mb3JtYXQlM0QlMjJmbHVpZCUyMiUwQSUyMCUyMCUyMCUyMCUyMGRhdGEtYWQtY2xpZW50JTNEJTIyY2EtcHViLTA1MDY1Mzg0MjY0NTY4NzclMjIlMEElMjAlMjAlMjAlMjAlMjBkYXRhLWFkLXNsb3QlM0QlMjIxNjk0OTc1MjIyJTIyJTNFJTNDJTJGaW5zJTNFJTBBJTNDc2NyaXB0JTNFJTBBJTIwJTIwJTIwJTIwJTIwJTI4YWRzYnlnb29nbGUlMjAlM0QlMjB3aW5kb3cuYWRzYnlnb29nbGUlMjAlN0MlN0MlMjAlNUIlNUQlMjkucHVzaCUyOCU3QiU3RCUyOSUzQiUwQSUzQyUyRnNjcmlwdCUzRQ==[/vc_raw_html][/vc_column][/vc_row]

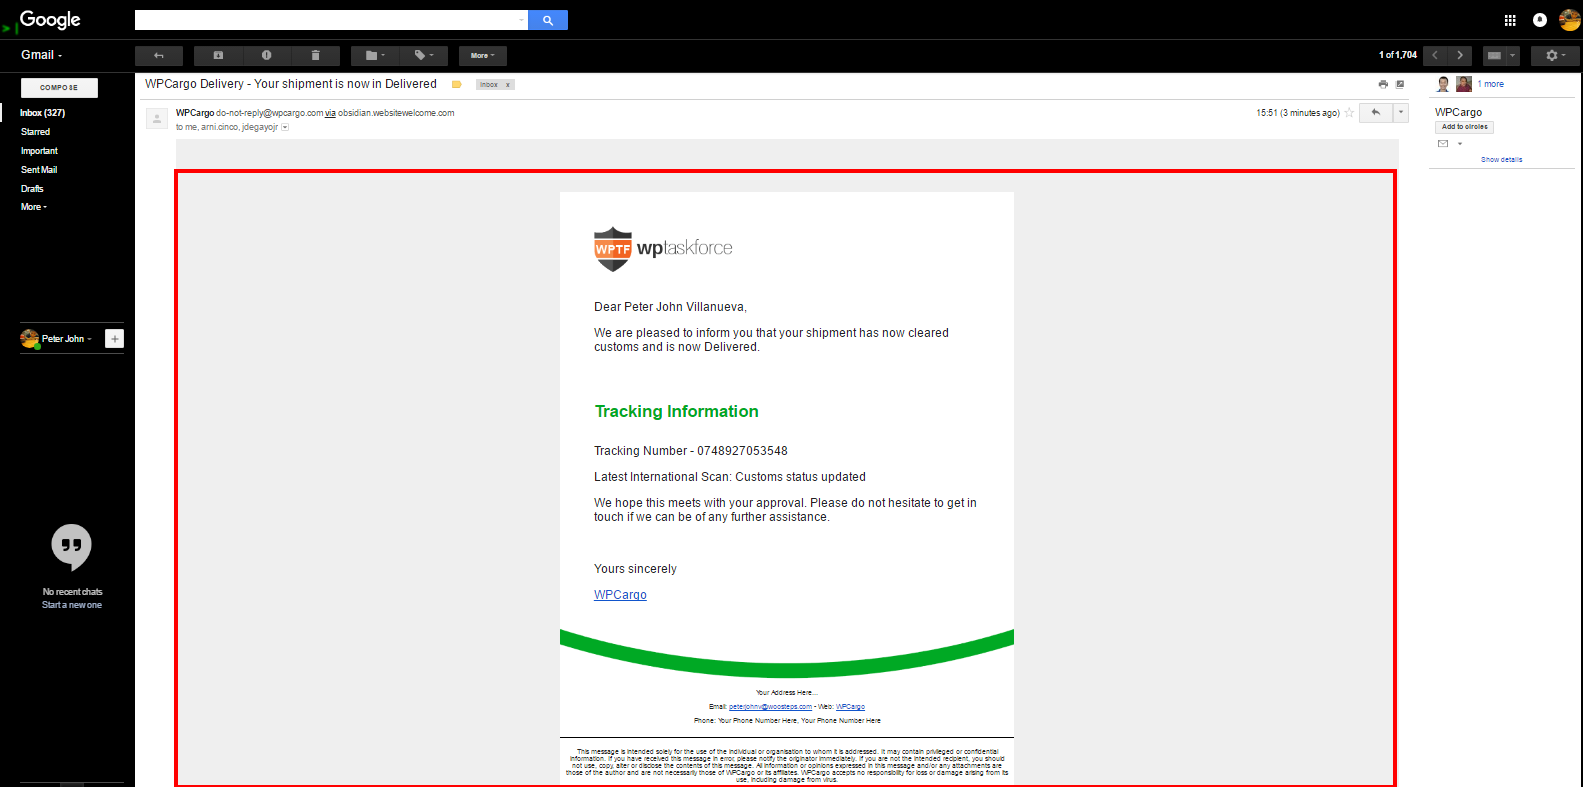
 [/vc_column_text][dt_fancy_title title=”WPCargo Proof of Delivery Add-ons ” title_size=”h2″ title_color=”custom” custom_title_color=”#000000″][vc_column_text css=”.vc_custom_1513240359311{margin-top: 20px !important;}”][wpc_driver_accounts] – List of shipment assigned to a driver
 [/vc_column_text][dt_fancy_title title=”WPCargo Client Account Add-ons ” title_size=”h2″ title_color=”custom” custom_title_color=”#000000″][vc_column_text css=”.vc_custom_1513240409025{margin-top: 20px !important;}”] – List of shipment created or booked by customers
 [/vc_column_text][dt_fancy_title title=” WPCargo Parcel Quotation Add-ons” title_size=”h2″ title_color=”custom” custom_title_color=”#000000″][vc_column_text css=”.vc_custom_1519053983383{margin-top: 20px !important;}”][wpc-pq-dashboard orderpageid=”ID of Order page” viewpageid=”ID of View Page” updatepageid=”ID of Update Page”] –
  [/vc_column_text][dt_fancy_title title=”WPCargo Address Book Add-ons” title_size=”h2″ title_color=”custom” custom_title_color=”#000000″][vc_column_text css=”.vc_custom_1513240474763{margin-top: 20px !important;}”][wpc-pq-book-address] – To create and list of shipper book address and receiver book address.
 [/vc_column_text][dt_fancy_title title=”WPCargo Shipment Container Add-ons” title_size=”h2″ title_color=”custom” custom_title_color=”#000000″][vc_column_text css=”.vc_custom_1513240388504{margin-top: 20px !important;}”][wpcargo-container-track-form pageredirect=”page_id”] – To locate or track the container no. and view where “pageredirect” parameter will redirect to page where the “[wpcargo-container-track-result]” is added.
 [/vc_column_text][vc_raw_html]JTNDc2NyaXB0JTIwYXN5bmMlMjBzcmMlM0QlMjIlMkYlMkZwYWdlYWQyLmdvb2dsZXN5bmRpY2F0aW9uLmNvbSUyRnBhZ2VhZCUyRmpzJTJGYWRzYnlnb29nbGUuanMlMjIlM0UlM0MlMkZzY3JpcHQlM0UlMEElM0NpbnMlMjBjbGFzcyUzRCUyMmFkc2J5Z29vZ2xlJTIyJTBBJTIwJTIwJTIwJTIwJTIwc3R5bGUlM0QlMjJkaXNwbGF5JTNBYmxvY2slM0IlMjB0ZXh0LWFsaWduJTNBY2VudGVyJTNCJTIyJTBBJTIwJTIwJTIwJTIwJTIwZGF0YS1hZC1sYXlvdXQlM0QlMjJpbi1hcnRpY2xlJTIyJTBBJTIwJTIwJTIwJTIwJTIwZGF0YS1hZC1mb3JtYXQlM0QlMjJmbHVpZCUyMiUwQSUyMCUyMCUyMCUyMCUyMGRhdGEtYWQtY2xpZW50JTNEJTIyY2EtcHViLTA1MDY1Mzg0MjY0NTY4NzclMjIlMEElMjAlMjAlMjAlMjAlMjBkYXRhLWFkLXNsb3QlM0QlMjIxNjk0OTc1MjIyJTIyJTNFJTNDJTJGaW5zJTNFJTBBJTNDc2NyaXB0JTNFJTBBJTIwJTIwJTIwJTIwJTIwJTI4YWRzYnlnb29nbGUlMjAlM0QlMjB3aW5kb3cuYWRzYnlnb29nbGUlMjAlN0MlN0MlMjAlNUIlNUQlMjkucHVzaCUyOCU3QiU3RCUyOSUzQiUwQSUzQyUyRnNjcmlwdCUzRQ==[/vc_raw_html][/vc_column][/vc_row]
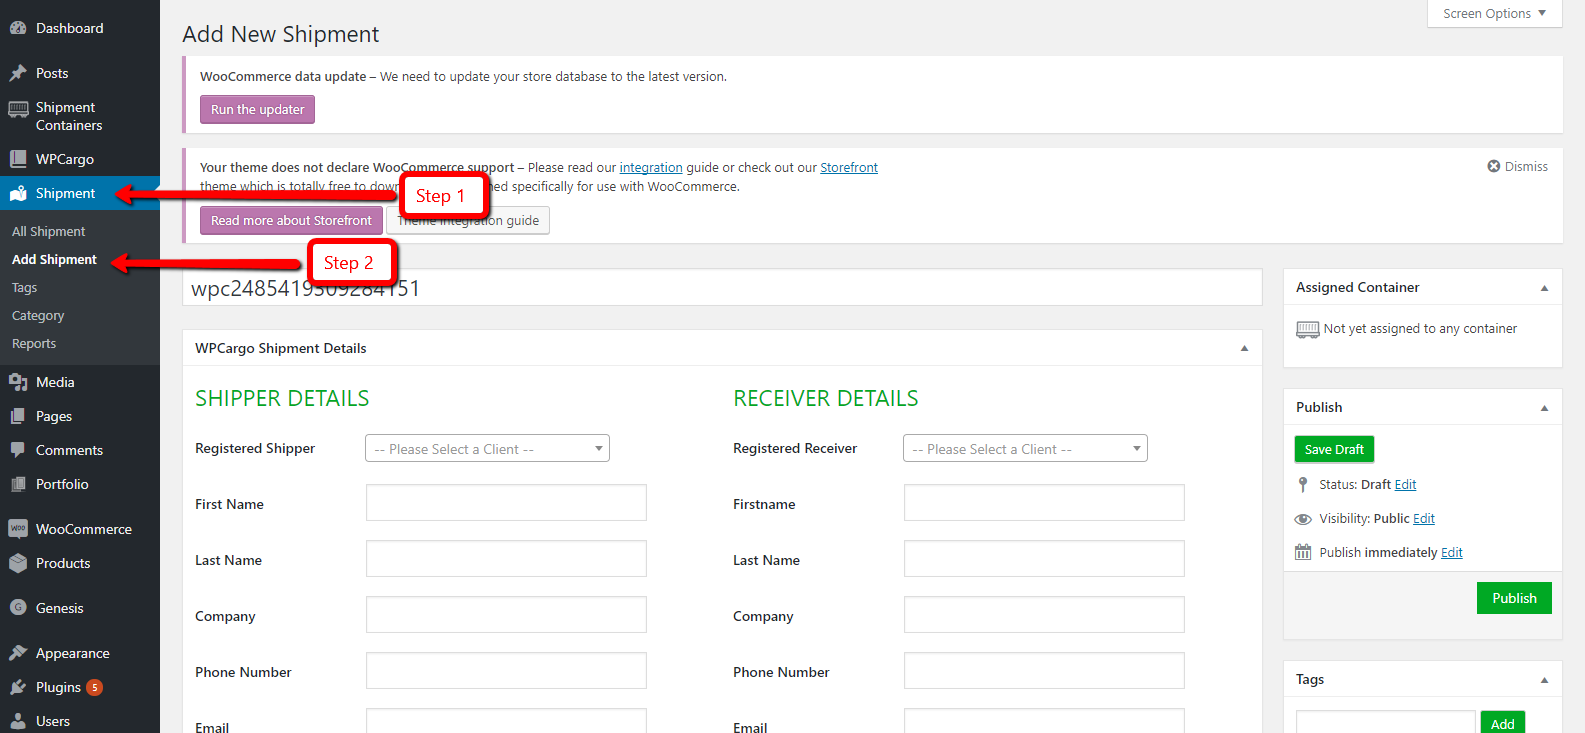
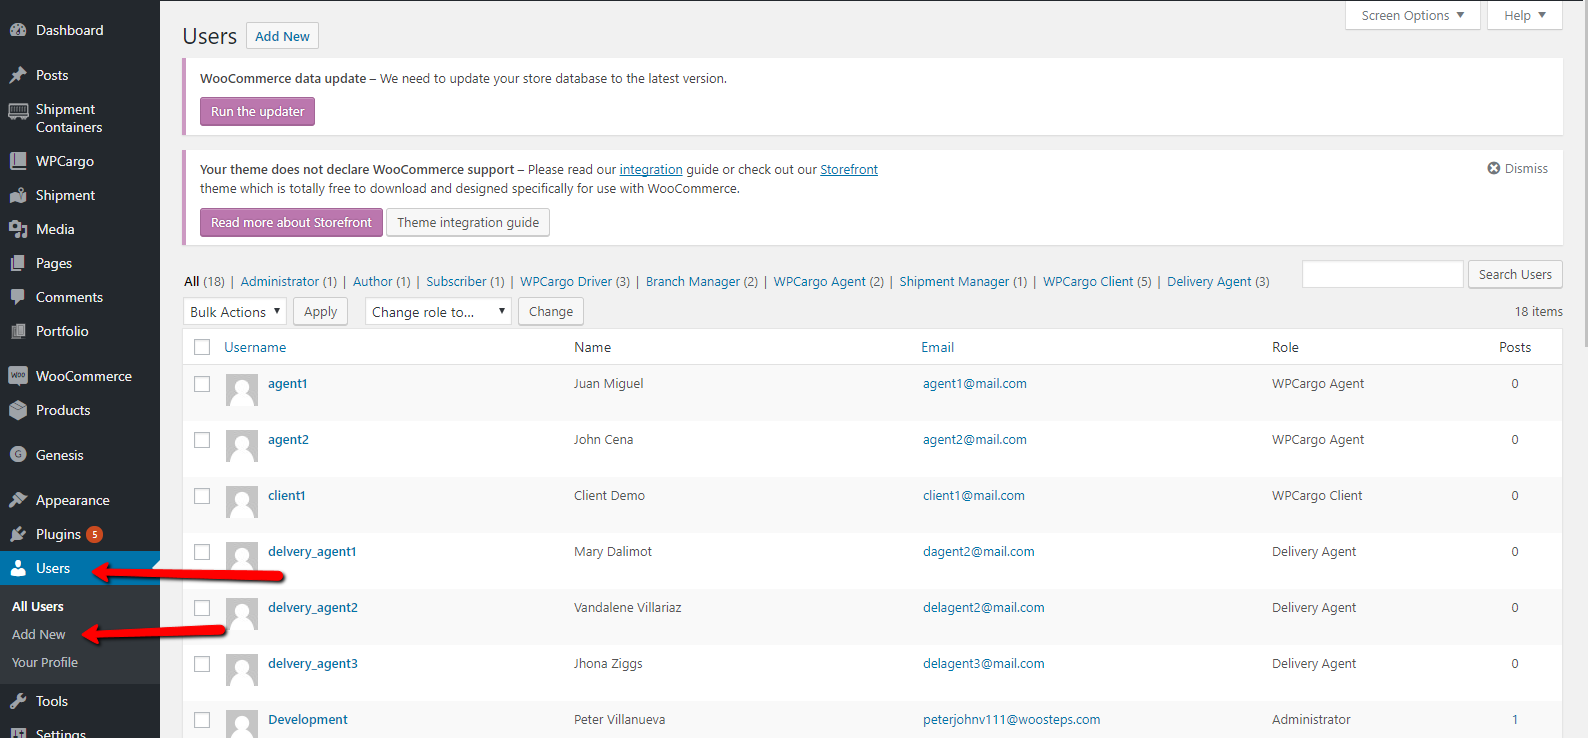
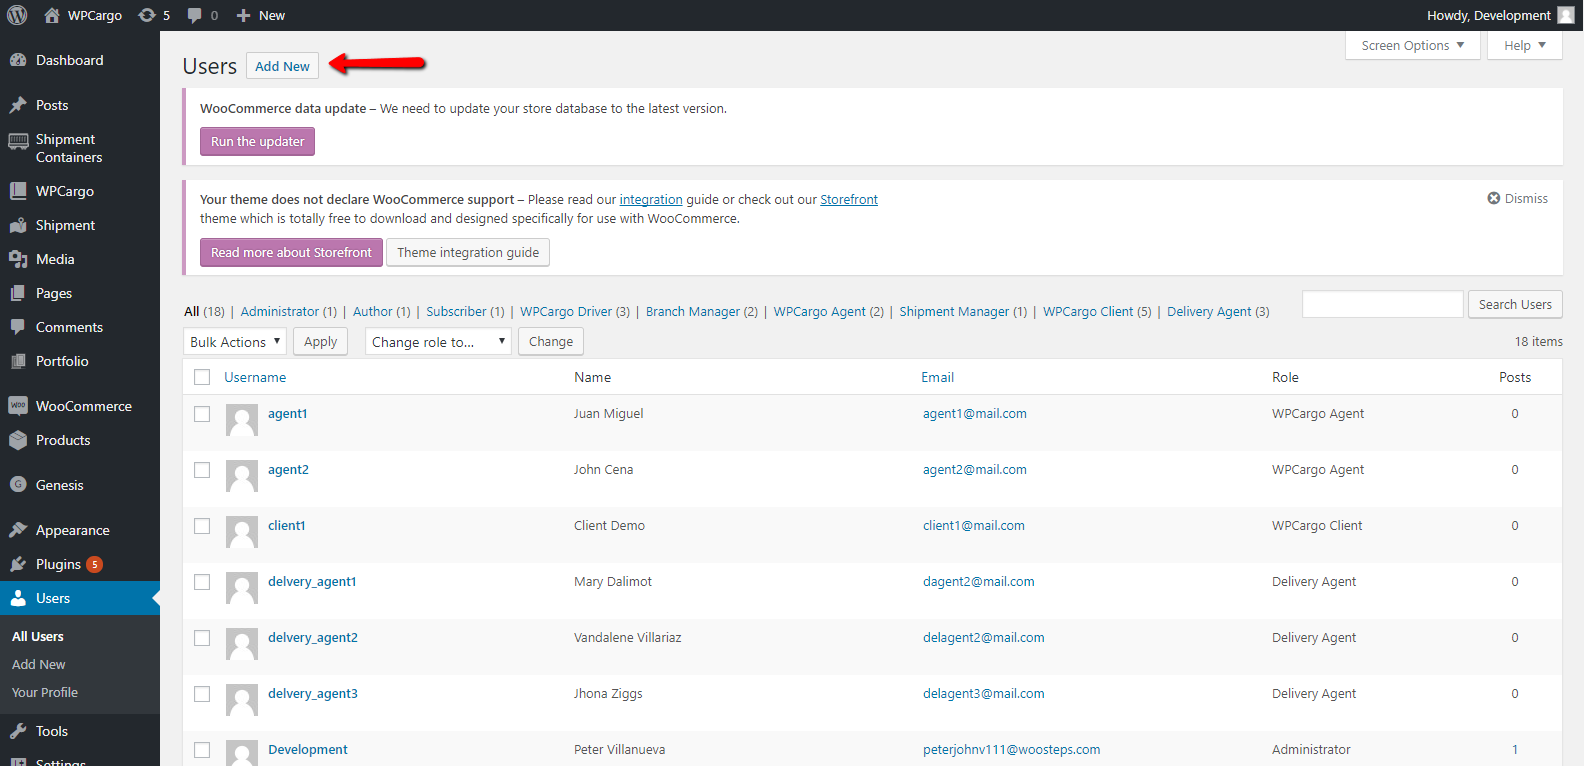



 [/vc_column_text][vc_raw_html]JTNDc2NyaXB0JTIwYXN5bmMlMjBzcmMlM0QlMjIlMkYlMkZwYWdlYWQyLmdvb2dsZXN5bmRpY2F0aW9uLmNvbSUyRnBhZ2VhZCUyRmpzJTJGYWRzYnlnb29nbGUuanMlMjIlM0UlM0MlMkZzY3JpcHQlM0UlMEElM0NpbnMlMjBjbGFzcyUzRCUyMmFkc2J5Z29vZ2xlJTIyJTBBJTIwJTIwJTIwJTIwJTIwc3R5bGUlM0QlMjJkaXNwbGF5JTNBYmxvY2slM0IlMjB0ZXh0LWFsaWduJTNBY2VudGVyJTNCJTIyJTBBJTIwJTIwJTIwJTIwJTIwZGF0YS1hZC1sYXlvdXQlM0QlMjJpbi1hcnRpY2xlJTIyJTBBJTIwJTIwJTIwJTIwJTIwZGF0YS1hZC1mb3JtYXQlM0QlMjJmbHVpZCUyMiUwQSUyMCUyMCUyMCUyMCUyMGRhdGEtYWQtY2xpZW50JTNEJTIyY2EtcHViLTA1MDY1Mzg0MjY0NTY4NzclMjIlMEElMjAlMjAlMjAlMjAlMjBkYXRhLWFkLXNsb3QlM0QlMjIxNjk0OTc1MjIyJTIyJTNFJTNDJTJGaW5zJTNFJTBBJTNDc2NyaXB0JTNFJTBBJTIwJTIwJTIwJTIwJTIwJTI4YWRzYnlnb29nbGUlMjAlM0QlMjB3aW5kb3cuYWRzYnlnb29nbGUlMjAlN0MlN0MlMjAlNUIlNUQlMjkucHVzaCUyOCU3QiU3RCUyOSUzQiUwQSUzQyUyRnNjcmlwdCUzRQ==[/vc_raw_html][/vc_column][/vc_row][vc_row][vc_column][/vc_column][/vc_row]