[vc_row][vc_column width=”1/4″][vc_widget_sidebar sidebar_id=”sidebar_3″][/vc_column][vc_column width=”3/4″][vc_column_text]Allows you to manage the orders of the client and also for the client to purchase/order online. Note: This needs WPCago and WPCargo Custom Field Add-ons plugin Installed.[/vc_column_text][dt_fancy_title title=”How to Install WPCargo Pick-up Management Add-ons Plugin” title_size=”h4″ title_color=”custom” separator_style=”double” custom_title_color=”#333333″][vc_column_text css=”.vc_custom_1471246622863{margin-top: 35px !important;margin-bottom: 35px !important;}”]
Cpanel Installation.
- Purchase the plugin in WPCargo.com
- Upload wpcargo-pick-up-management-addons.zip to the /wp-content/plugins/ directory or go to the wordpress site admin plugins page and upload the zip file
- Extract the plugin zip file
- Go to the site admin plugins page
- Activate the plugin
WordPress Admin Installation
- Purchase the plugin in WPCargo.com
- Go to the admin plugin > Add new
- Upload plugin wpcargo-pick-up-management-addons.zip file
- Activate the plugin in the plugin list
[/vc_column_text][dt_fancy_title title=”How to Activate WPCargo Pick-up Management Add-ons License” title_size=”h4″ title_color=”custom” separator_style=”double” custom_title_color=”#333333″][vc_column_text css=”.vc_custom_1471246873632{margin-top: 35px !important;margin-bottom: 35px !important;}”]
- Go to the Site admin dashboard
- Visit WPcargo > WPTaskforce
- Add the license in the “License Key” column
- Tick the “Activate” button to activate
[/vc_column_text][vc_single_image image=”1975″ img_size=”large” alignment=”center” style=”vc_box_rounded” onclick=”link_image” lazy_loading=”true”][dt_fancy_title title=”How to use WPCargo Pick-up Management Add-ons” title_align=”left” title_size=”h4″ title_color=”custom” separator_style=”double” custom_title_color=”#333333″][vc_column_text css=”.vc_custom_1471249633246{margin-top: 35px !important;margin-bottom: 35px !important;}”]Before using the WPCargo Pick-up management add-ons, you need to create custom fields for your pick-up management fields.[/vc_column_text][dt_fancy_title title=”How to Create Custom Field for Pick-up Management” title_size=”h4″ title_color=”custom” custom_title_color=”#333333″][vc_column_text css=”.vc_custom_1471249121955{margin-top: 35px !important;margin-bottom: 35px !important;}”]Note: This needs WPCargo Custom Field add-ons to be activated.
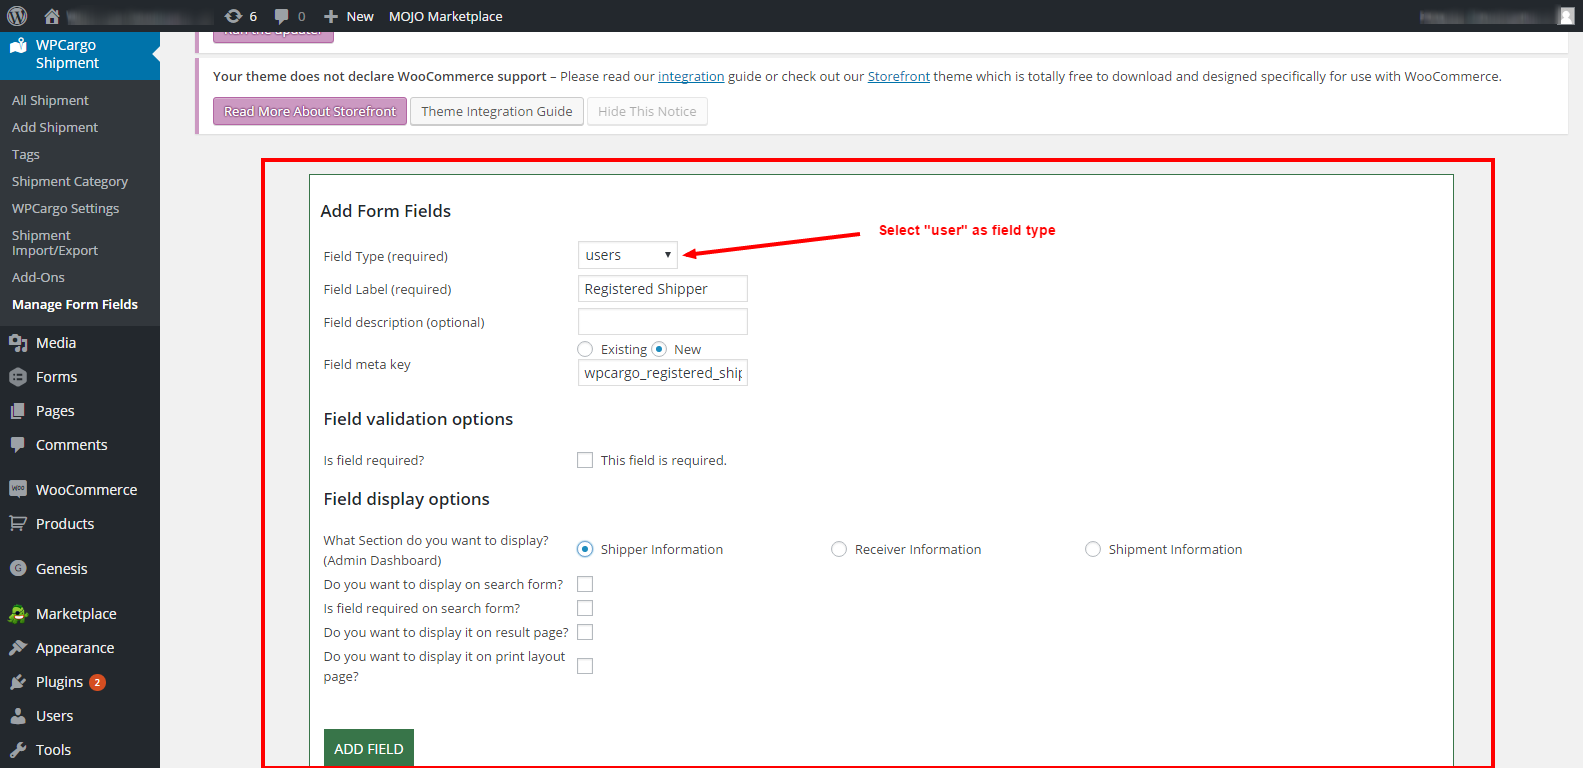
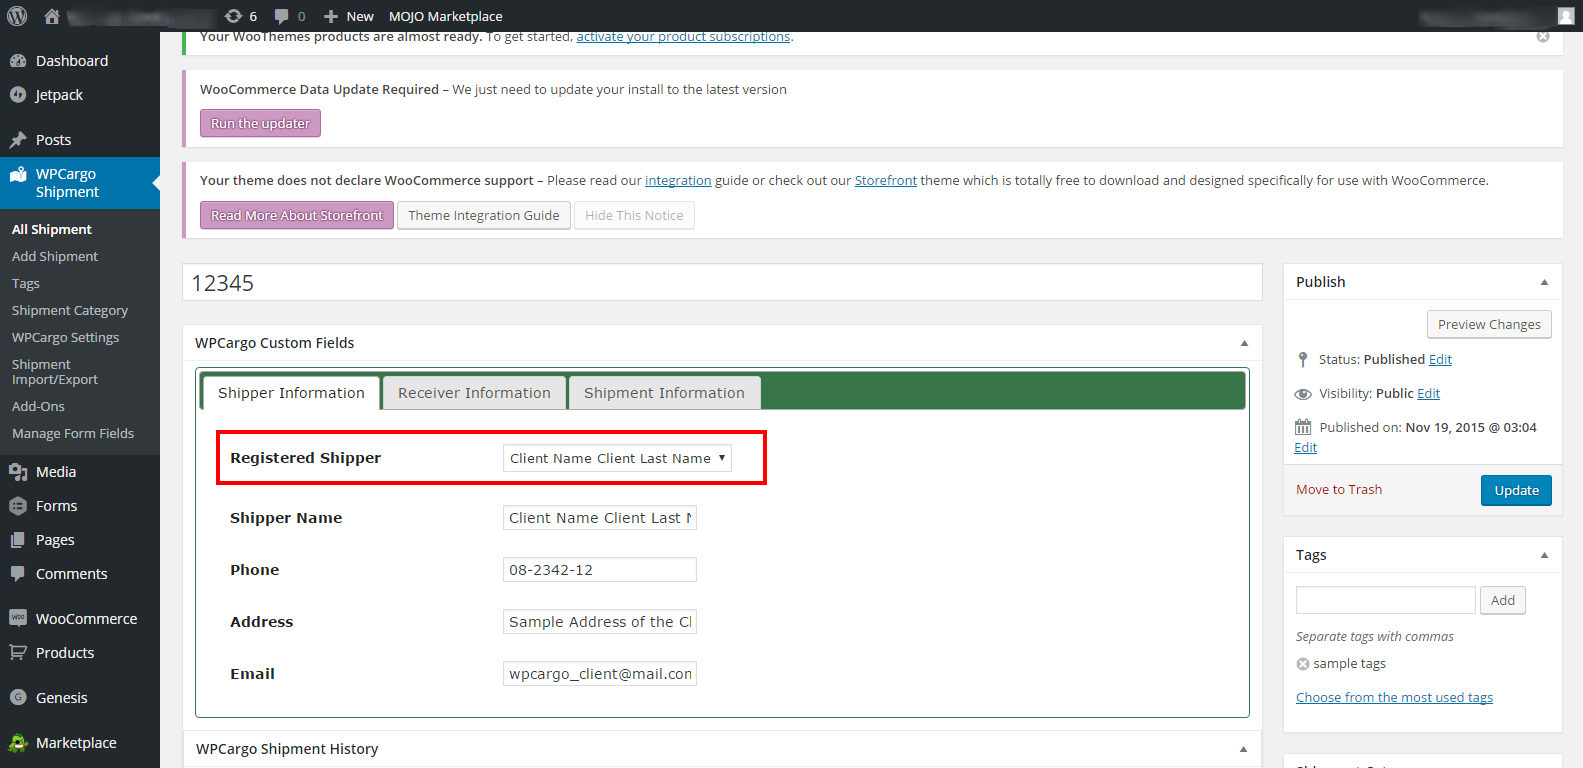
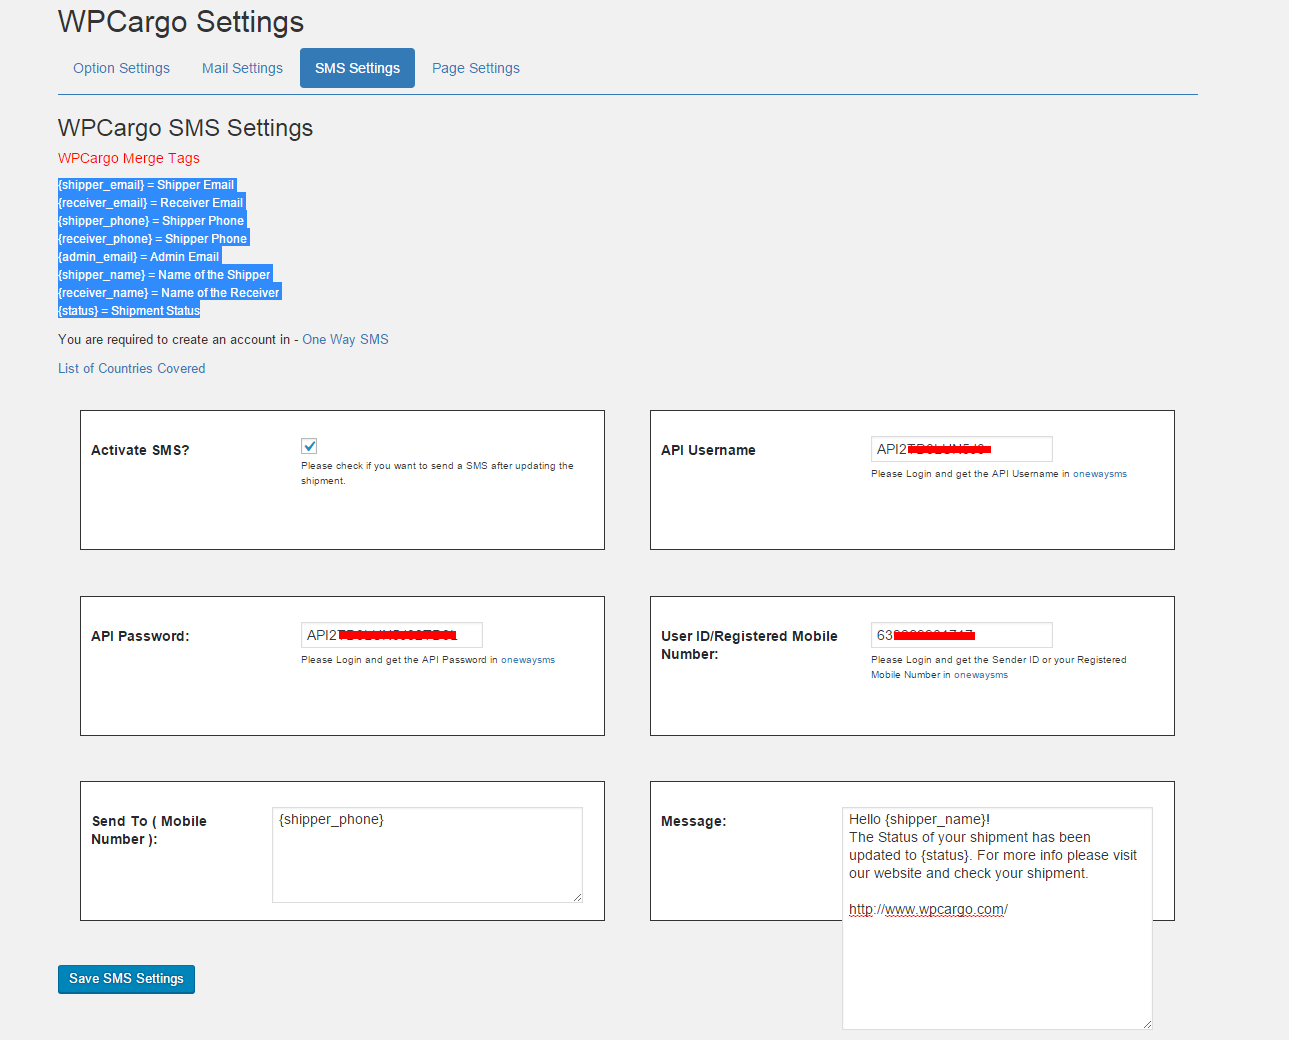
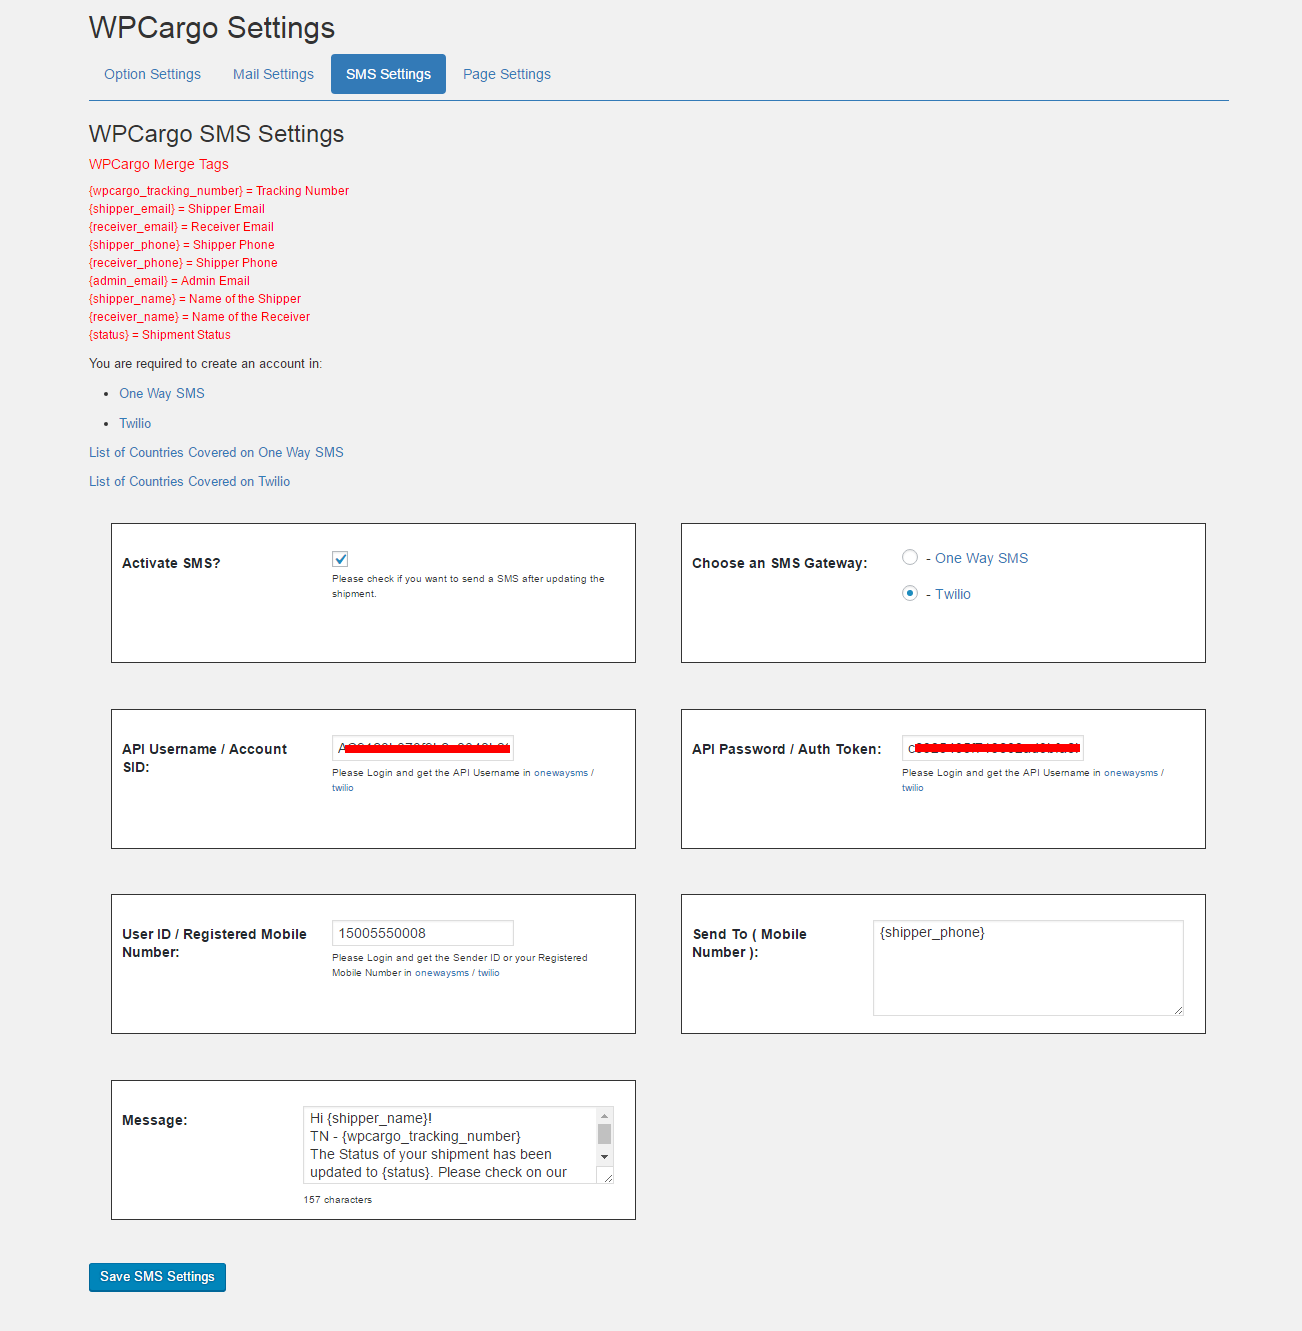
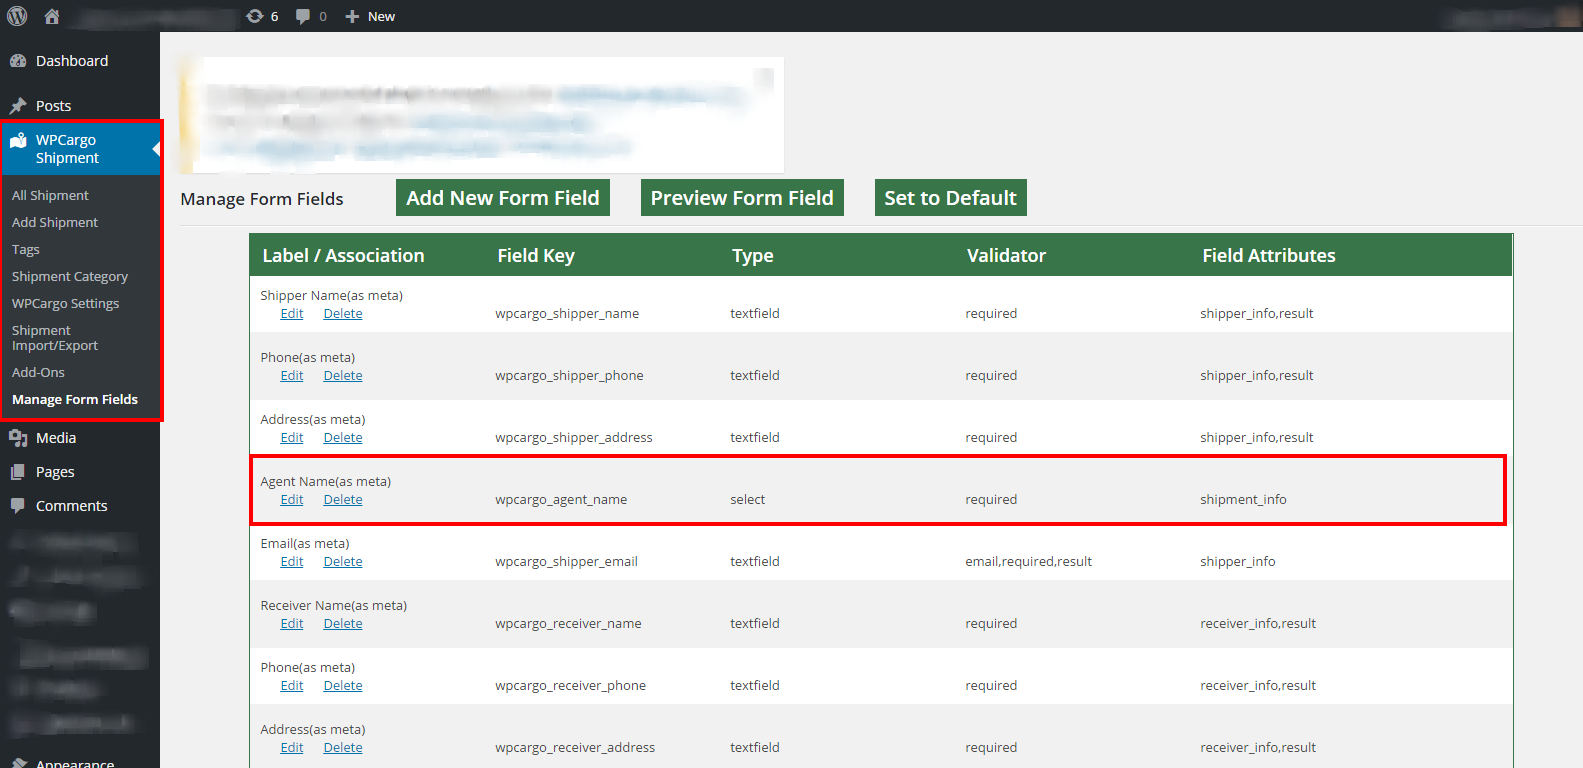
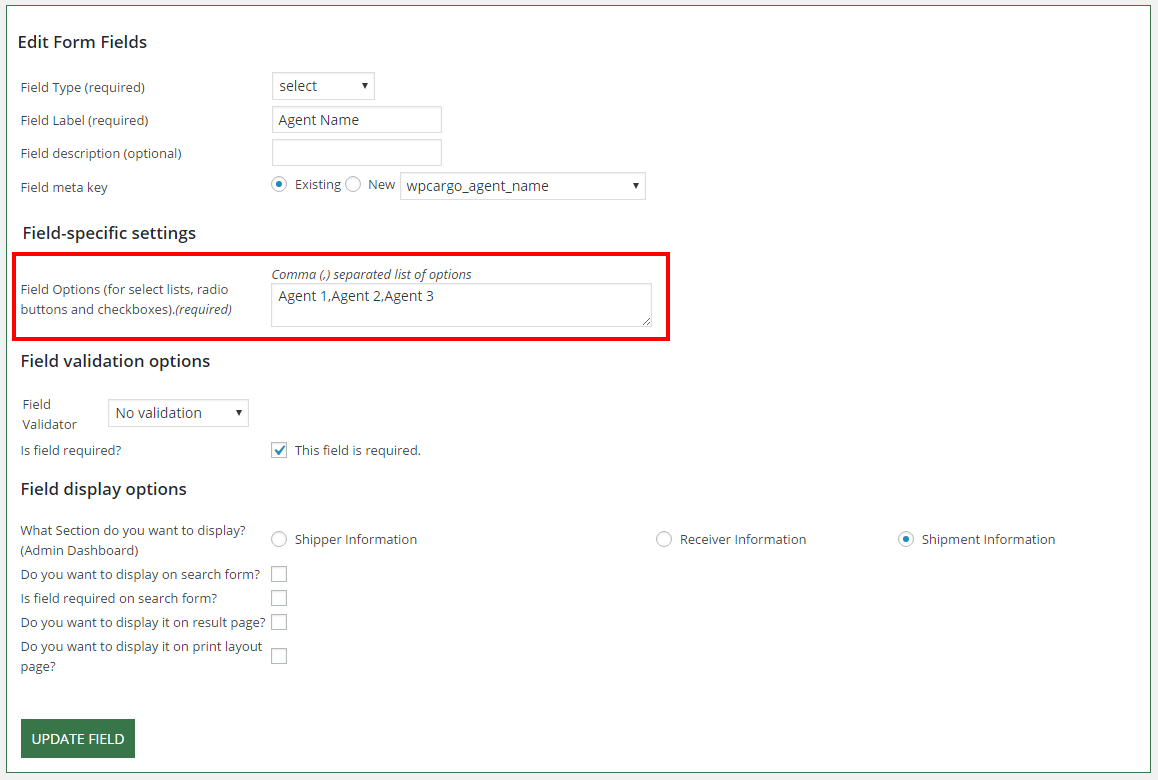
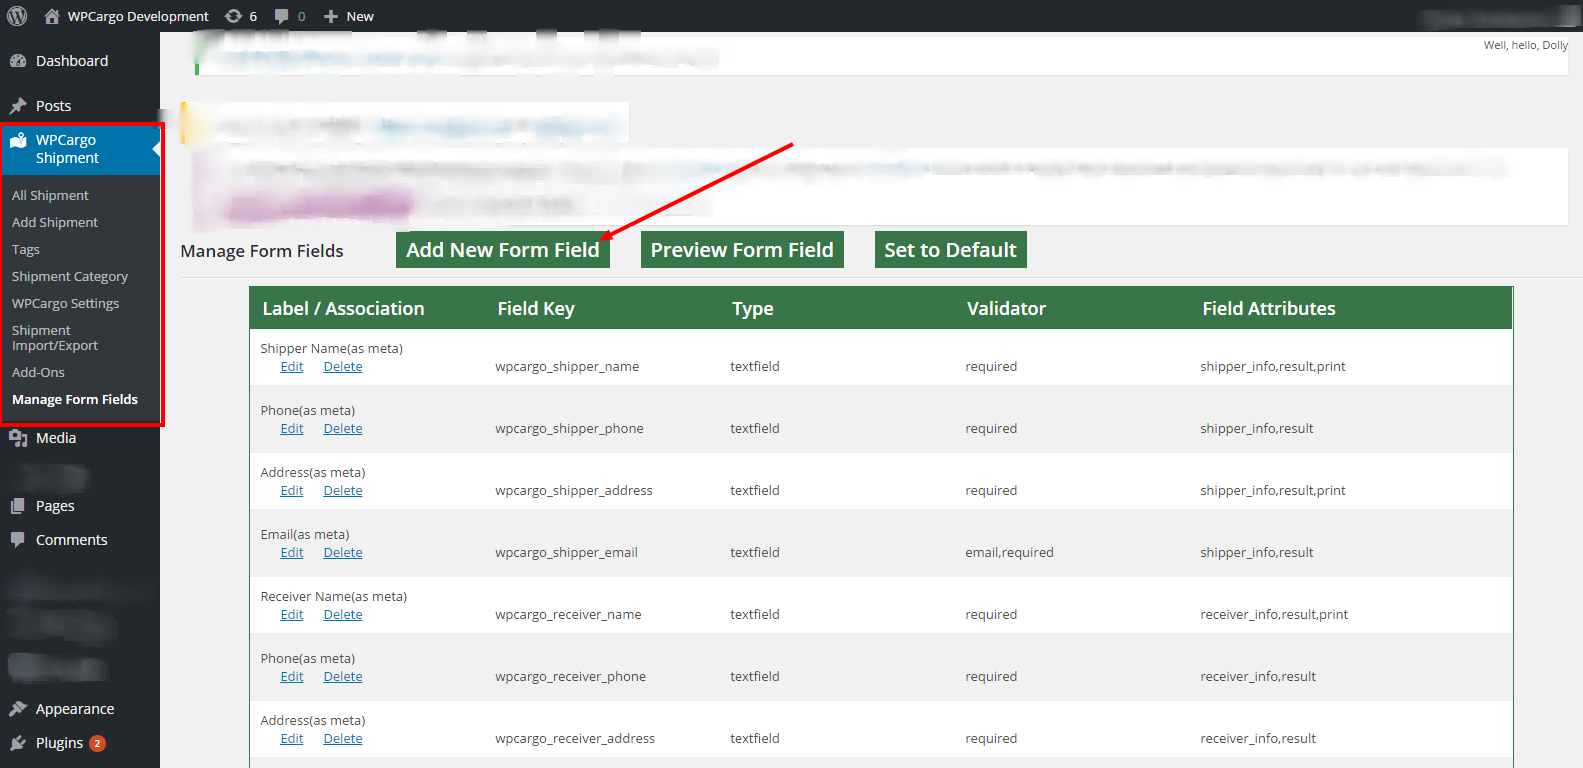
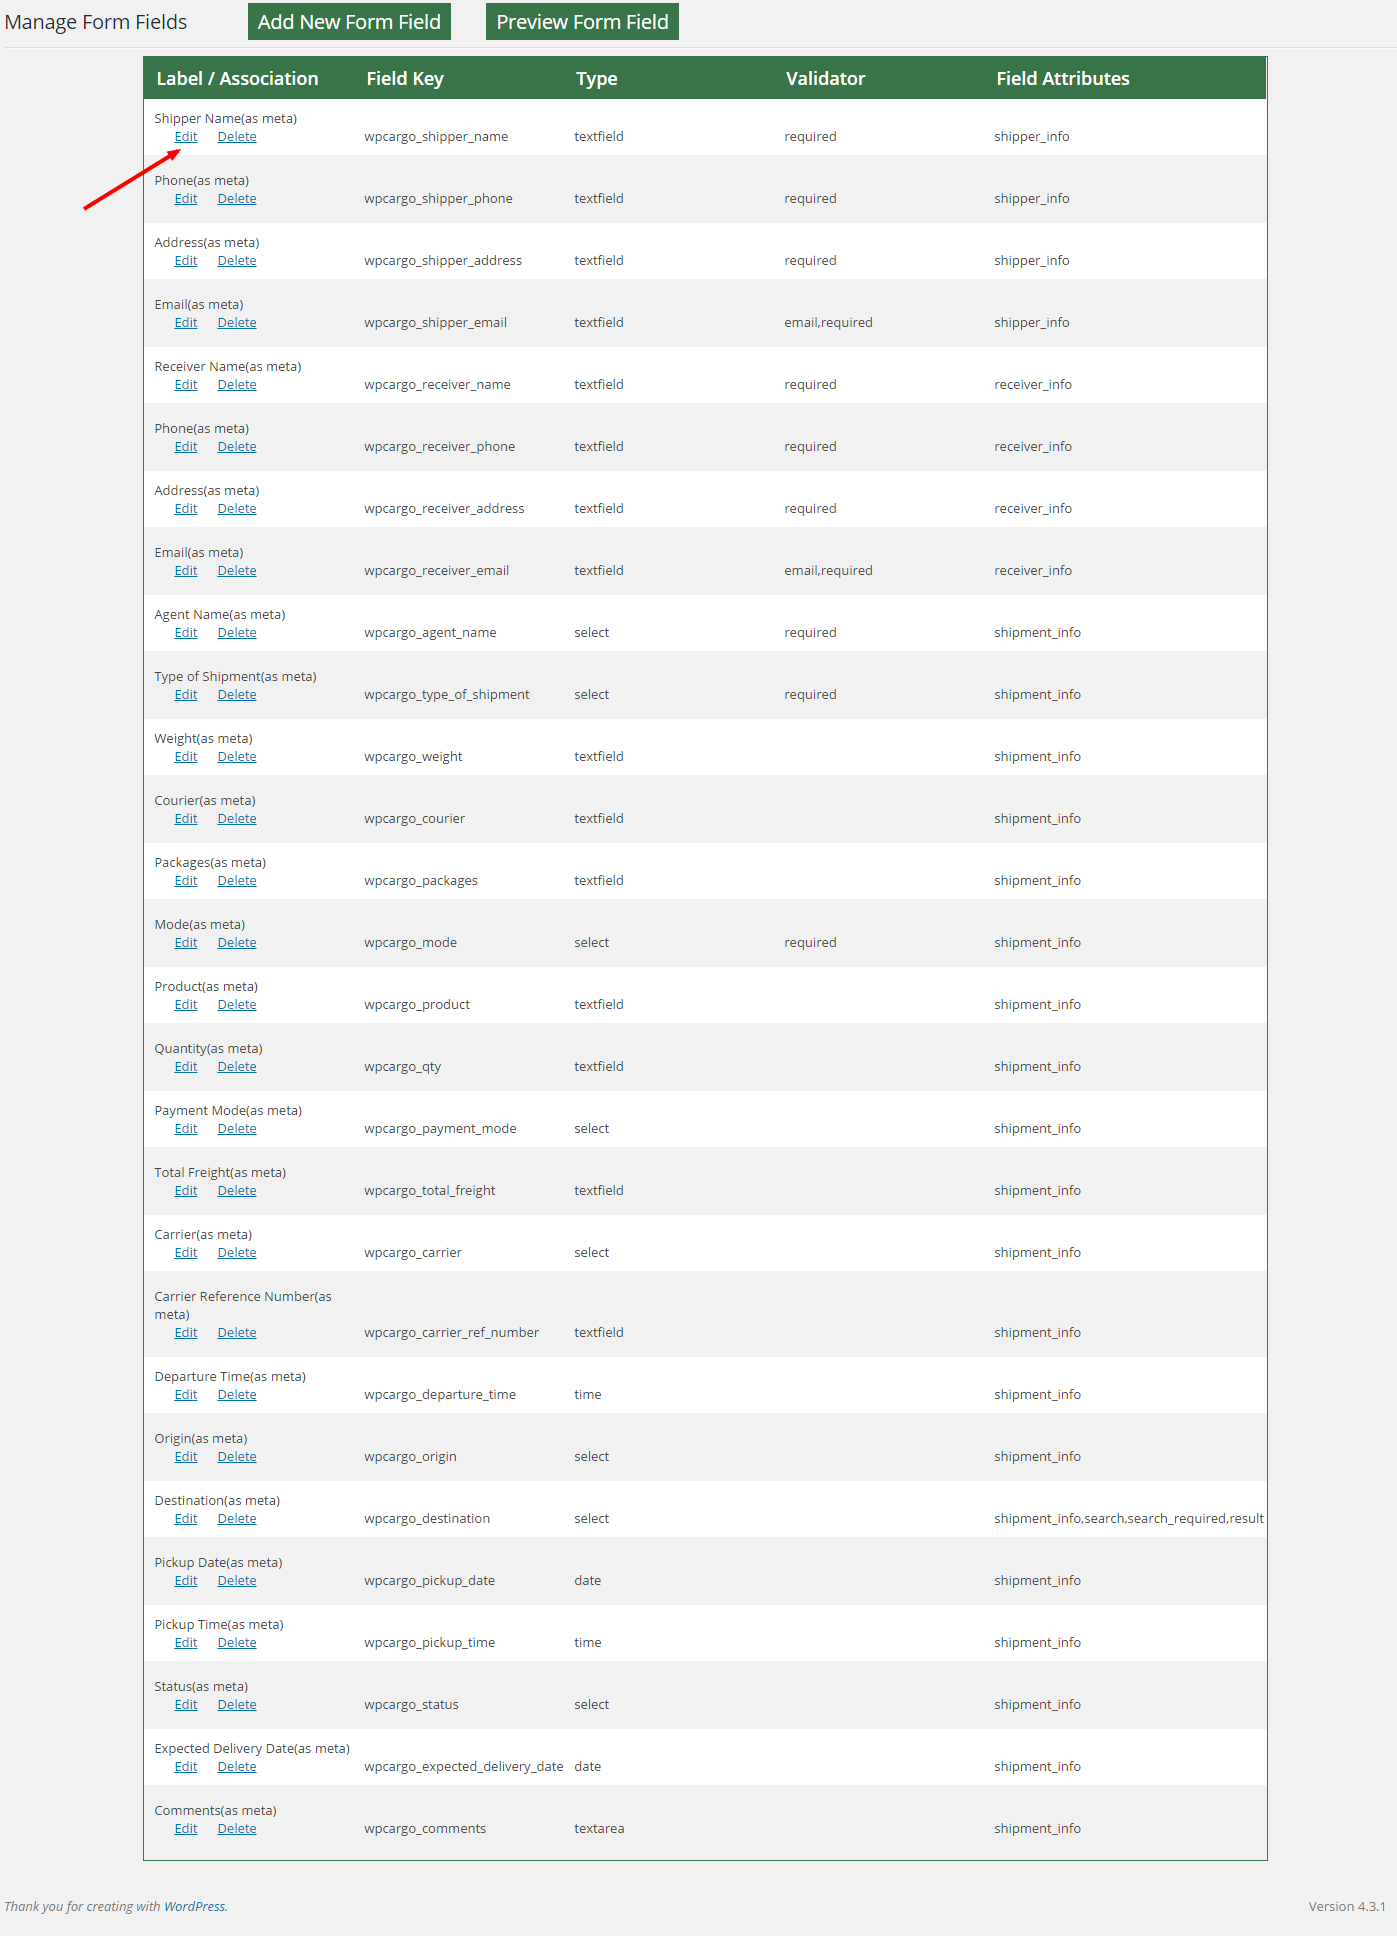
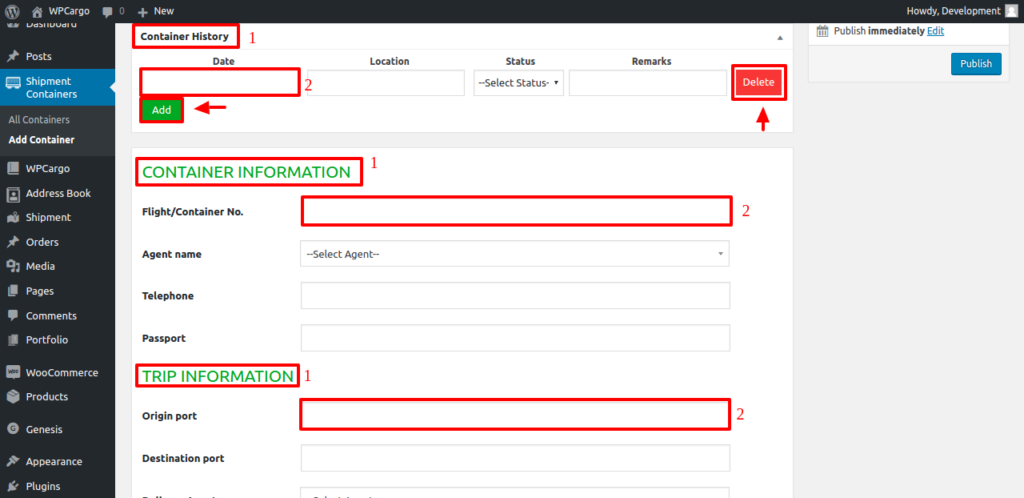
- Go to the Admin menu WPCargo > Manage Form Fields (See figure 2.1)
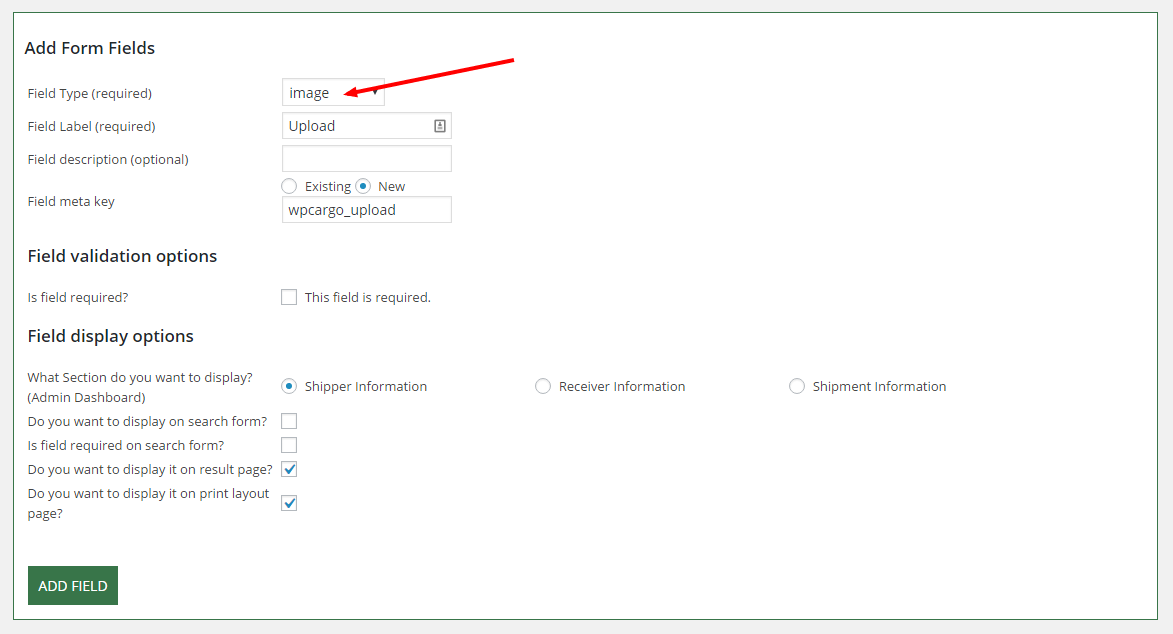
- Click “Add form field” tab to add New Form Field
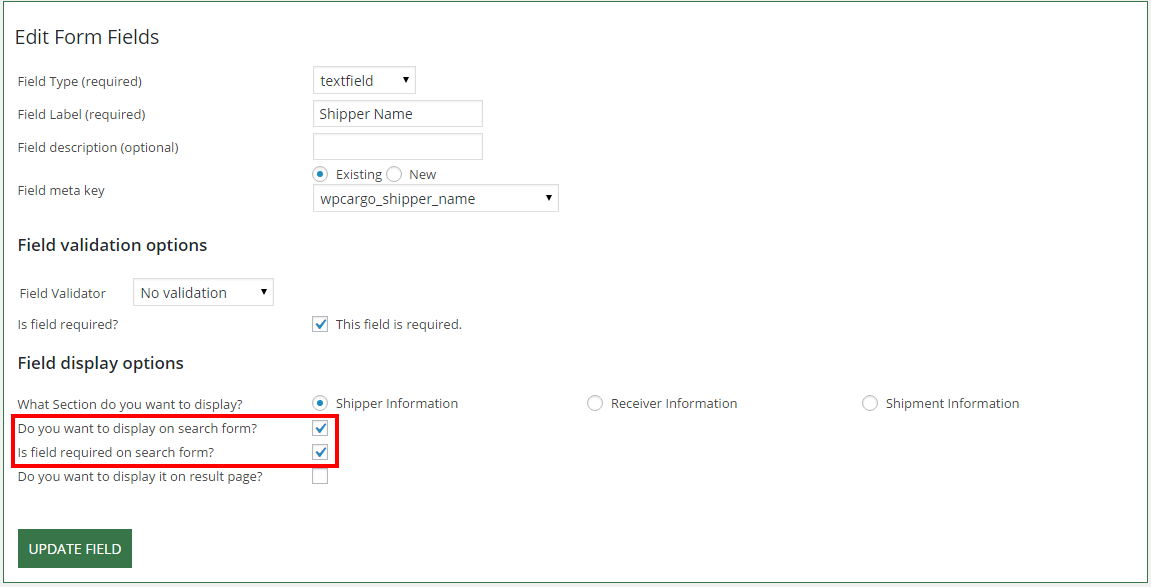
- Fill-up all the fields requirement for the form field. (See figure 2.2)
- Field Type – Type of input field.
- Field Label – Label on the input field.
- Field Description – Description of the input field.
- Field Options for select lists, radio buttons and checkboxes – This are the option of the input field (Note: This will be fillable when the selected Field Type is select, multiselect, radio, checkbox, Each selection must be sepated with comma (,) ).
- Field meta key – Name of the input field and this will be the name of the post meta key
- Is Field required? – Add “required” attribute to the input field.
- What Section do you want to display? – Assign the input field which section to be added
- Do you want to display on search form? – Select if you want the field to be added in the “Track Form”
- Is field required on search form? – Add “required” attribute to the form field in the “Track Form”
- Do you want to display it on result page? – Select if you want the field to be display in the “Track Form” result
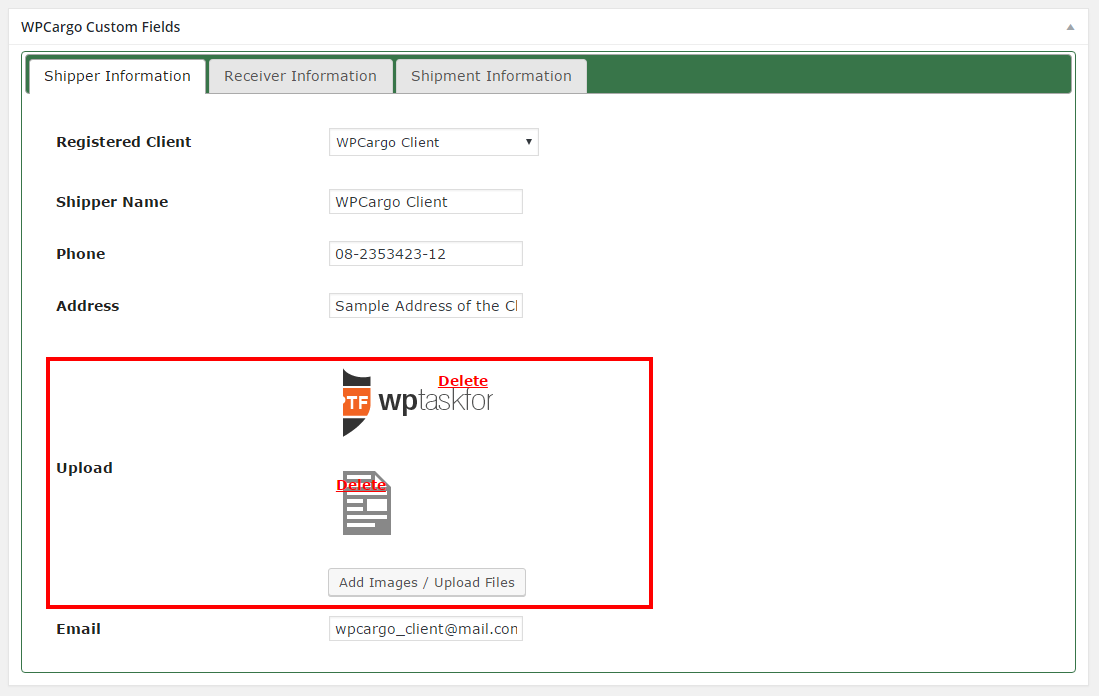
- Do you want to display it on pick-up management page? – Select if the form field want to add in the “Pick-up Management” form field.
- Click “Add Field”
[/vc_column_text][vc_row_inner][vc_column_inner width=”1/2″][vc_single_image image=”1978″ img_size=”full” add_caption=”yes” alignment=”center” style=”vc_box_rounded” onclick=”link_image” title=”Figure 2.1″ lazy_loading=”true”][/vc_column_inner][vc_column_inner width=”1/2″][vc_single_image image=”1979″ img_size=”full” add_caption=”yes” alignment=”center” style=”vc_box_rounded” onclick=”link_image” title=”Figure 2.2″ lazy_loading=”true”][/vc_column_inner][/vc_row_inner][vc_column_text css=”.vc_custom_1471248170668{margin-top: 35px !important;margin-bottom: 35px !important;}”]How to “Edit” the create form Field
- Go to the Admin menu WPCargo > Manage Form Fields
- Click “Add form field” tab to add Form Field List
- Hover on the Field label and click the “Edit” hyper link
- Edit the Field form that you want to edit
- Click the “Edit Field” button to save the changes
How to “Delete” the create form field
- Go to the Admin menu WPCargo > Manage Form Fields
- Click “Add form field” tab to add Form Field List
- Hover on the Field label and click the “Delete” hyper link
[/vc_column_text][dt_fancy_title title=”How to use plugin Shortcode” title_size=”h4″ title_color=”custom” custom_title_color=”#333333″][vc_column_text css=”.vc_custom_1471248306389{margin-top: 35px !important;margin-bottom: 35px !important;}”]
- Create a new page for your Pick-up Management Page
- Add [wpcargo-pick-up-management] shortcode for the content.
[/vc_column_text][dt_fancy_title title=”How to Set-up Plugin Parcel” title_size=”h4″ title_color=”custom” custom_title_color=”#333333″][vc_column_text css=”.vc_custom_1471248406908{margin-top: 35px !important;margin-bottom: 35px !important;}”]
- Go to the Admin menu Parcels > Add New
- Fill-up all the fields for the parcel information
- Click Publish to save parcel
[/vc_column_text][dt_fancy_title title=”How to Set-up Parcel Price Currency and Title Prefix” title_size=”h4″ title_color=”custom” separator_style=”double” custom_title_color=”#333333″][vc_column_text css=”.vc_custom_1471249150354{margin-top: 35px !important;margin-bottom: 35px !important;}”]
- Go to the Admin menu > Parcel > Pick-up Management Settings
- Fill-up all field based on you requirement (See Figure 3.1)
- Currency – Select currency symbol for the Parcel amount
- WPCargo Title Prefix – Title prefix for the Pick-up Management Form submission
- Click “Save Settings” button to save
[/vc_column_text][vc_single_image image=”1981″ img_size=”full” add_caption=”yes” alignment=”center” onclick=”link_image” title=”Figure 3.1″ lazy_loading=”true”][dt_fancy_title title=”How to View Pick-up Management Information” title_size=”h4″ title_color=”custom” separator_style=”double” custom_title_color=”#333333″][vc_column_text css=”.vc_custom_1471249164168{margin-top: 35px !important;margin-bottom: 35px !important;}”]
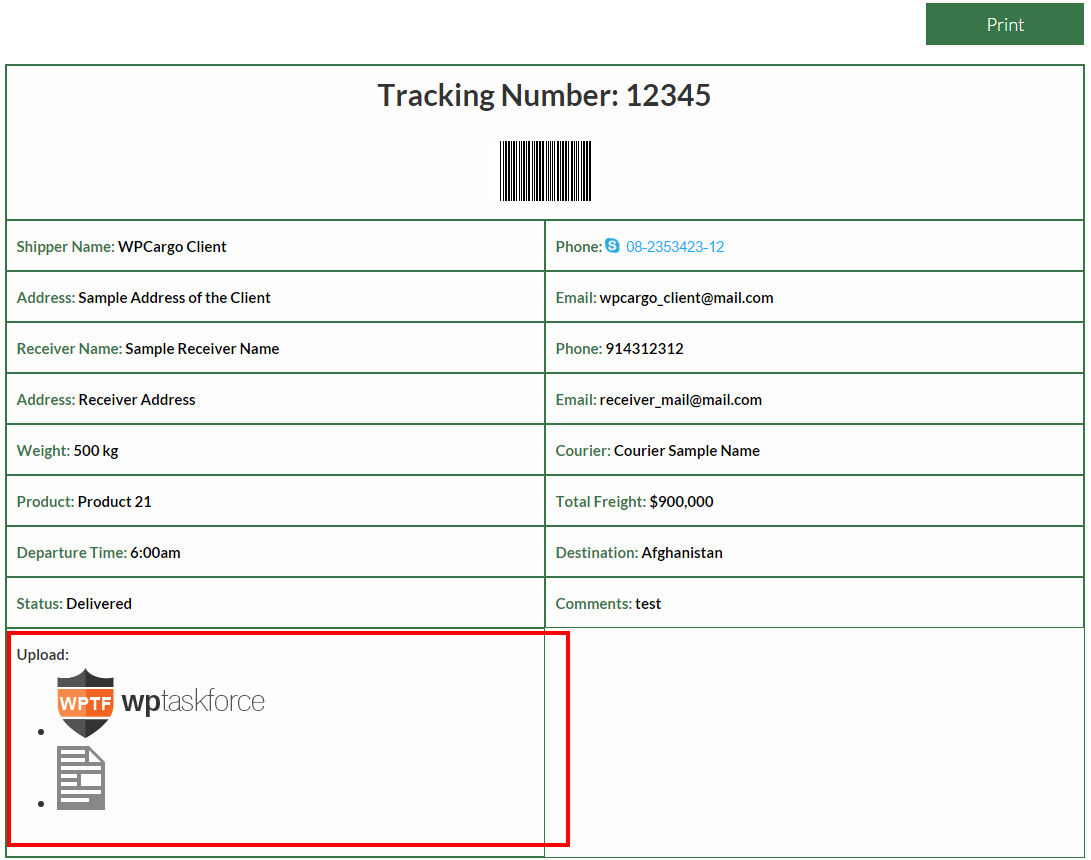
- Go to the Admin menu > Parcel > Parcel Orders
- Click the “Parcel order” you want to view (See Figure 4.1)
- Click the “Print Receipt” at the left side of the page to print the parcel order Information
[/vc_column_text][vc_single_image image=”1983″ img_size=”full” add_caption=”yes” alignment=”center” style=”vc_box_rounded” onclick=”link_image” title=”Figure 4.1″ lazy_loading=”true”][/vc_column][/vc_row]


 [/vc_column_text][vc_raw_html]JTNDc2NyaXB0JTIwYXN5bmMlMjBzcmMlM0QlMjIlMkYlMkZwYWdlYWQyLmdvb2dsZXN5bmRpY2F0aW9uLmNvbSUyRnBhZ2VhZCUyRmpzJTJGYWRzYnlnb29nbGUuanMlMjIlM0UlM0MlMkZzY3JpcHQlM0UlMEElM0NpbnMlMjBjbGFzcyUzRCUyMmFkc2J5Z29vZ2xlJTIyJTBBJTIwJTIwJTIwJTIwJTIwc3R5bGUlM0QlMjJkaXNwbGF5JTNBYmxvY2slM0IlMjB0ZXh0LWFsaWduJTNBY2VudGVyJTNCJTIyJTBBJTIwJTIwJTIwJTIwJTIwZGF0YS1hZC1sYXlvdXQlM0QlMjJpbi1hcnRpY2xlJTIyJTBBJTIwJTIwJTIwJTIwJTIwZGF0YS1hZC1mb3JtYXQlM0QlMjJmbHVpZCUyMiUwQSUyMCUyMCUyMCUyMCUyMGRhdGEtYWQtY2xpZW50JTNEJTIyY2EtcHViLTA1MDY1Mzg0MjY0NTY4NzclMjIlMEElMjAlMjAlMjAlMjAlMjBkYXRhLWFkLXNsb3QlM0QlMjIxNjk0OTc1MjIyJTIyJTNFJTNDJTJGaW5zJTNFJTBBJTNDc2NyaXB0JTNFJTBBJTIwJTIwJTIwJTIwJTIwJTI4YWRzYnlnb29nbGUlMjAlM0QlMjB3aW5kb3cuYWRzYnlnb29nbGUlMjAlN0MlN0MlMjAlNUIlNUQlMjkucHVzaCUyOCU3QiU3RCUyOSUzQiUwQSUzQyUyRnNjcmlwdCUzRQ==[/vc_raw_html][/vc_column][/vc_row]
 d. Fill out the Form for Time Information
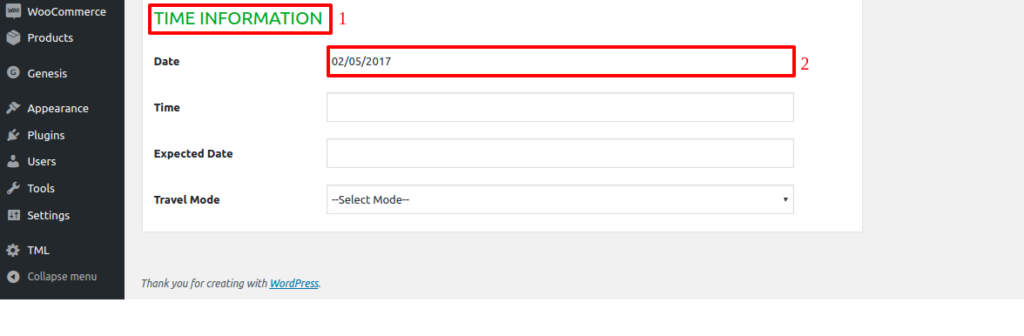


 [/vc_column_text][/vc_column][/vc_row]